
Hello, Crafty friends! I’m passing by to share a little project and a reminder of things you can create with dies and heat transfer vinyl from HTVront.
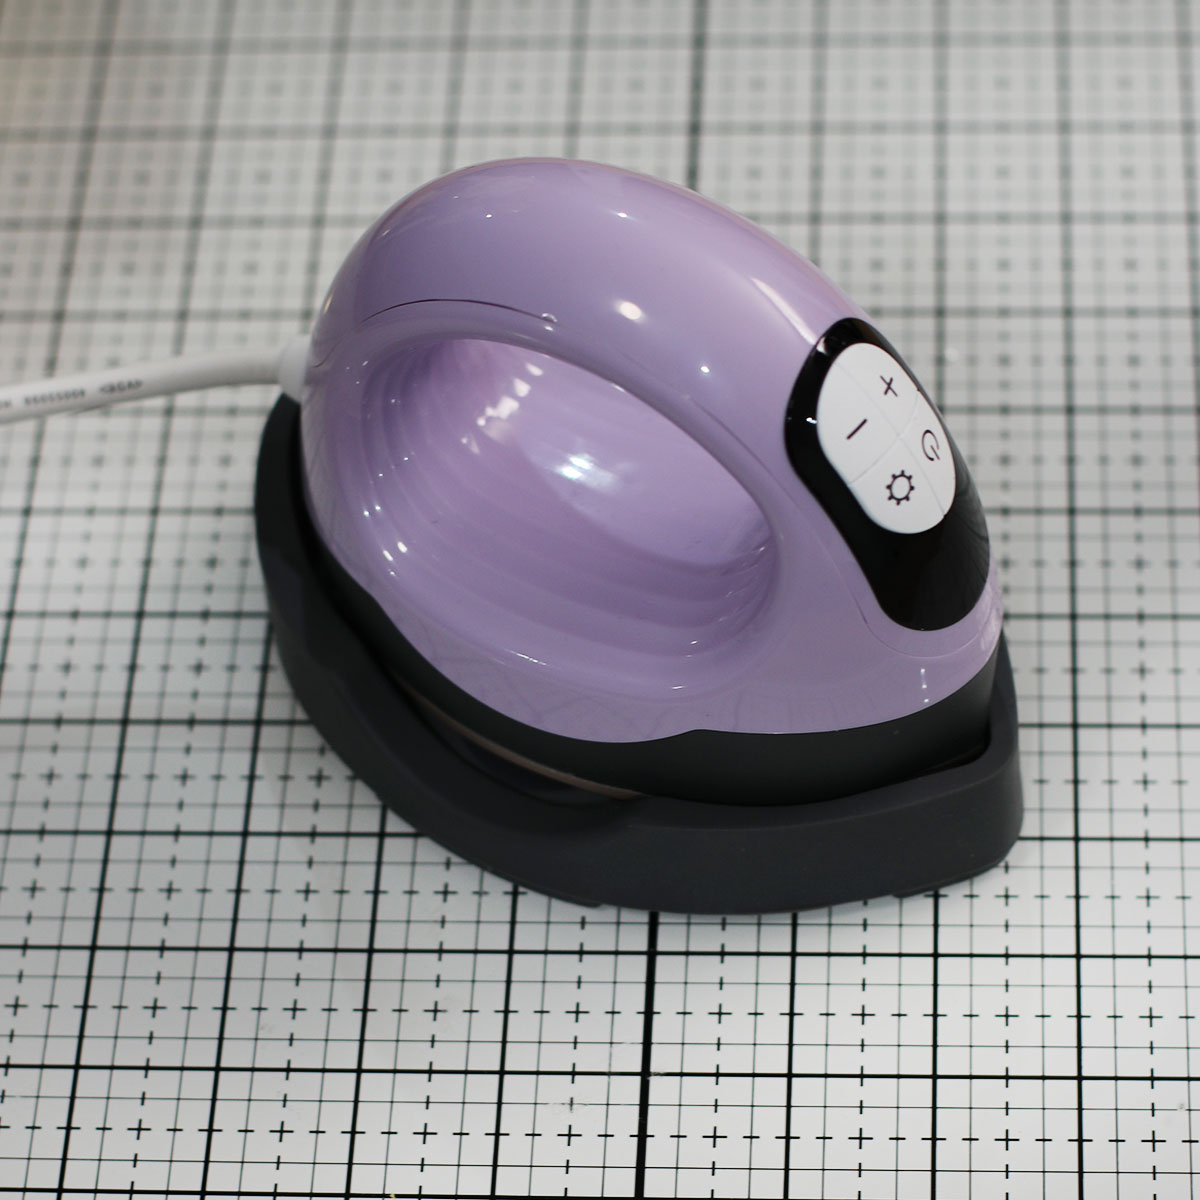
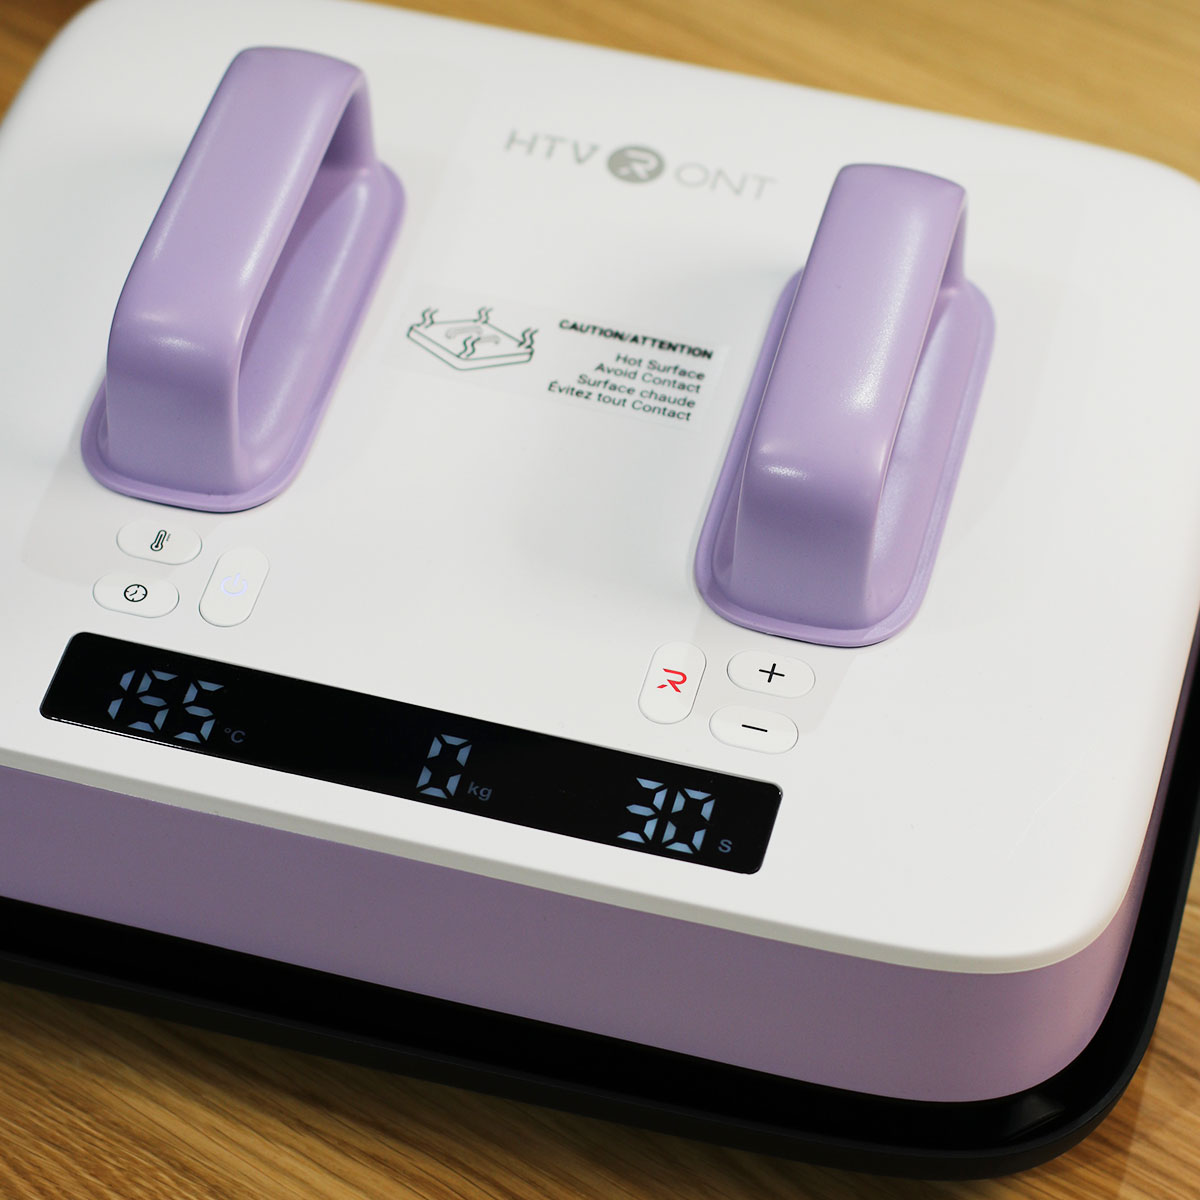
I was also testing the new and improved HTVront Heat Press H10 and Mini3 Heat Press.
In the near future, I will be sharing more about the new Heat Press H10.
DISCOUNT CODES
🇺🇸 Click here to go to the HTVront USA Shop
Use the code: HP20 and save $20 off the New Heat Press H10
Get the Mini3 press for $19 here 👉🏼 (limited time offer)
🇬🇧 UK click here to get 10% Discount
This code does not expire
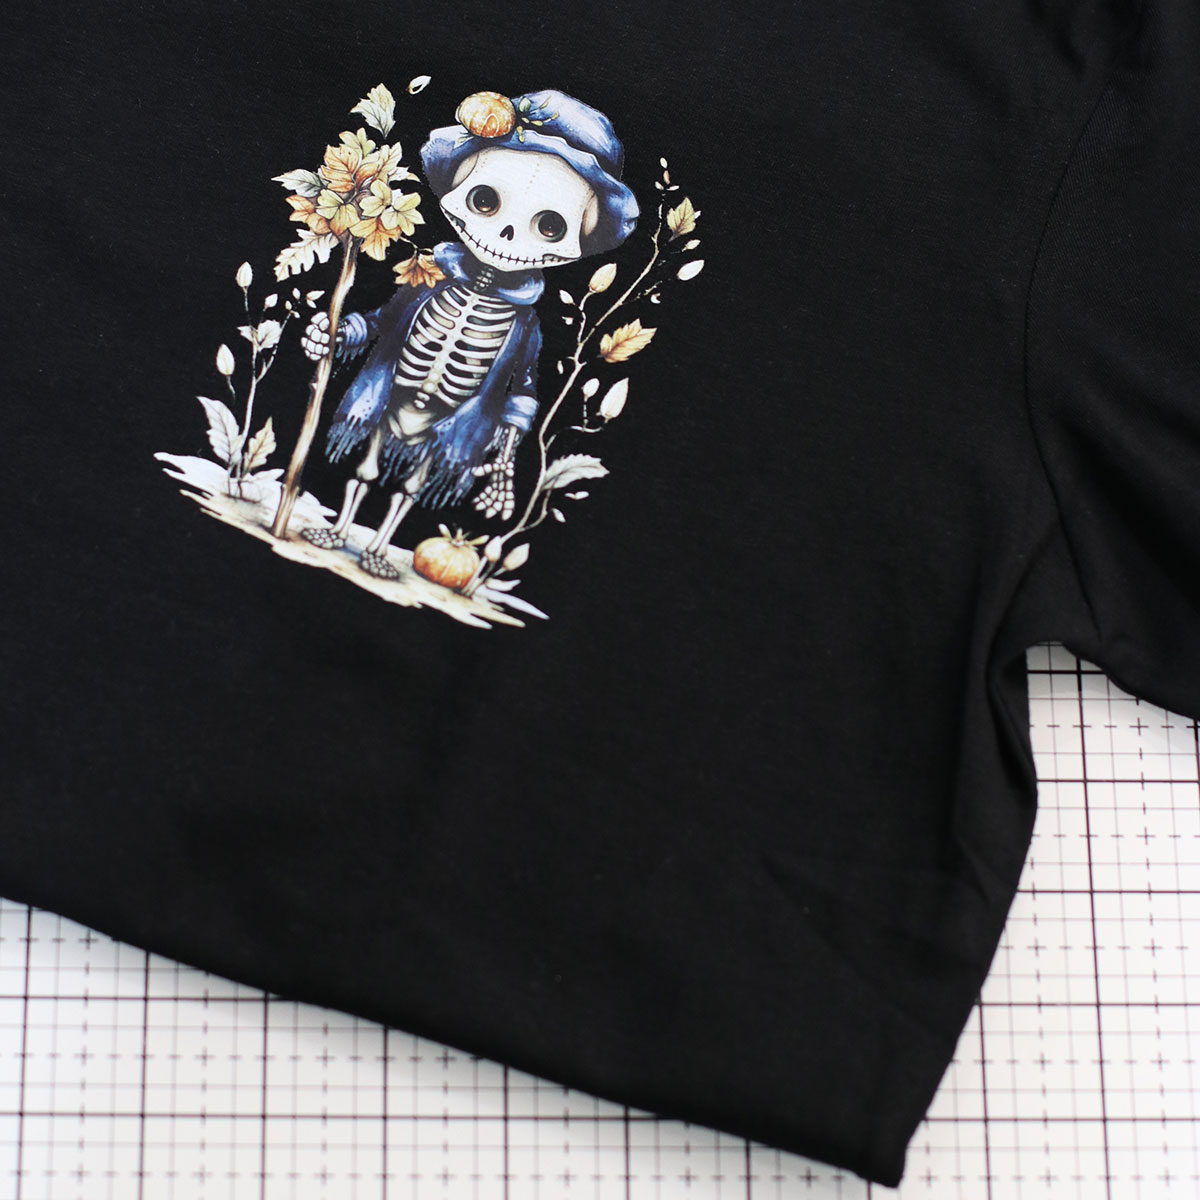
Die Cutting Heat Transfer Vinyl
For today’s sample, I used the Spellbinders Stitched Classic Pooh die set.
You can find a cardmaking idea made with the die set here.
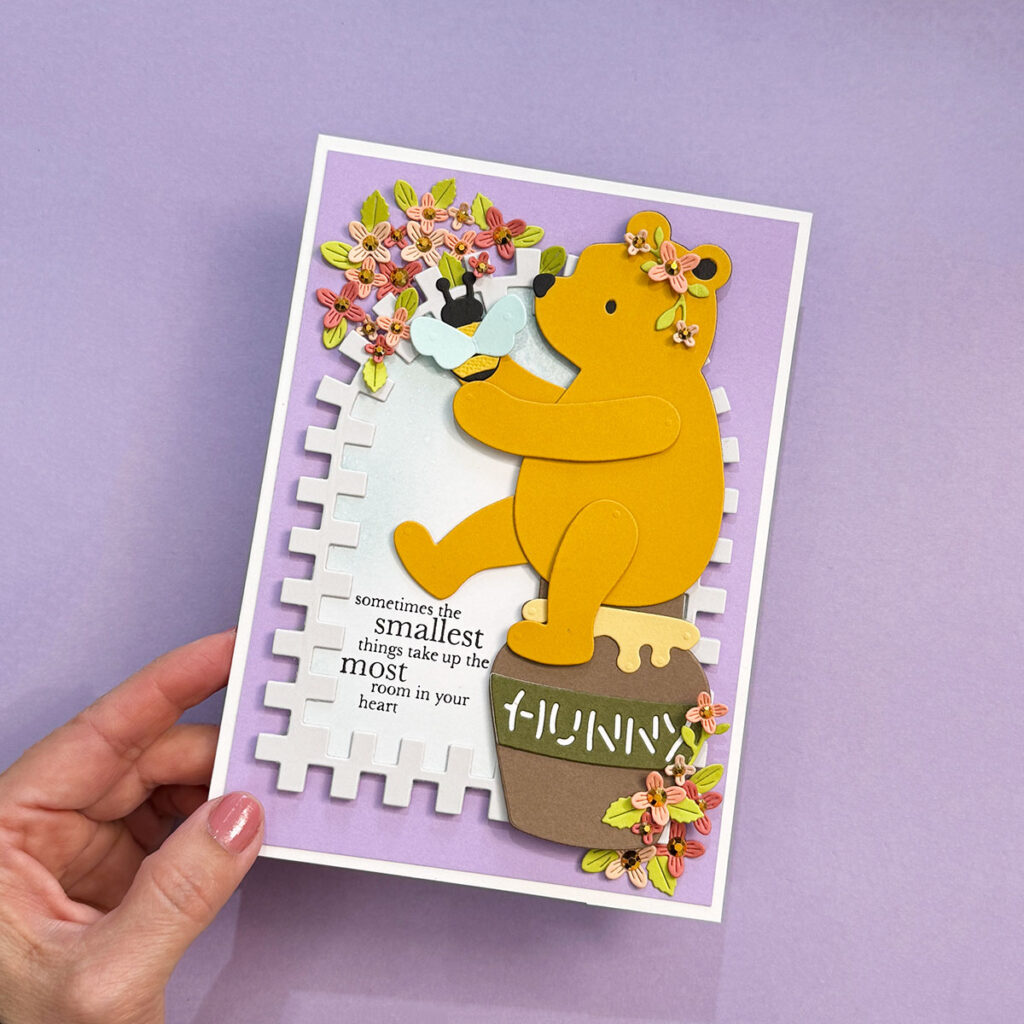
You can use any die set you have, but sets that allow you to build characters, alphabets, or die-cut words work especially well for this type of design.
To press the vinyl into the fabric, I also used the Mini3 Heat Press set at 160°C, and that little gadget performed incredibly well.
In terms of speed, this new mini press feels faster than previous versions, which I also like to do different small jobs.
It took about 10 seconds to transfer each layer, and I removed the protective plastic while the material was still hot. You’ll definitely need to experiment and be very careful to avoid lifting the vinyl. If it hasn’t fully set into the fabric, you can always apply a bit more heat.
For extra security, once everything was layered, I applied heat for an additional 15 seconds.
UK promo: Find the Mini Press 3 here and use the Code BIBIANACAMERON to save 10% off your order.
If you are a papercrafter, imagine the heat transfer vinyl is paper, and your glue is the heat.
Each layer of vinyl has a protective plastic that needs to be removed after heating and setting, and before continuing to layer any other piece over.
Note: The heat transfer vinyl from HTVront is washable and holds up well, especially on a gentle hand-wash cycle. However, like most heat transfer vinyl, frequent washing and tumble drying can affect its longevity.
When used on items that don’t require frequent washing, the product’s longevity increases dramatically.
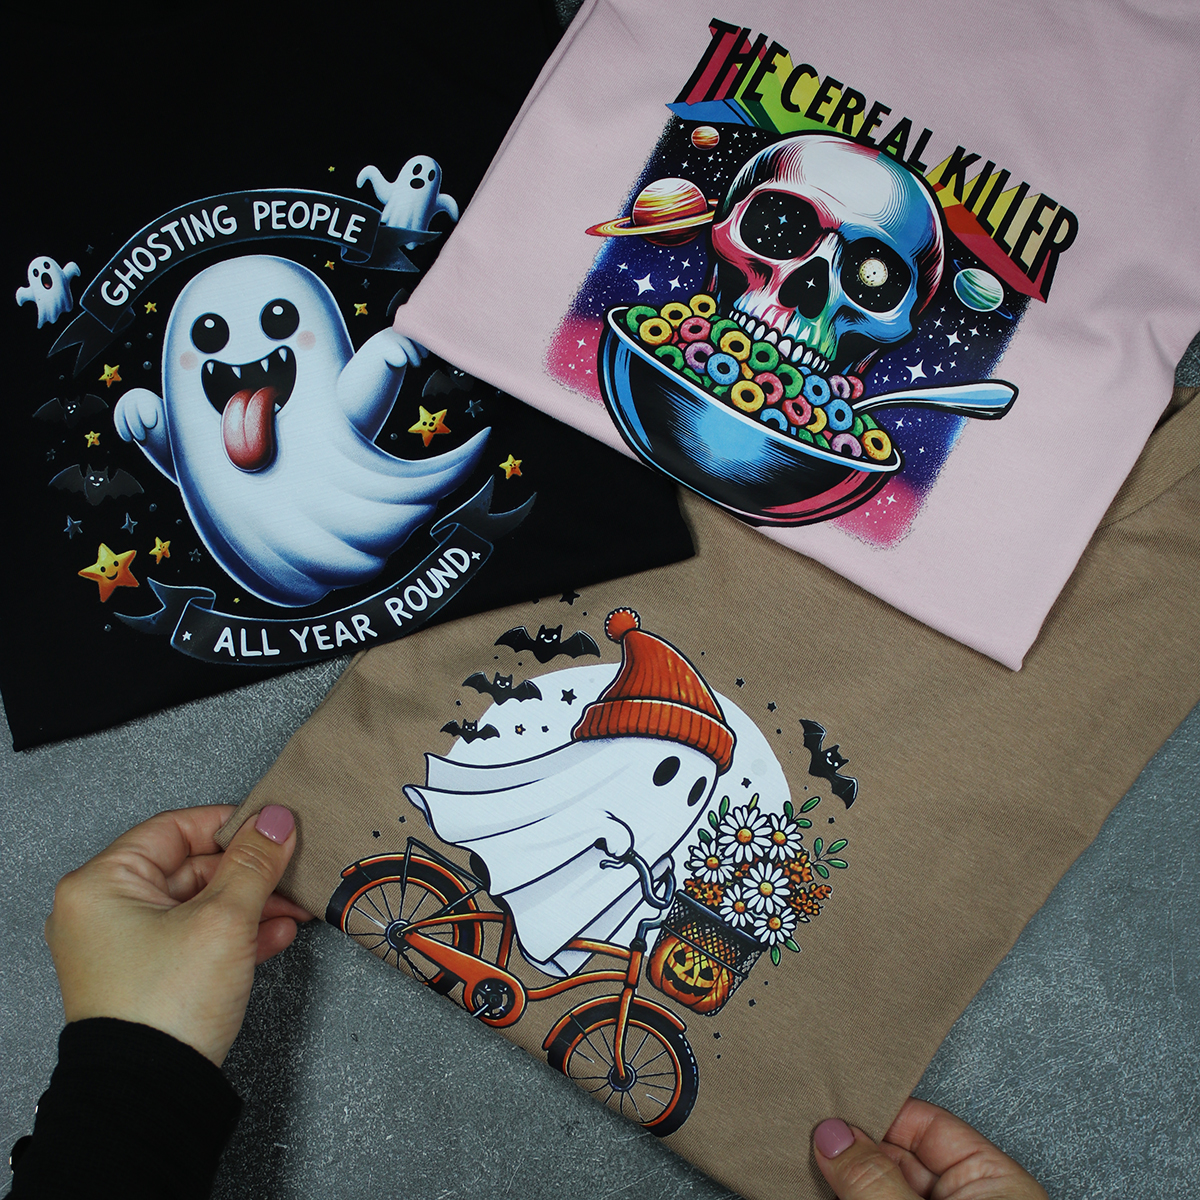
DTF Files + HeaT press
For durability, you might want to use DTF files and the Heat Press.
This process also involves artwork, either something you create yourself or purchase. You can print it at home if you have a DTF printer, or send it to a company that offers DTF printing services, as I do.
DTF files usually come with instructions for the time and heat needed for the transfer. I like to experiment, and if the backing paper isn’t lifting easily, I simply apply a bit more heat.
The DTF print I used is a cold peel, so I had to wait for it to cool down before removing the film. (Bear in mind this print had been in storage for about two years.) Sadly, the artwork I sent for this experiment was delayed due to the Easter holidays.
The new H10 Heat Press cover a larger area, so it is worth it to transfer a HUGE image. I’ll show you that later when time allows me.
So yeah! DTF involve a third party and some production time, but once you have your prints, heat transfer is a breeze.
I used digital files from Creative Fabrica, and I had them printed as DTF transfers through a seller on Etsy.
Note: I made several T-shirts two years ago, and even after heavy washing and tumble drying, some of the artwork is still going strong.
New and Improved Heat Press H10 12″ x 10″
USA code: HP20 to save $20 off the New Heat Press Here
UK: Get 10% off the New Heat Press H10 here
That’s all for today.
Thanks for stopping by.
X Bibi
Explore More HTVront IDEAS?
Supplies
Affiliate links apply at no extra cost to you. Thanks for your support.


Leave a Reply