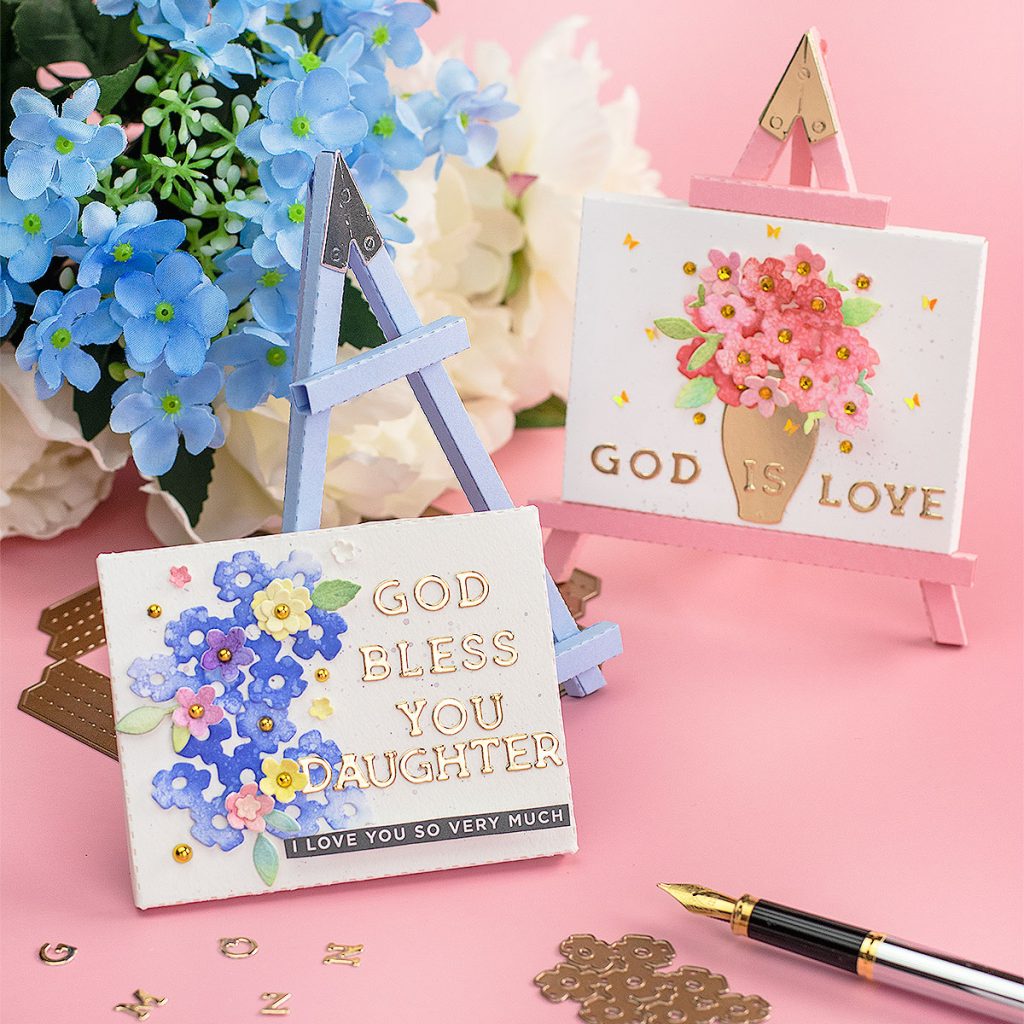
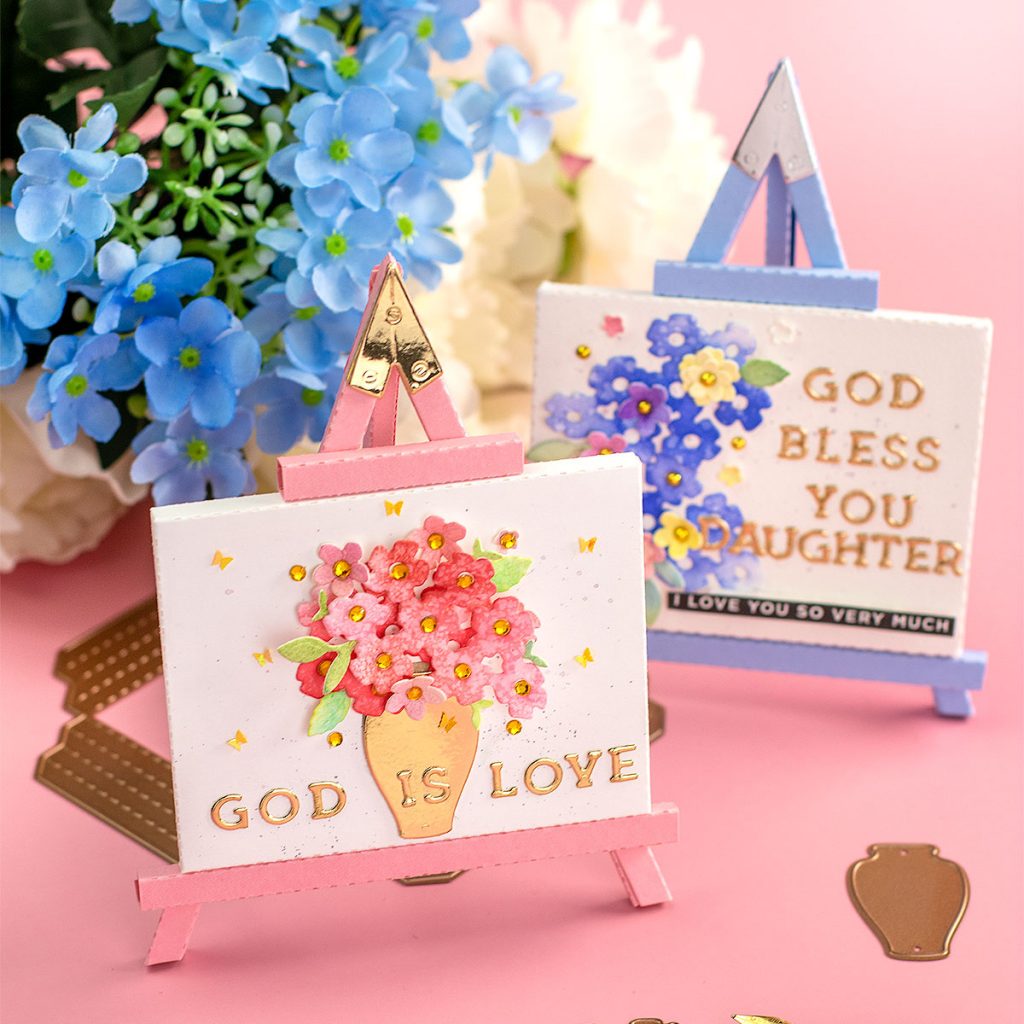
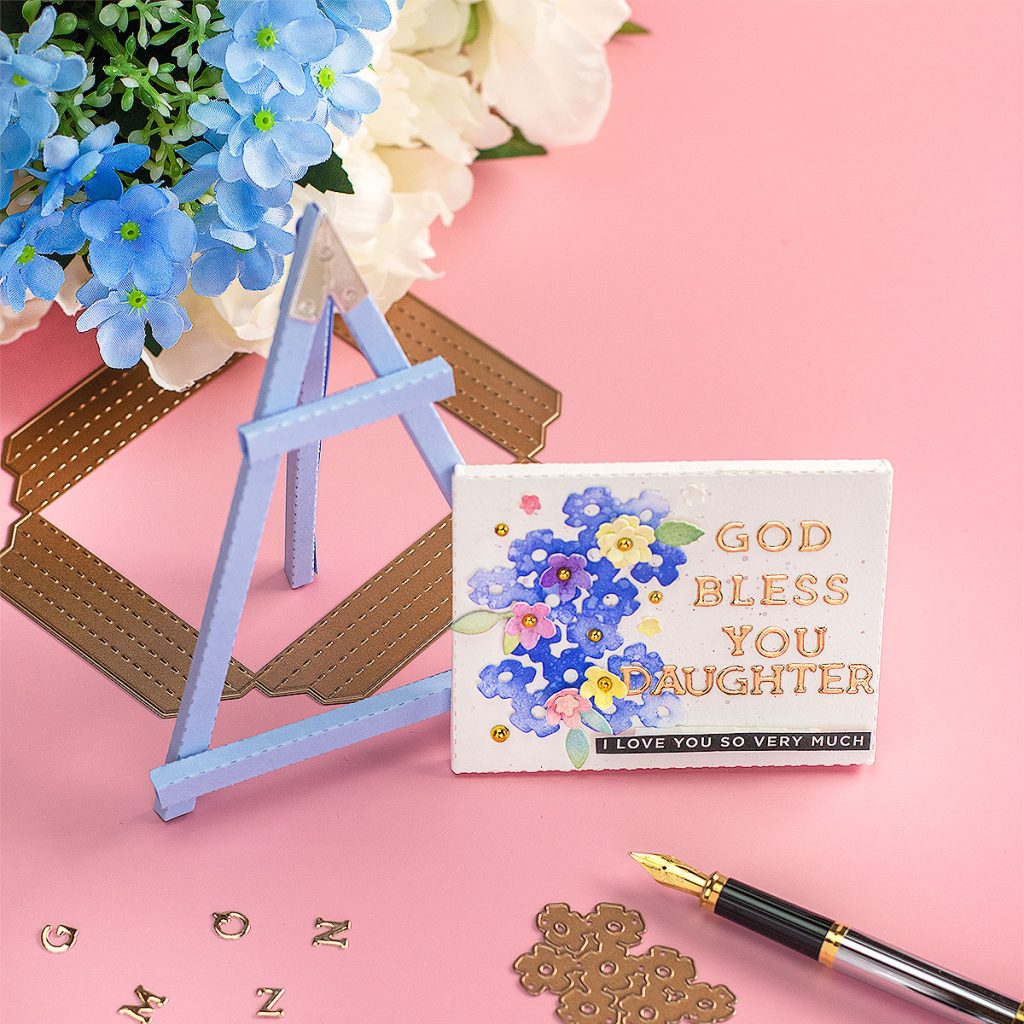
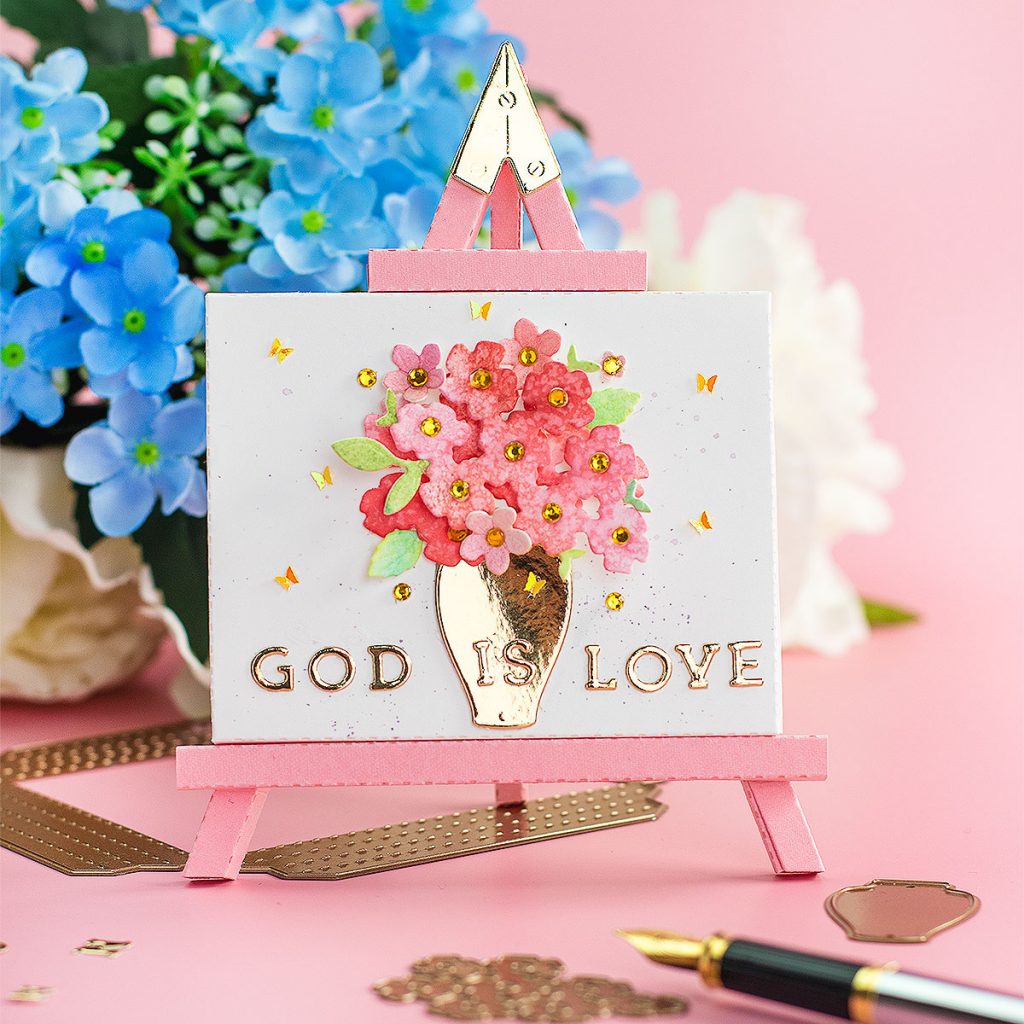
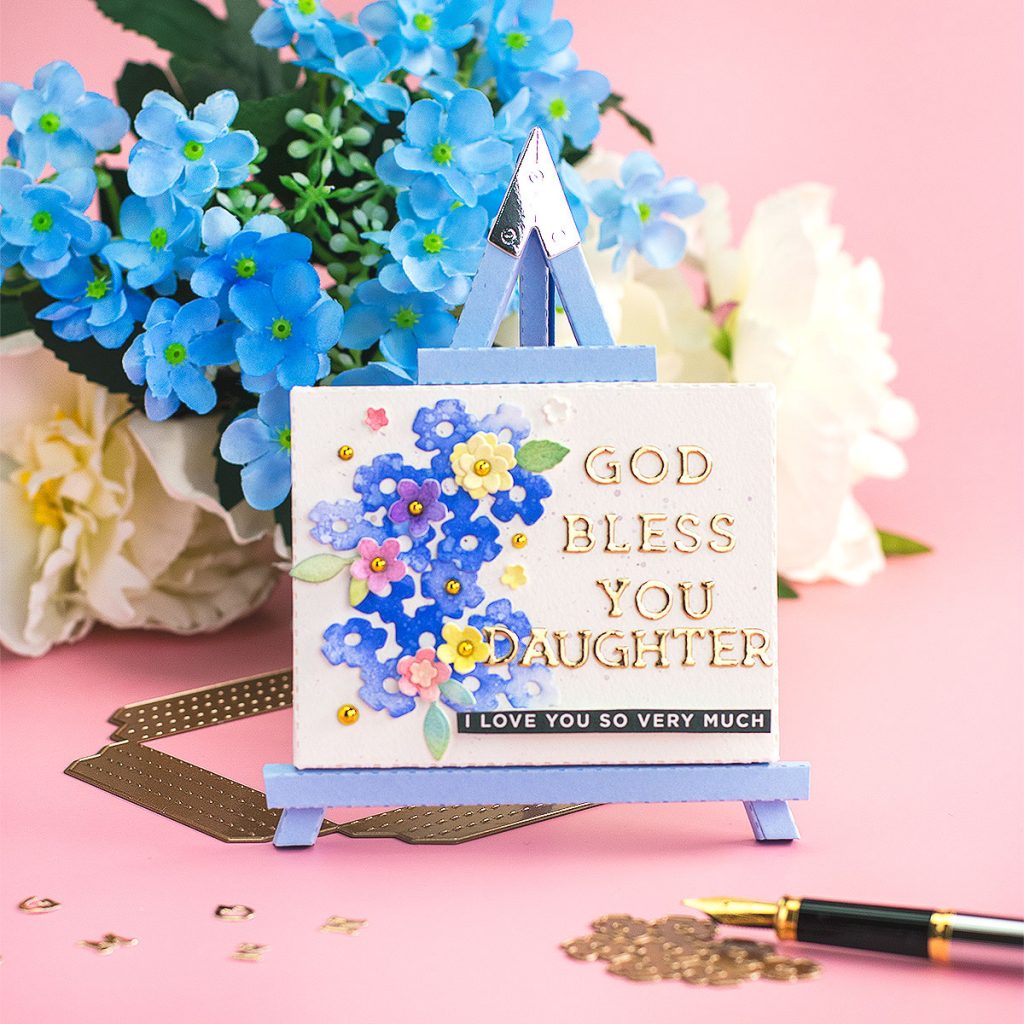
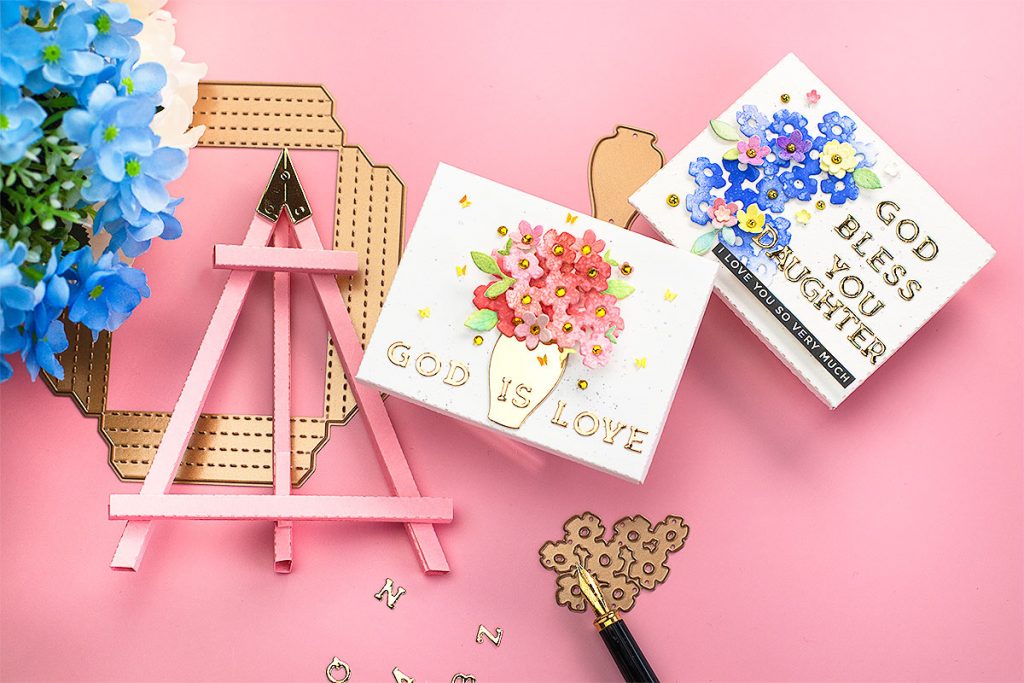
I’m in love with the Spellbinders Large Die – August 2020 designed to create an easel card but not like the ones we know.
Today I’m sharing a detailed step by step to put together these projects.
This is such a fresh and cute concept to deliver a handmade card or a message that the recipient can use also as a decor piece.
I also used the small alphabet dies included in the Spellbinders small die of the month to add a personalised message to my easel cards.
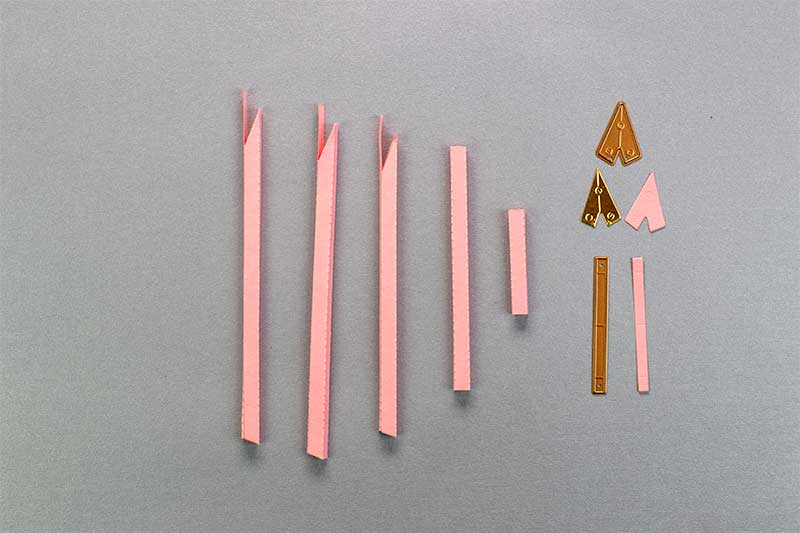
the embellishments
Ok so I first die cut all the embellishments and put them to a side.
- I die cut the floral base and the alphabet out of gold mirror card.
- Then I die cut several flowers using the floral die in the Spellbinders Large Die of this month.
- Using distress inks, I applied colors to the floral die cuts.
- To add texture, I sprayed the die cuts with water.
To completed the floral arrangements in these projects, I also used tiny flowers and leaves I got left from the project here.
The tiny florals were made using Mr & Mrs Wedding Cake Etched Dies.
making the canvas or shadow box
- Using the larger die in the set, I cut a piece of watercolor paper for one of my projects (blue) and for the other (pink) I used 240 grams smooth cardstock.
- This can be also used as a mini shadowbox
- Once finished the little canvas measures 2-3/4″ x 3-1/2″ inches ( 7x9cm)
- It will fit in the front panel of a C6 card.
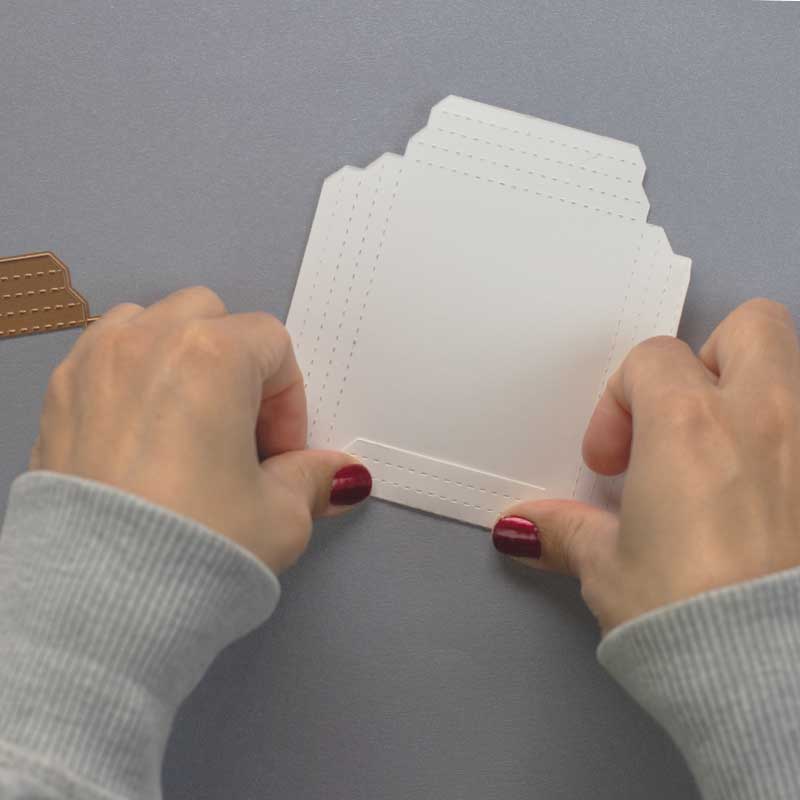
Let’s start by identifying the die to cut the frame.
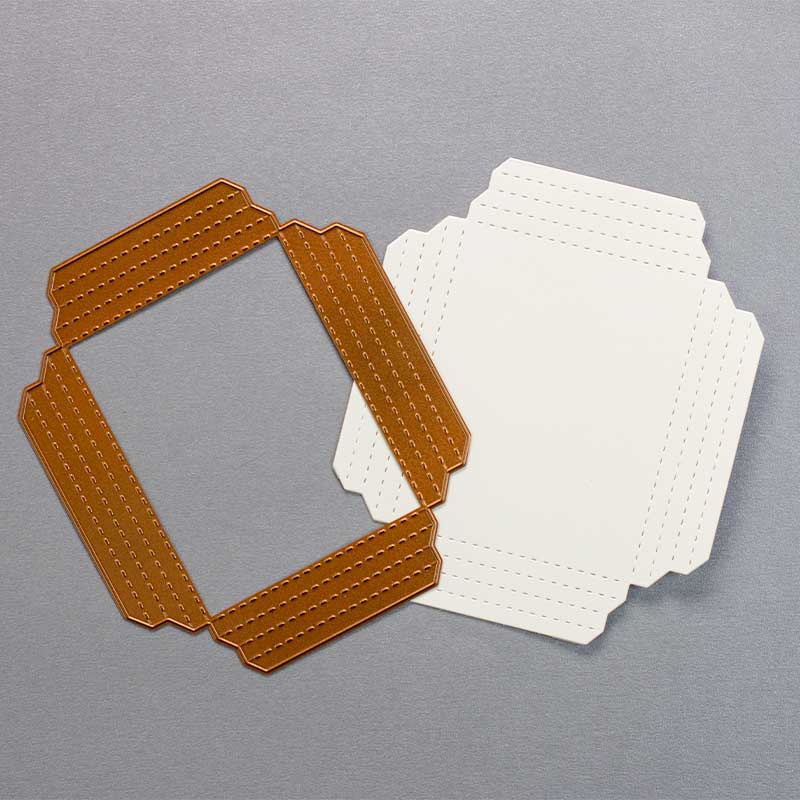
This will fit in standard 6″ die cutting machine with no problem. It actually fit in a C6 panel.
After die cutting all you need to do is to carefully fold over the scoring lines crated by the die. They are very evident.
Although the folds are very sharp, you will get practice folding this small piece really quick and to make it it will only take a few minutes.
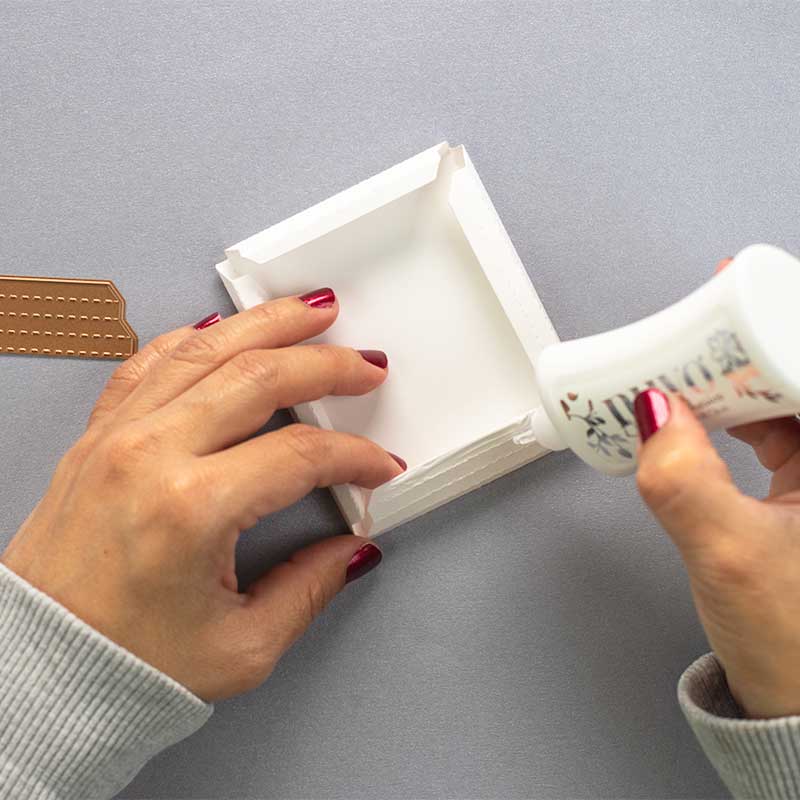
- Don’t be afraid to twist or bend the paper to give shape to this canvas.
- Use liquid glue for a permanent bond.
- Hold each side for a few seconds while the glue dries.
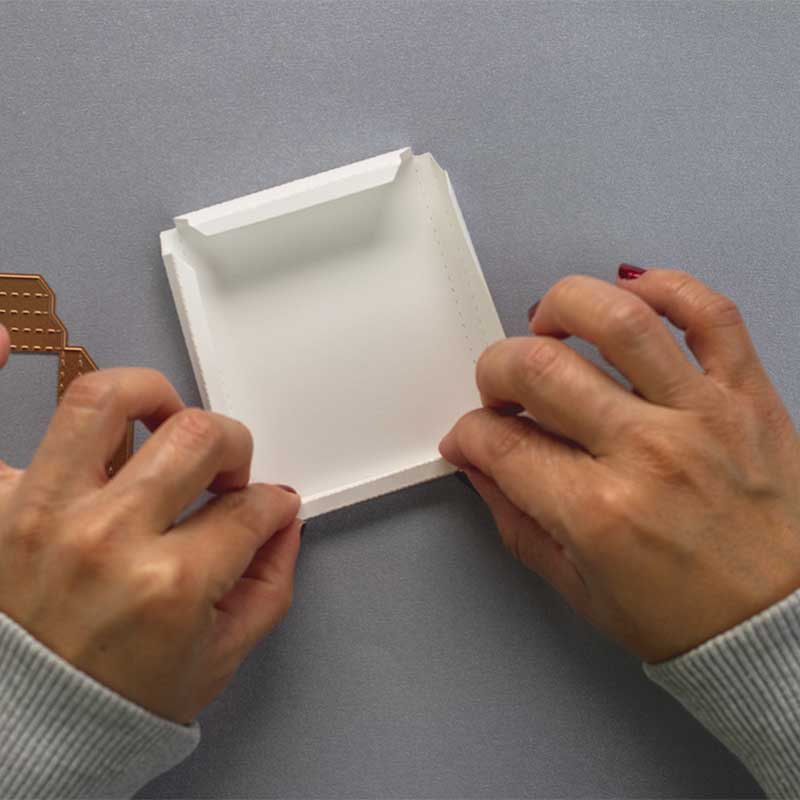
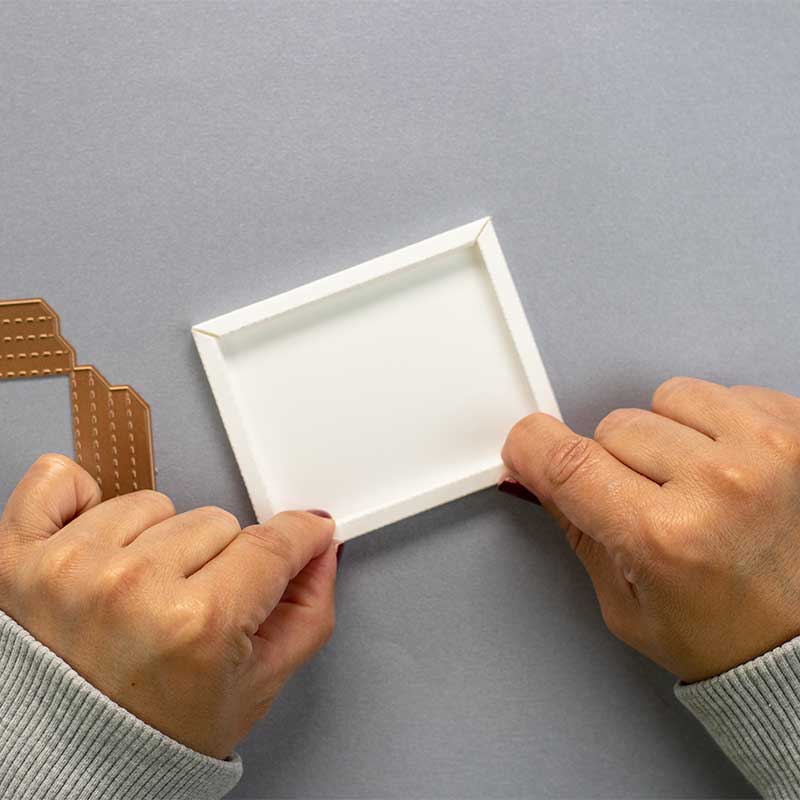
Easy! isn’t it ?
Let’s make the easel
Here is the die to create the main thing.
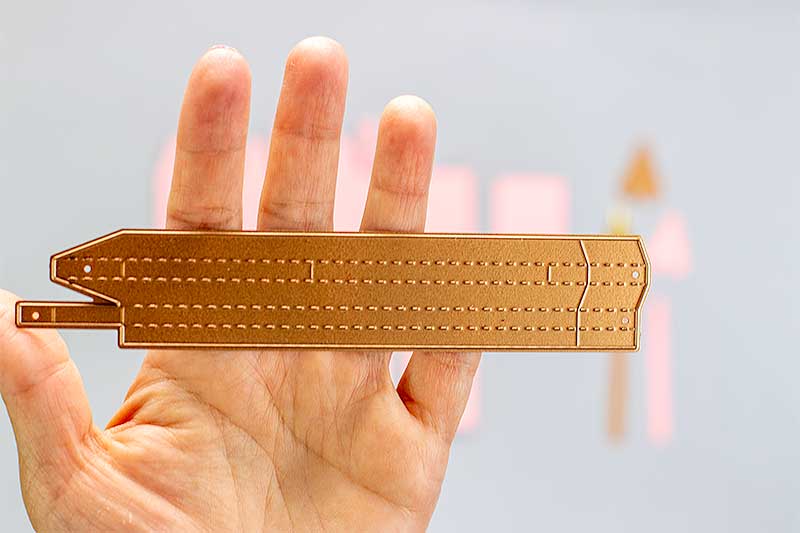
Can you see the little lines in the die? Those will emboss the paper guiding you to cut it later to get the legs of the easel.
The lines will also guide you to know where to adhere the bottom bar to hold the canvas in place.
Everything will make sense as you work with the die cuts.
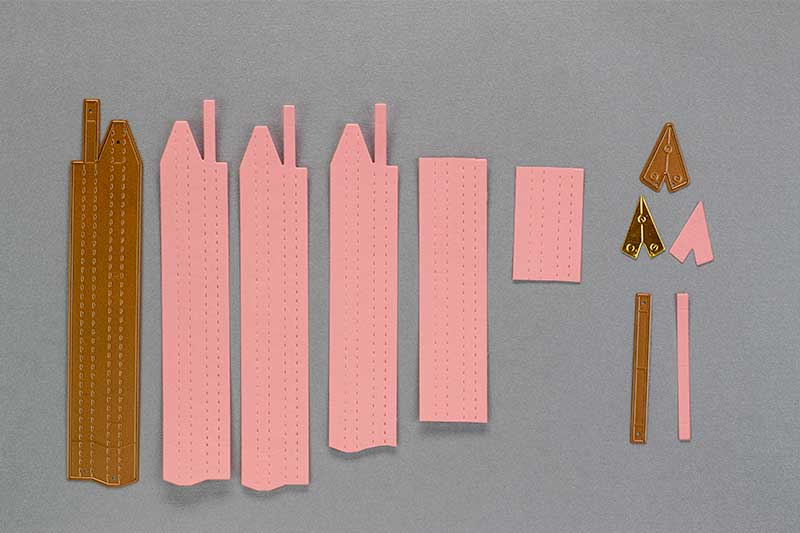
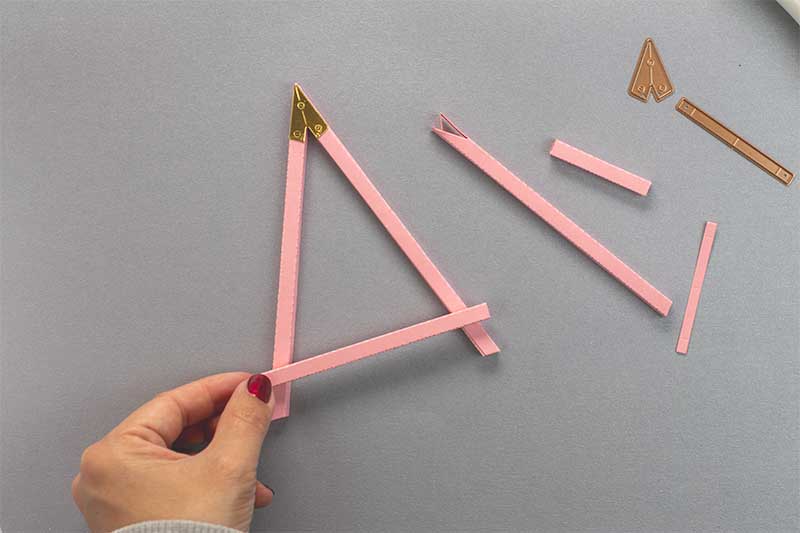
We need to cut 5 pieces using the die above + use the dies in the picture below to create additional die cuts that we will need to during the assembling.
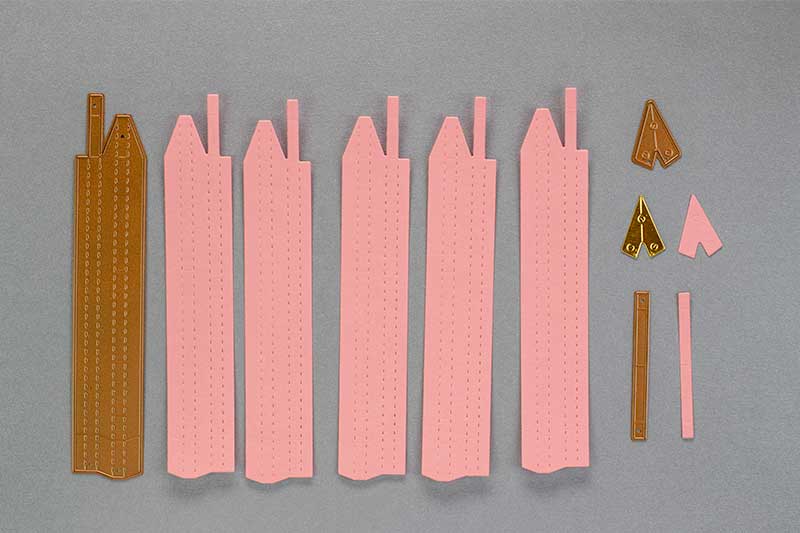
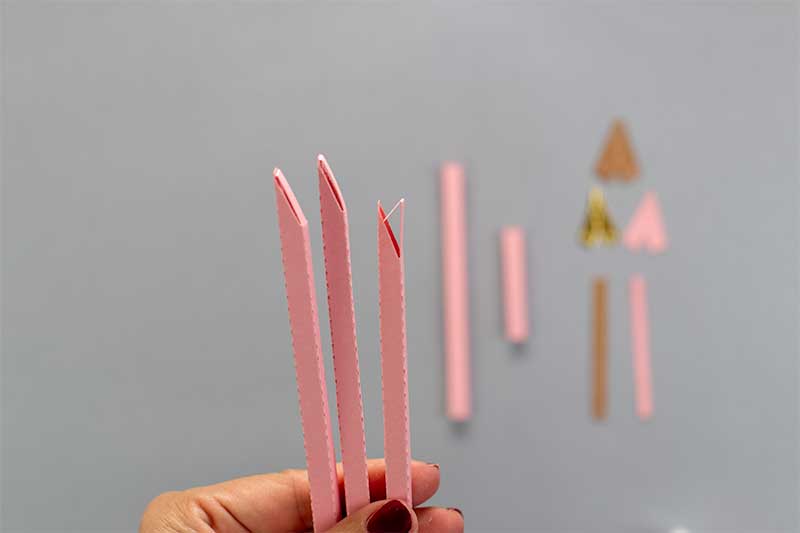
Next we need to trim 3 of the 5 legs as show in the picture below.
- Right after the die, you will see the piece 1 and 2. They don’t need to be trimmed down.
- These will be the front legs of the easel.
- Then you can see the third piece in the picture. You need to trim that one across the bottom over the embossed line created by the die.
- This will be the backing leg of the easel.
- For the “Piece 4 in the picture” you need to trim the triangular top of the die-cut. Then find from top to bottom the last little scoring line created by the die.
- This will be the larger bar that will hold the canvas in the easel.
- Piece 5 in the picture: Trim the triangular top of the die-cut. From top to bottom find the nearest tiny scoring lines created by the die.
- This will be the top bar that will hold the canvas in the easel.
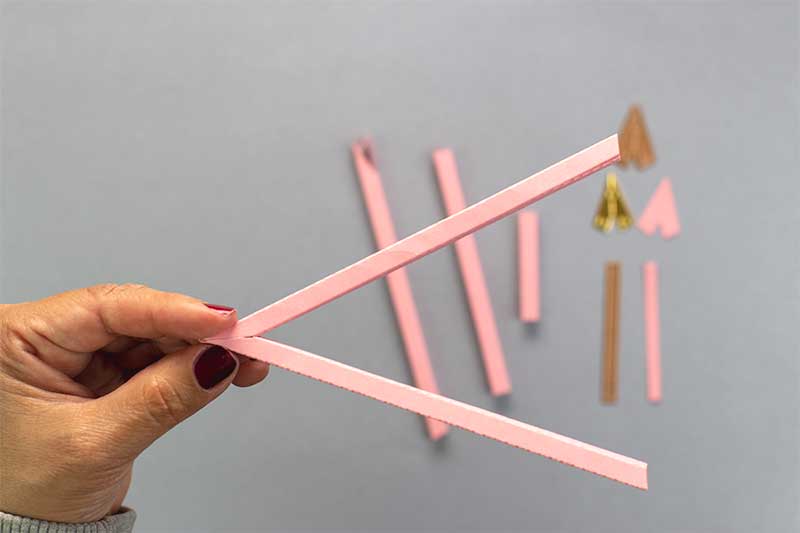
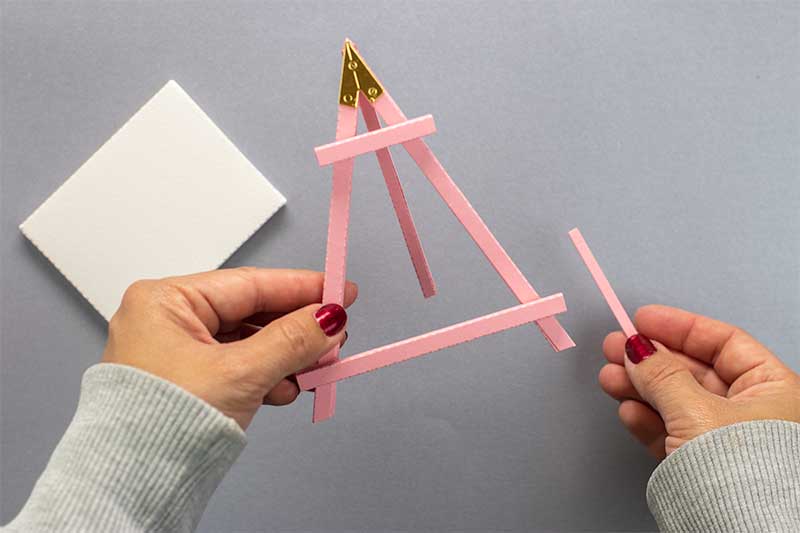
Once you got ll your pieces trimmed down. We need to fold and glue the legs.
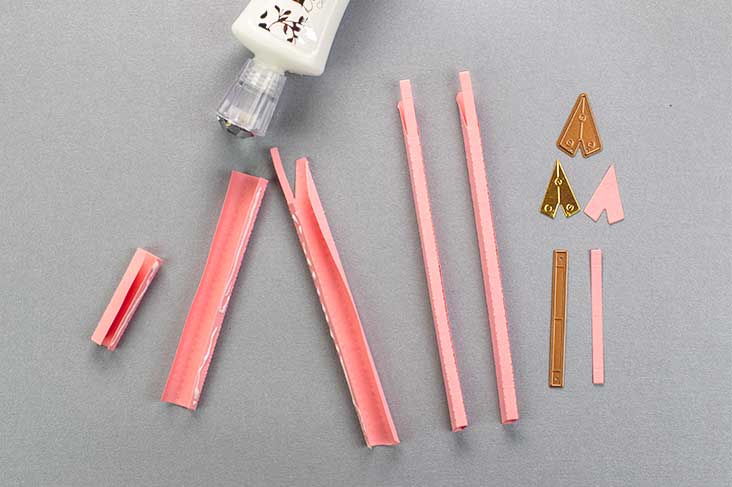
- Apply adhesive in the slimmer tab of the die cuts.
- Next fold towards the inside of the 2 larger legs the little flap at the top of the die-cut and glue in place.
- Do the same with the third piece we have created for the back of the easel.
- You can glue in place or chose not to glue it so the easel will fold
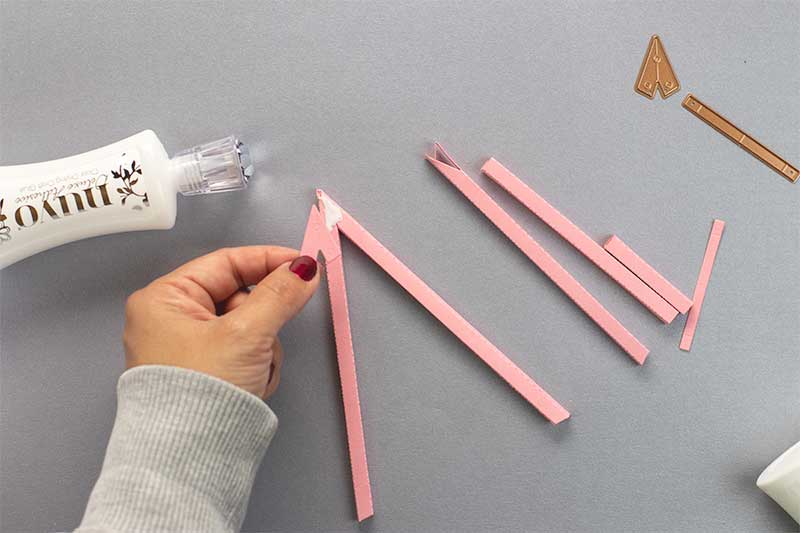
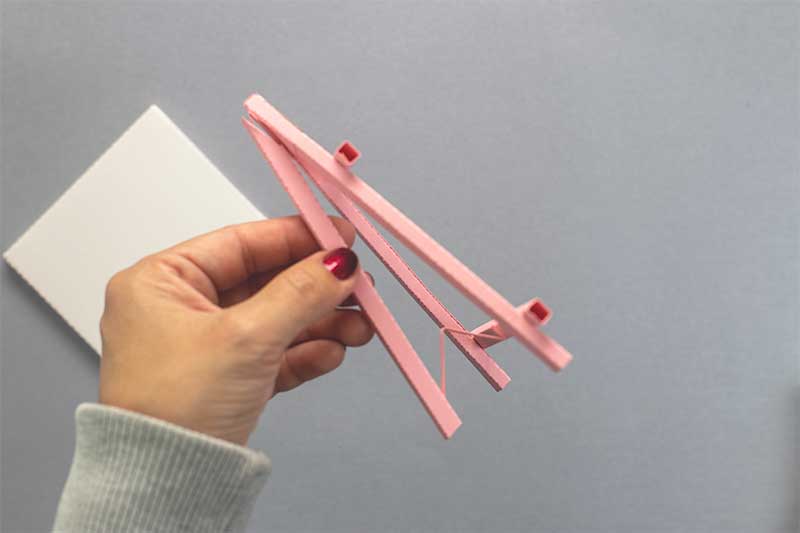
You can see the final pieces a lot better in the picture below.

Now, we need to glue the 2 larger pieces as shown above and below.
Use liquid glue and hold in place until the glue dry.
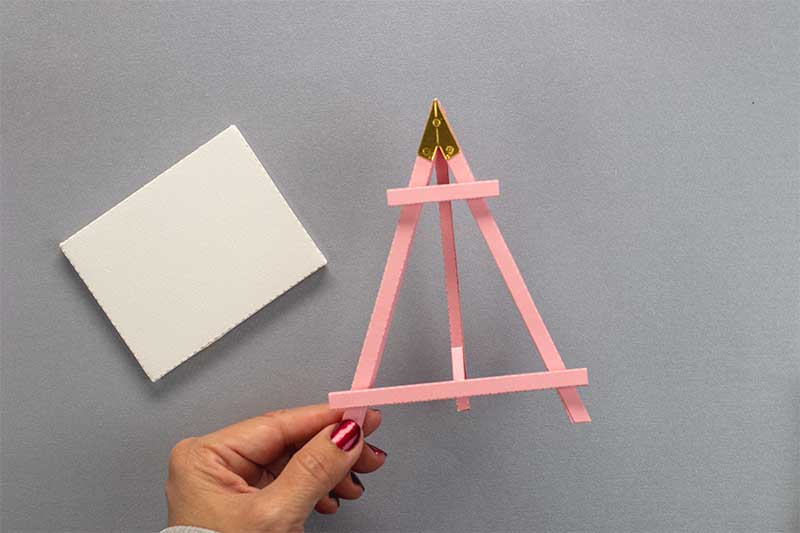
Next we need to add stability to the easel so we need to glue the little top triangular pieces as shown below.
- These are also decorative pieces as well and essential to keep the easel together.
- I used a smooth pink cardstock for the piece at the back of the easel and gold mirror cardstock for the on that will show in the front.
Tip
- It is easy to glue smooth cardstock together than gluing smooth cardstock to mirror cardstock.
- So I chose my paper strategically as we will be gluing the backing leg over that triangular piece in the back.
Ok so now we need to adhere the 2 bars that will hold the canvas.

I added glue on the little scoring lines created by the die at the bootom of the legs.
As it was hard to see in the picture but you will be able to see them when creating with this die set.
Once the larger bottom bar is in place, we need to use the canvas to know where to glue the top bar.
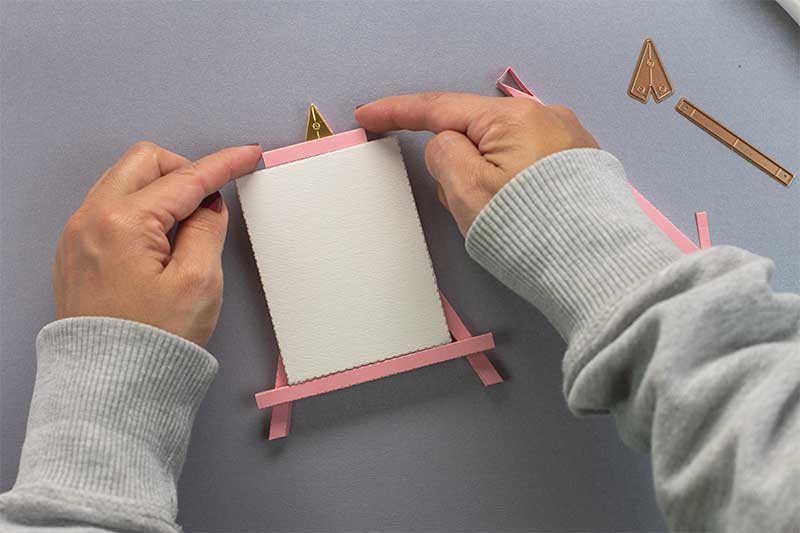

It all depends on how you want to layout your canvas.
As I like the canvas in horizontal. I glued the top bar accordingly.
At this stage we only have 2 last pieces to adhere to our easel!!!
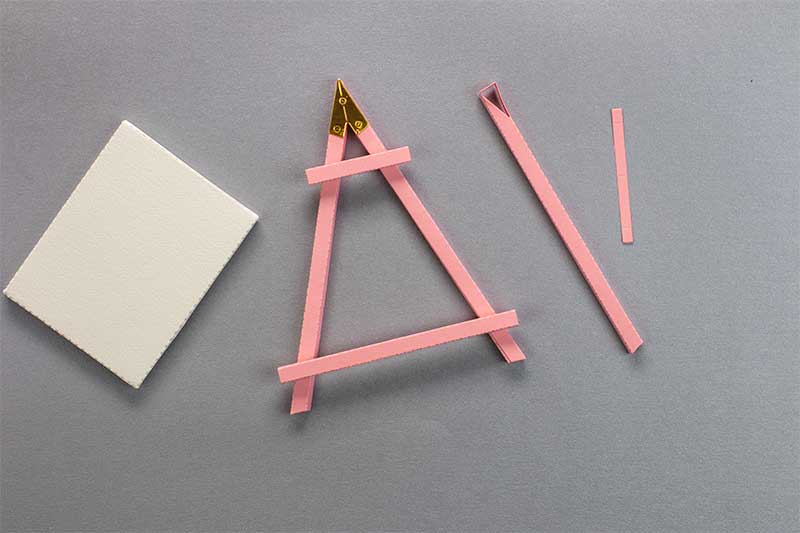
Turn around the easel and glue the back leg piece in place.
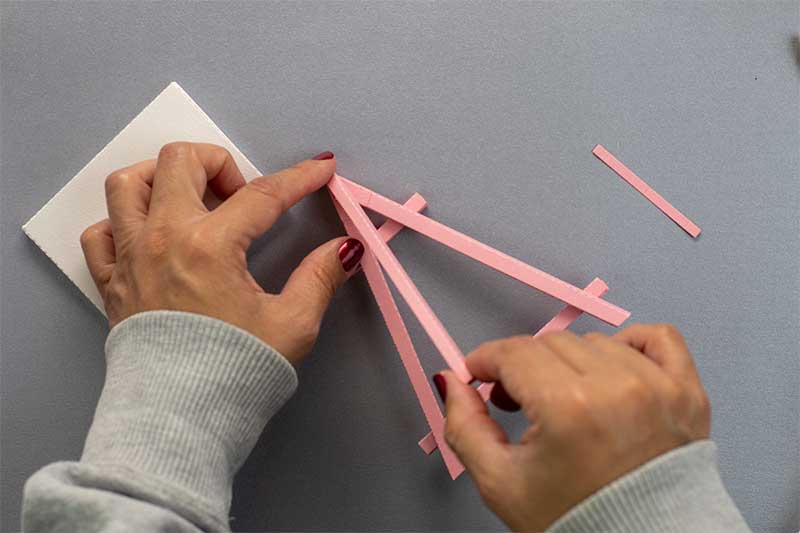
Find the scoring lines in that tiny and narrow piece to create the folding support and glue it from the bottom bar to the backing leg as shown in the picture below.
Voila, we are done!
Sound like a pile of work but heck I enjoyed doing this … I lose the track of time and space and my eldest daughter love her little gift!
display on the easeal cute compositions
If you thought Ill let you go without showing packaging solution you are wrong !!!
paper easel in a box
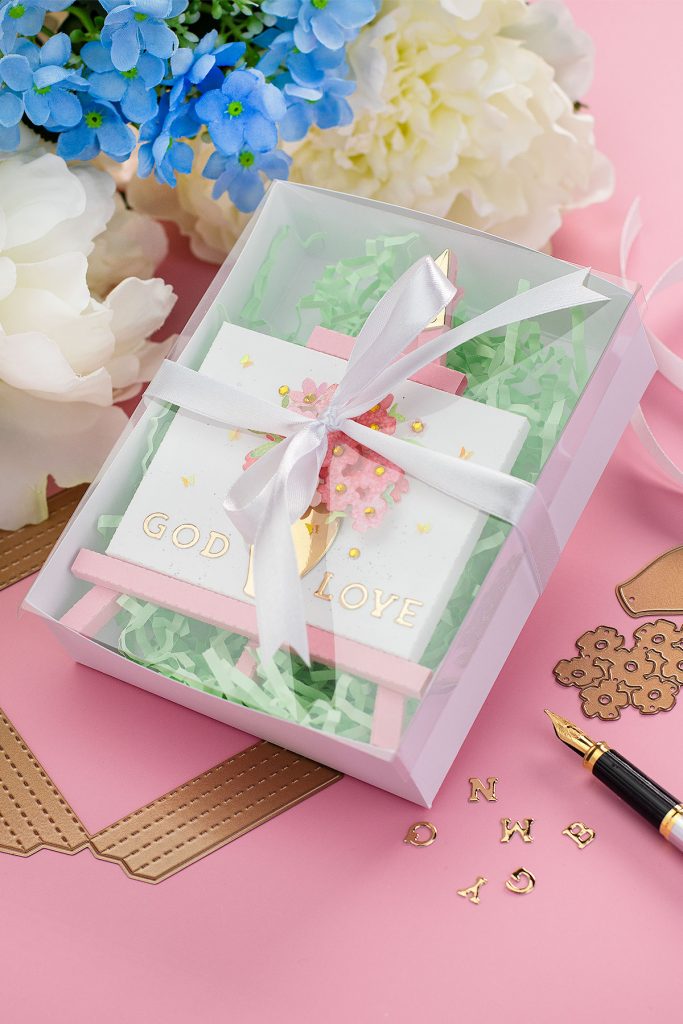
- This is a DIY box that measures 5-1/2″ inches x 4-1/4″.
- I made the lid using heavyweight acetate.
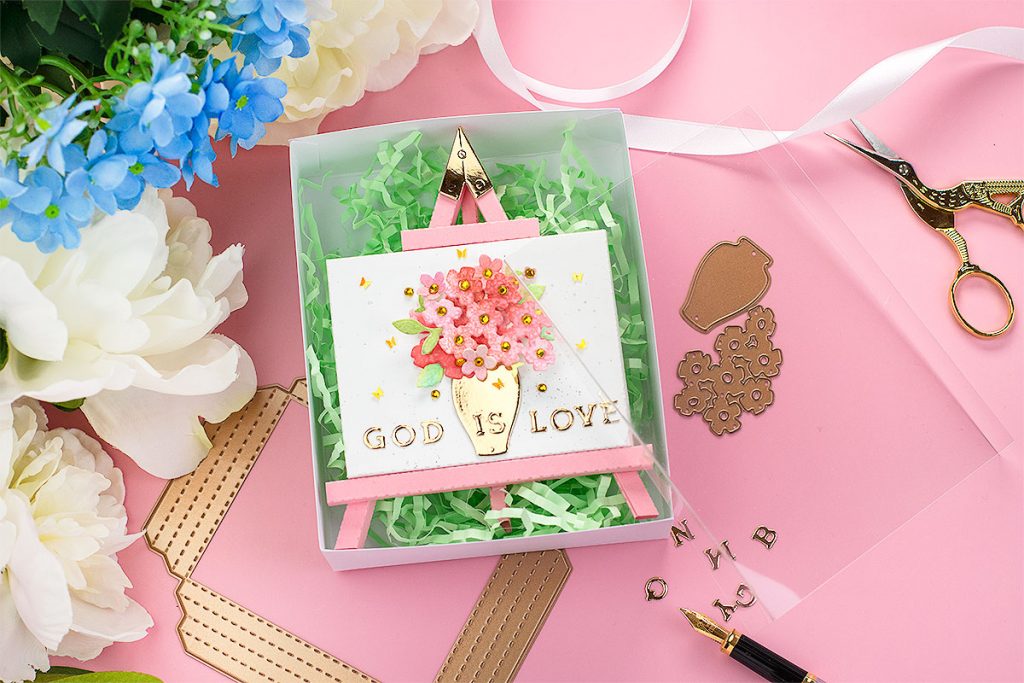
- I just scored at 1/2″ inch each side of the acetate piece.
- It will stay in places as the acetate flaps are making some pressure towards the inside.
- I made the box and the lid using my scoring board.
- Check out a very old video tutorial ( sorry I know the video is very ugly) but it will guide you to make the box.
You can also use ribbon or anything else to keep the box sealed and to create a very nice handcrafted gift.
Phew!! That was all for today.
I hope you find this post helpful and inspirational.
Happy crafting
x
Bibi


This is super cute! I totally want to make something like this now.
Beautiful!
Your cards are awesome. I love the vase and flowers.