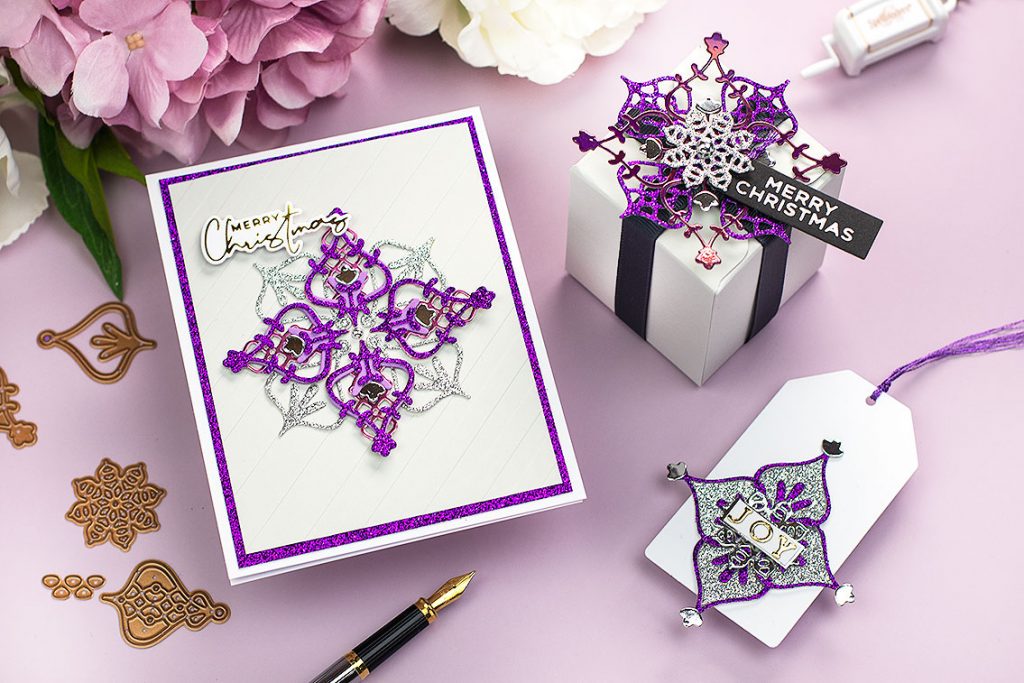
I hope you are doing well. Today I’m sharing 3 easy and quick ideas using the Spellbinder Small die of the Month August 2020.
This is a 10 pieces die set that will allow you to create endless patterns that can be used to create card backgrounds or toppers.
I first thought of using the different die cuts produced by the different dies in this set to create floral patterns. I found they work a lot better to make snowflake designs.
So I made super simple Christmas themed projects.

First, I chose the cardstock colors.
I have never used purple for Xmas projects but for some reason, it was the colour that was appealing to me when I saw the die-cut shapes.
I used a combination of different types of lilac, purple and silver mirror and glitter cardstock. These look gorgeous in flesh.
snowflake christmas card
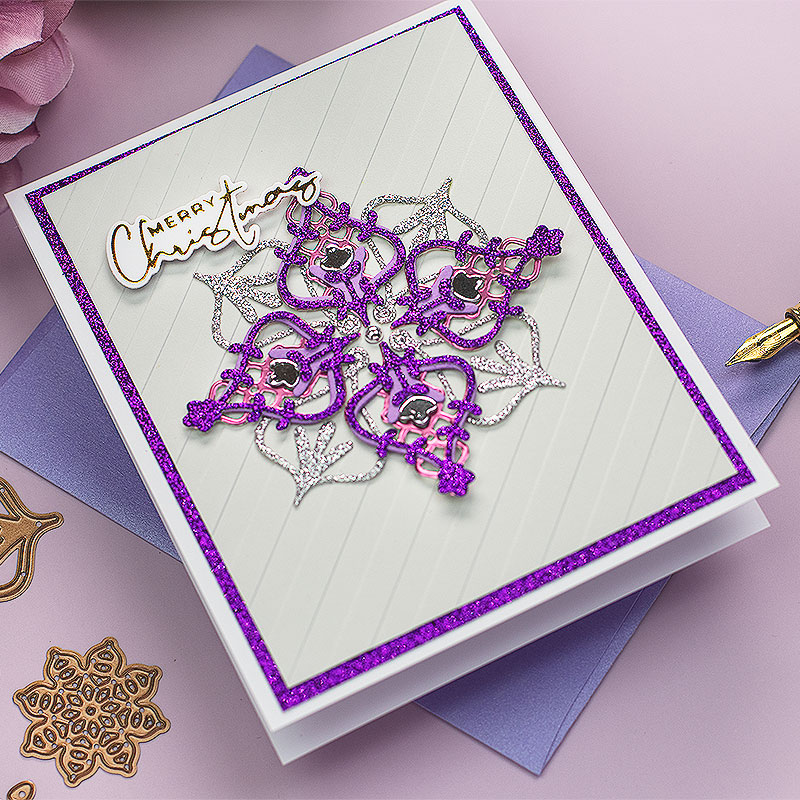
For this card I used:
- Fun Stampers Journey Lavender Fusion ( smooth cardstock)
- Craft Perfect Nebula Purple Glitter Cardstock
- Silver Glitter and Mirror Cardstock, Pink Chiffon Satin Effect Cardstock.
***Find these papers listed below in the supplies list.
- After choosing the paper I die cut several pieces using different dies in the Spellbinder Small die of the Month- August 2020.
- I layered the different die cuts in different ways according to their color and shape. There were so many possibilities!!
For the sentiment, I used a glimmer plate from the new Yana’s Christmas Sentiments Glimmer Hot Foil Plate & Die Set. These are stunning!!
I also think this snowflakes will look divine in blue or red with silver accents or gold.. althought just silver and gold cardstock will do!
SnowFlake Topper

For this project, I used Silver and Nebula Purple glitter cardstock and I also added Purple Rain Iridescent mirror cardstock.
- To make the box I used a piece of Tin Pail cardstock that measured 8″x 8″ inches.
- Then I fed the paper on an envelope punch board and I punched and scored the paper at 2″ and 6″ all around the edges.
- This only takes 1 minute and then you will be able to fold and trim the paper to make this mini box
this box measures:
- Inches : 2-3/8″ Length x 2-3/8″ width and it is 2-3/4″ tall.
- Cm: 6cm length x 6 width x 7 cm depth.
In this very old post here I show the process to make the box in a smaller size plus there is a video.
Christmas ornament tag
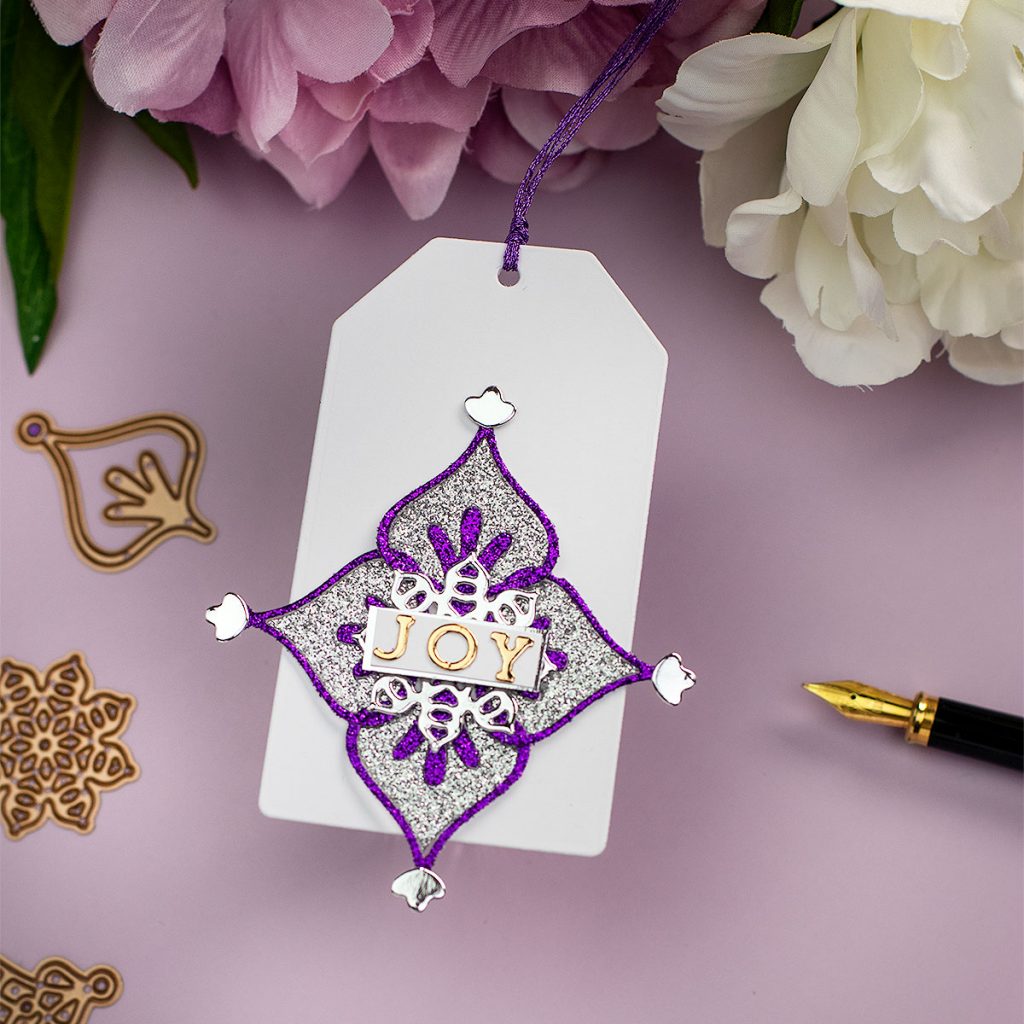
I put together this mini tag applying a super easy paper piecing technique and I used the negative die cuts from projects above.
This mini Christmas tag measures 2″ x 3-1/4″ inches.
PIN ME

Supplies list
Affiliate links apply at no extra cost to you. Thanks for your support.


Leave a Reply