Hi there, last Saturday we enjoyed a new stamping release designed by Anita Jeram for Colorado Craft Company in the post here.
Today, I’m sharing a couple of new cards and also a video answering colouring FAQ.
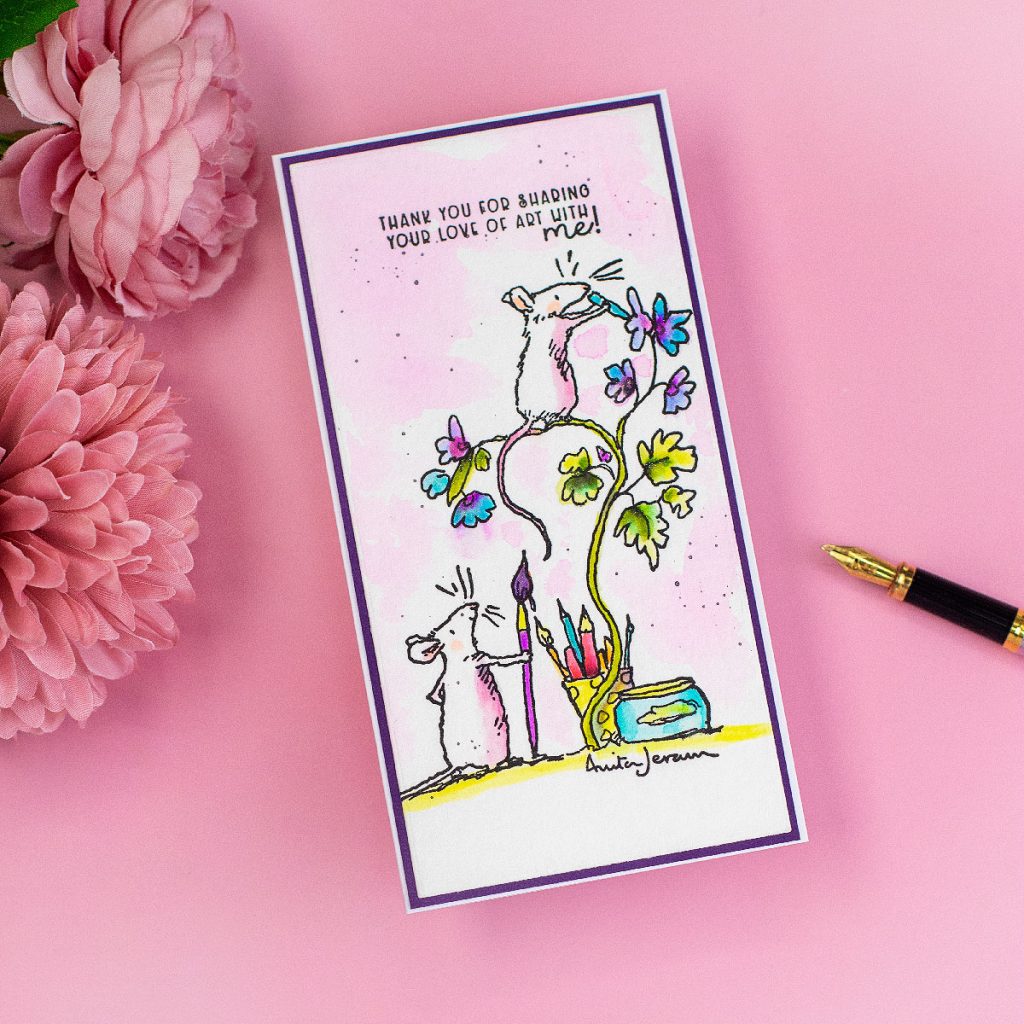
Love Art Stamp Set by Anita Jeram

For this mini slimline card, I used Love Art stamp set and I applied super easy colouring using Tombow water-based markers.
To show you that you can use whatever coloring media you might have, I only used colors from Tombow Retro 12 colour set.
I die cut the panel using Mini Slimline Rectangles Die set by Simon Says Stamp.
Amazing Mum Stamp Set by Anita Jeram

For this card, I used the Amazing Mum stamp set and I added colours to the image using Arteza Real Brush pens.
Find a detailed blog post about Arteza Real Brush Pens here! BTW they are on promo on the Arteza UK here and Arteza USA site here just now.
I die cut the panel using Mini Slimline Rectangles Die set by Simon Says Stamp.

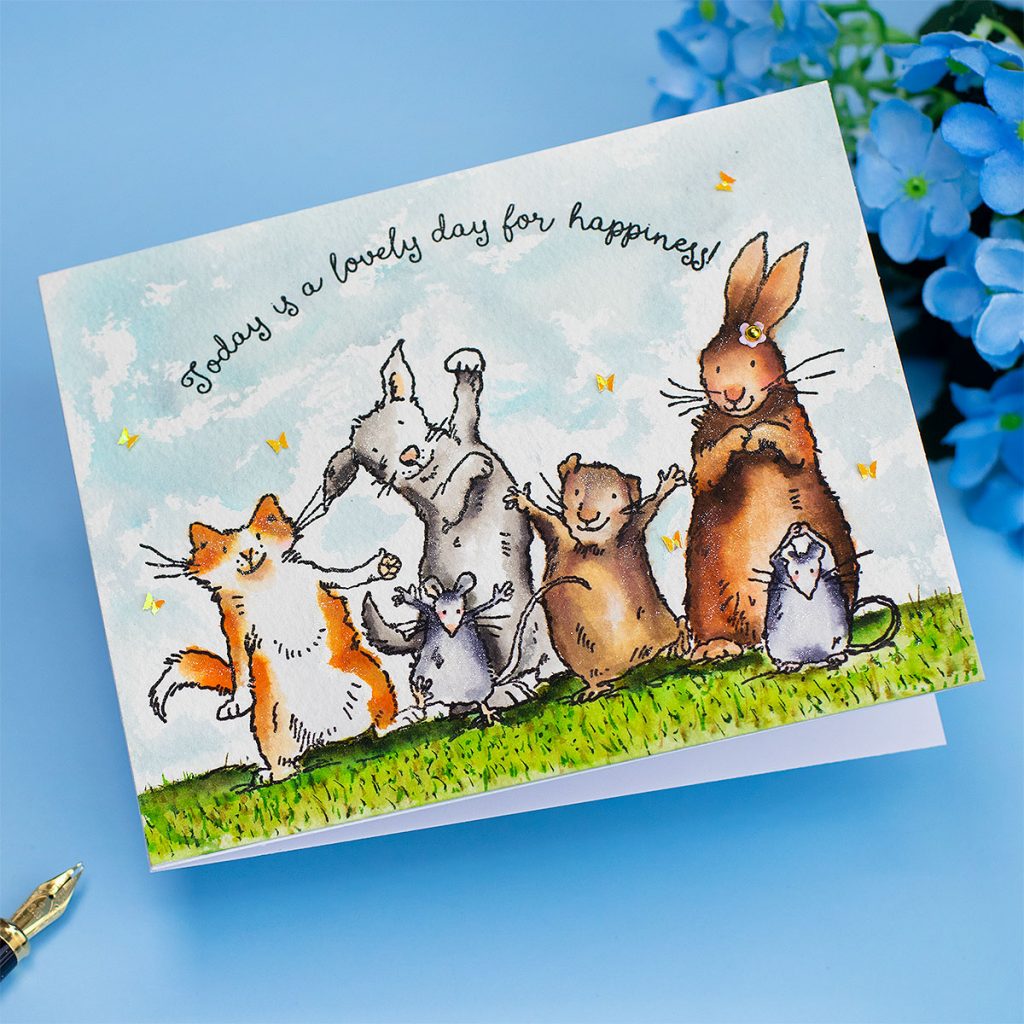
Proud of You Stamp Set by Anita Jeram

This card is one of the 3 cards I shared in the release blog hop here, using Proud of You stamp set.
I consider this image perfect to show you how I apply colours just because it contains a different little animals.
In the video below I’m answering some of the frequent questions about water-based markers and I avoided to the maximum to speed up the camera so that you can see how I apply colors in real-time.
Explore Anita Jeram’s April Release…
FAQS
I would like a slower version of your coloring videos Bibi.
The video contains real-time coloring. Phew!
How long it takes to add color to an image?
The Expected time coloring is from 10 to 40 minutes per illustration with several images. This depends on the details you want to apply.
My markers seem not to be working. What I’m doing wrong?
- I believe your markers are ok. The issue could be the technique you are applying, the paper you are using, the amount of water and ink applied, or a mix of all of these.
- Getting the right paper is “key’.
- It is key to apply very little ink from the marker on the paper.
- You need to work quickly. Do not allow the ink to dry and stain the paper before you can’t even blend it.
- It is important to use very little water.
What paper do you use?
- Strathmore Watercolor Paper Cold Press300 Grams
- Strathmore Bristol Smooth 270 grams
- Arches ( Any kind) . Hot Pressed and Rough could require the use of more water to do the ink blending.
What brush do you use?
- I like to use a Nuvo water brush to blend and spread the ink over the image and I do not press on the barrel so the tip of the brush is almost dry.
- Using other watercolour brushes to blend the ink of water-based markers might not be ideal. As you need to dip the brushes in water they might be loaded with to much water for this work. If they are too dry you won’t be able to move the ink.
- In my opinion, a water brush is the best option.
Tips
- Clean the tip of the water brush frequently so that you keep it clean to achieve colour degradation.
- Allow room to do the blending. Do not cover the whole image with Ink!
- To add color to critters, I would advise working from the edges of the images towards the center.
What ink would you recommend to apply water-base coloring mediums?
- I love Versafine Black Onyx Ink ( waterproof)
Which are the colour of the marker you are using?
Kuretake Zig Colour Combos for Animals:
Browns
- Dark Brown
- Brown
- Beige
- Mustard
Greys
- Grey
- Mid Grey
- Grey Bown
Yellow/ Orange for Cats and Foxes
- Bright Yellow
- Beige
For Grass
- Light Green
- Olive Green
- Bright Green
- Dark Green
For the Sky
Any blue will do the job. I used light blue and cornflower blue.
That’s all for today.
I hope you enjoy this post.
X
Happy crafting
Supplies List
Affiliate links applies at no extra cost to you. Thanks for your support.


Leave a Reply