
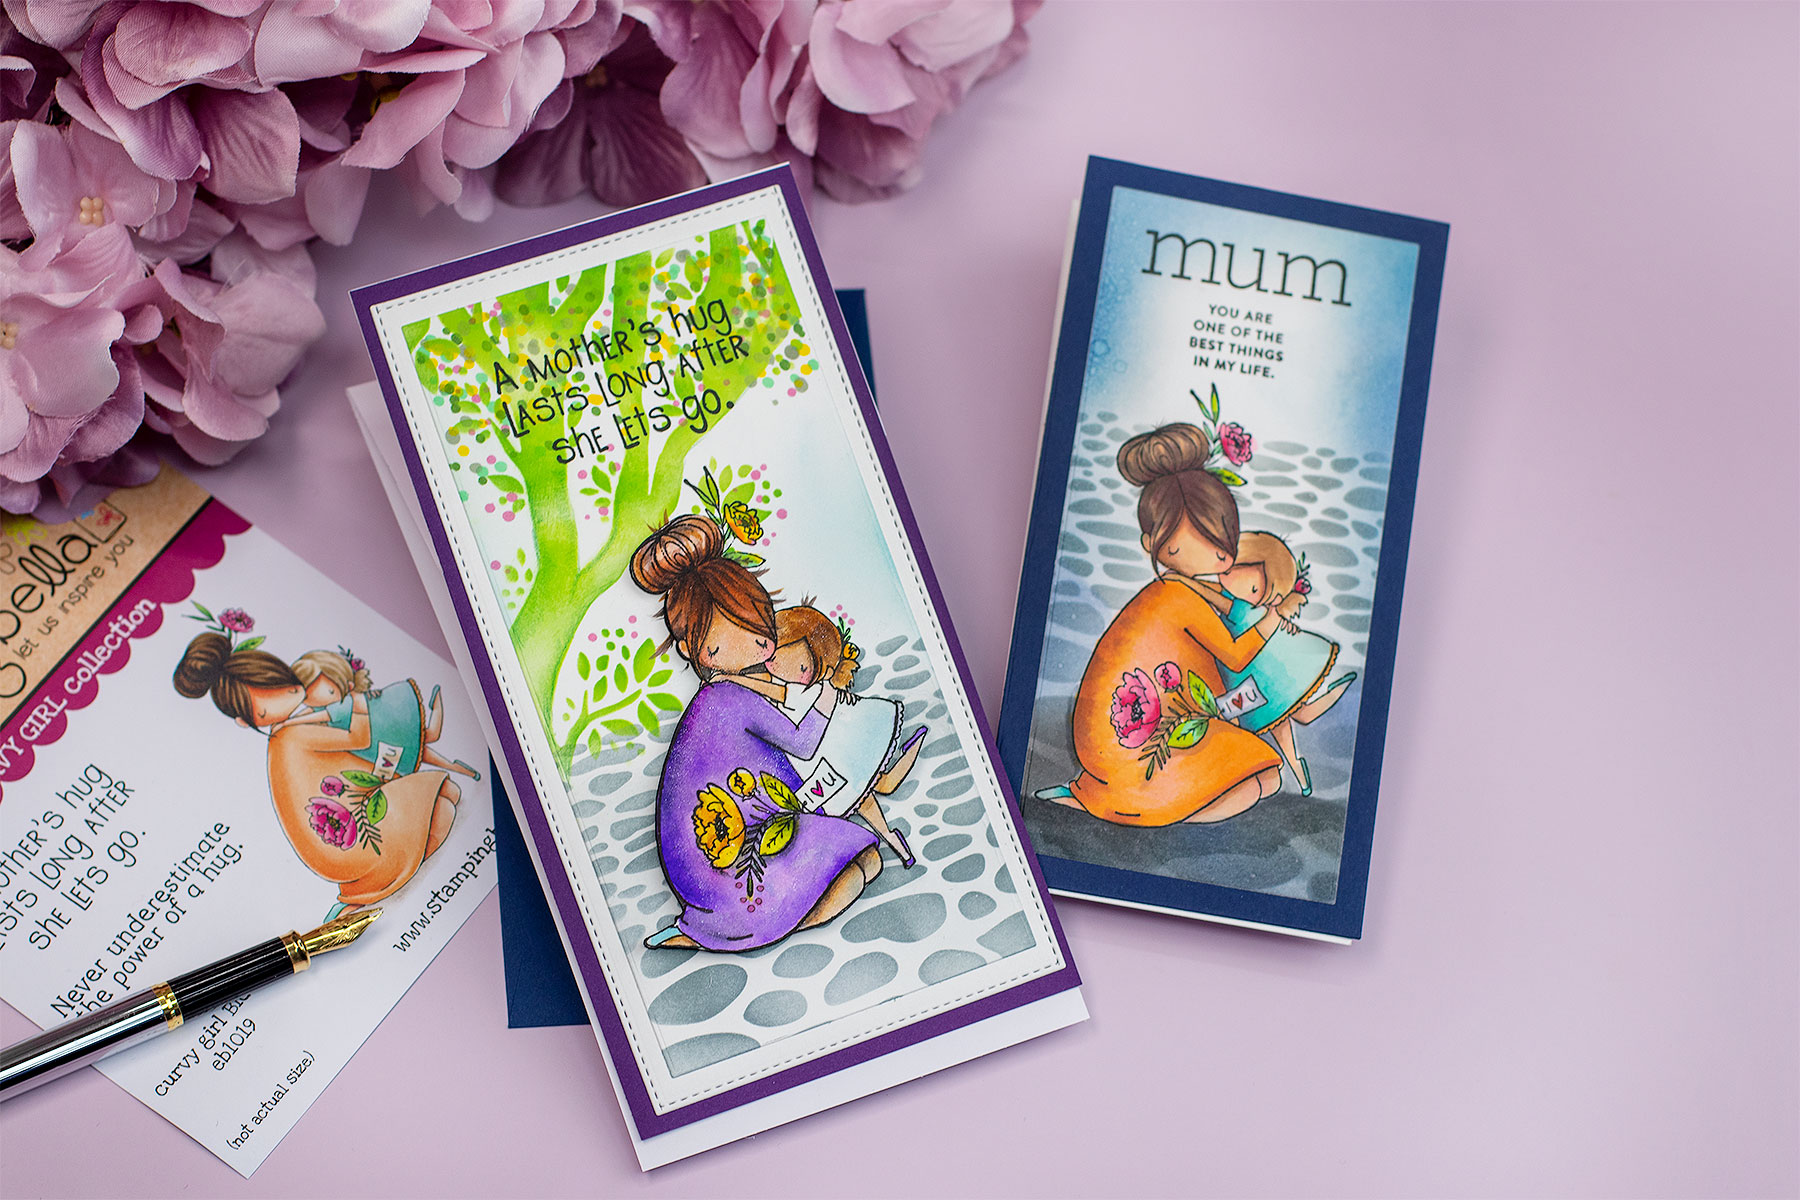
Hi there, today I’m featuring the gorgeous image from Curvy Girls Big Hug stamp set by Stamping Bella and also an idea to incorporate a Fun Z fold to the card base so that it can easily be turned into an easel.

Z Fold Mini Slimline EasEl Card
I wanted to try a different card base design for mini slimline cards and a way to save paper when creating the card bases for format.
So I decided to add a super easy Z fold that can be also turned into an easel.

As the mini slimline panel measures 6 -1/4″ long we can only get one card base per each A4 sheet of cardstock.
By incorporating this fun fold to the card base we can get 2 card bases from an A4 sheet of cardstock and they will fit on the Mini Slimline Envelopes sold by Simon Says Stamp!
You can also make larger cards if you want to, and then you may need to customise the envelope.

How To Make the Card Base
- Cut along the larger size of an A4 sheet of paper at 3″ inches
- Score the piece at 6-1/4″ inches
- Fold over the scoring line.
- Next, fold in half the shorter panel of the card base.
- To complete the card base, glue over the folded part a slimline a 6-1/4″ x 3″ inches panel.
Note : You can use dies from Mini Slimline Rectangles by Simon Says Stamp for a nice finish.
The card base is Done ! and you can add a front panel to your cards.
Insta- Video
I made a 30 seconds video on my Instagram to show you how easy is to put this cards together.

The Images
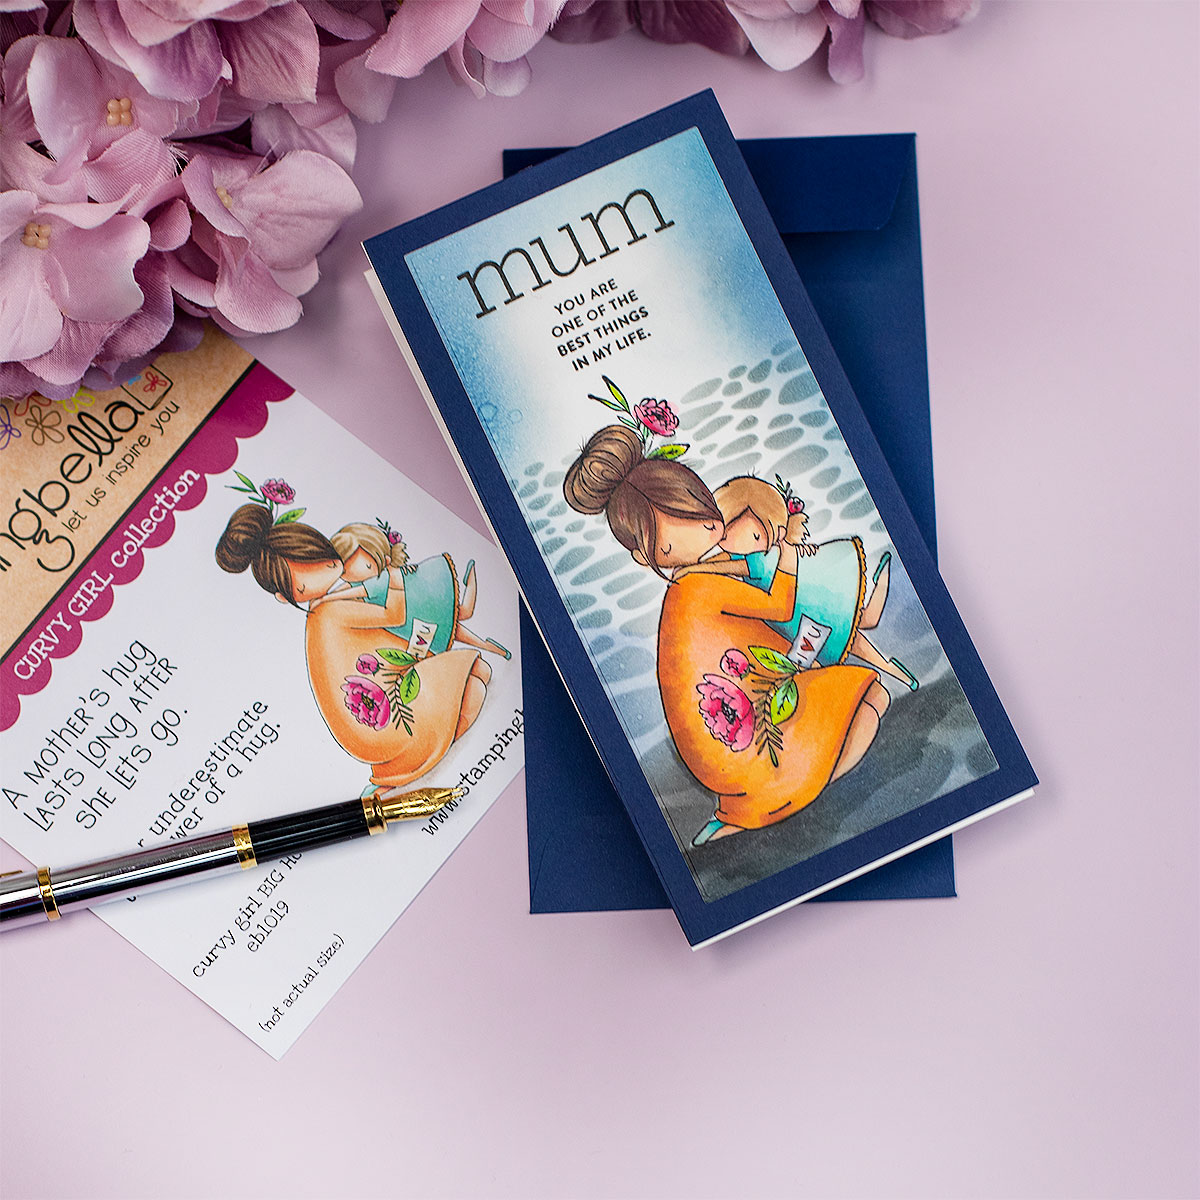
I stamped the image from Curvy Girls Big Hug stamp set on Strathmore watercolour paper using the Misti and Versafine Black Onyx Ink.
For the purple card, I fussy cut it and I foam mounted it on the background panel. For the card below I did a single layer composition.
Colouring
I also was playing with Tombow Retro markers. This is a pack of 10 water-based markers and it doesn’t include browns or skin tones.
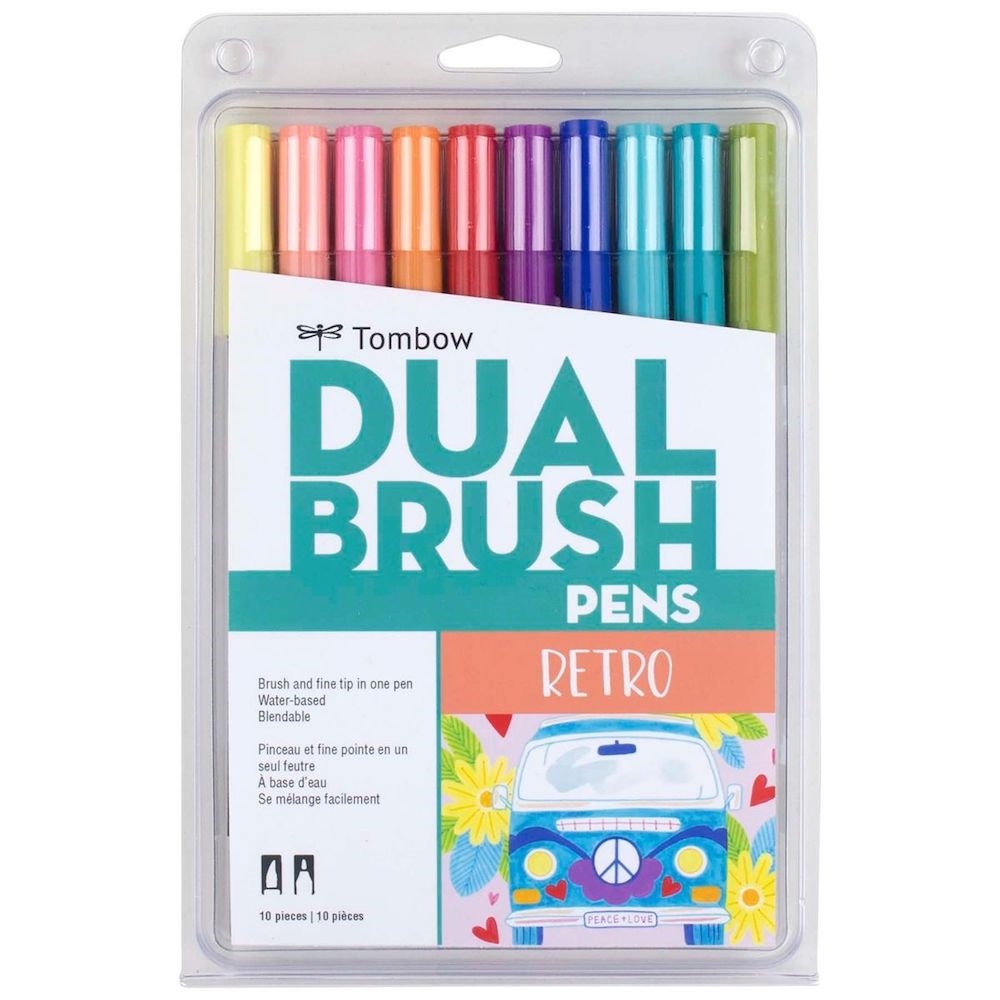
My aim was practicing some blending and creating new colours using only the bright colours in this pack.
So I blended red and green to create browns and by adding more water and a little bit of pink I made skin tones.
I got a bit lazy and I reach out dark brown Zig markers to add shades.
The Background
After colouring, I also used Fluttering By ( tree stencil) and Pave the Way Stencil to easily add a background to the scenes using also distress inks.
In the video here you can see how too make this kind of backgrounds
That’s all for today.
Thanks for stopping by.
x
Bibi

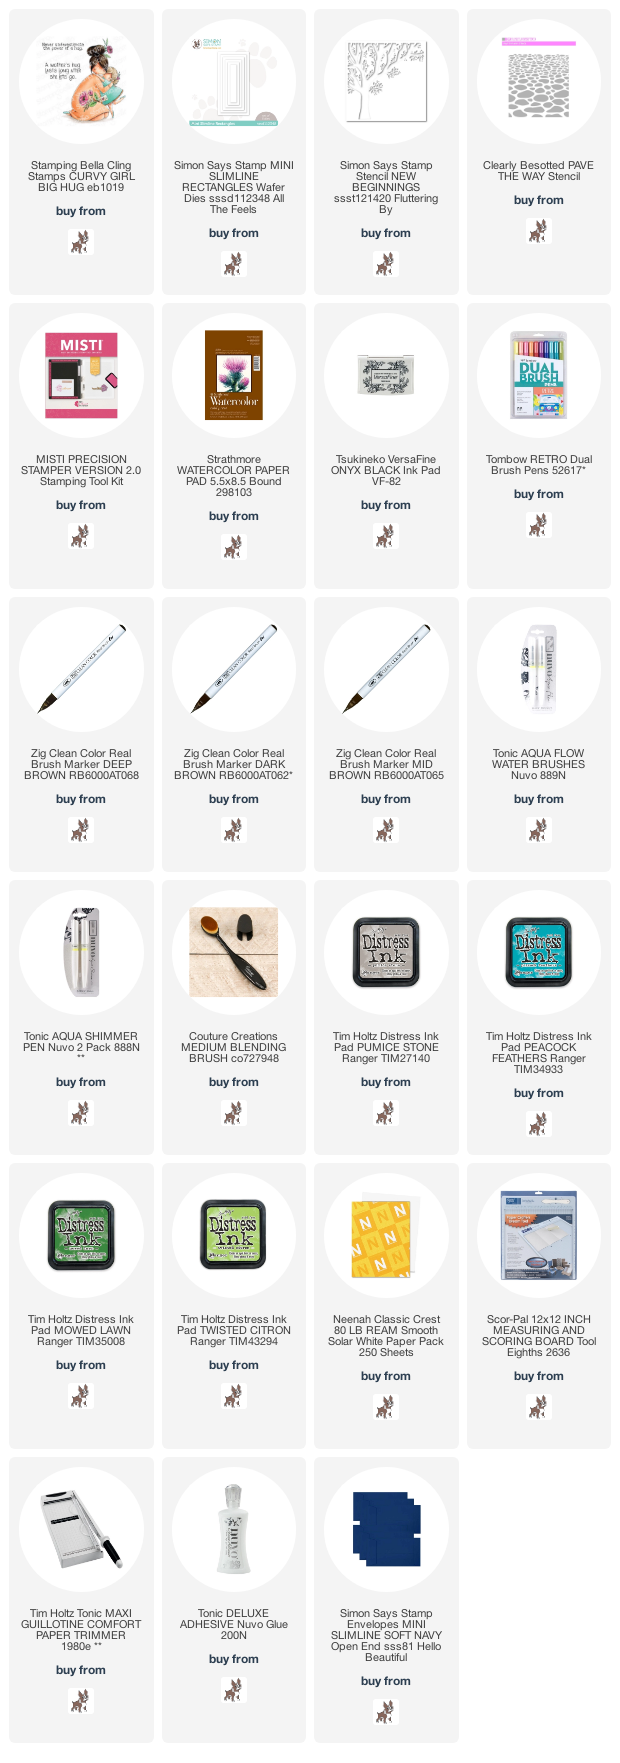
Supplies List
Affiliate links applies at no extra cost to you . Thanks for your support.


Leave a Reply