
Hello there, Today made super fun-shaped cards using the “ Honey Bee Flower Pot Card die set” .
I love to make die-cut shaped cards as these are versatile, super cute, and easy to put together.
Honey Bee Flower Pot Card die set

- This is 10 PCS dies.
- Extremely easy to use.
- It will create a 5″ x 3-1/2″ inches shaped card (you can make it slightly toller if you want to.)

The Pot Envelope
- To create the pot/ envelope you will only need to die cut a single piece of paper, fold it in half and stick the sides.
- Then, you can add a decorative scalloped die-cut on the top edge of the pot to complete it.
- It measures 3-1/4″ x 3-1/2″ inches.

The Card Base
- The card base slides into the finished flower pot card.
- It is made using 1 die from the set.
- To decorate it, you can use the different flowers and leaves dies included in the set.
- It measures 3-1/2″ x 5″ inches assembled.
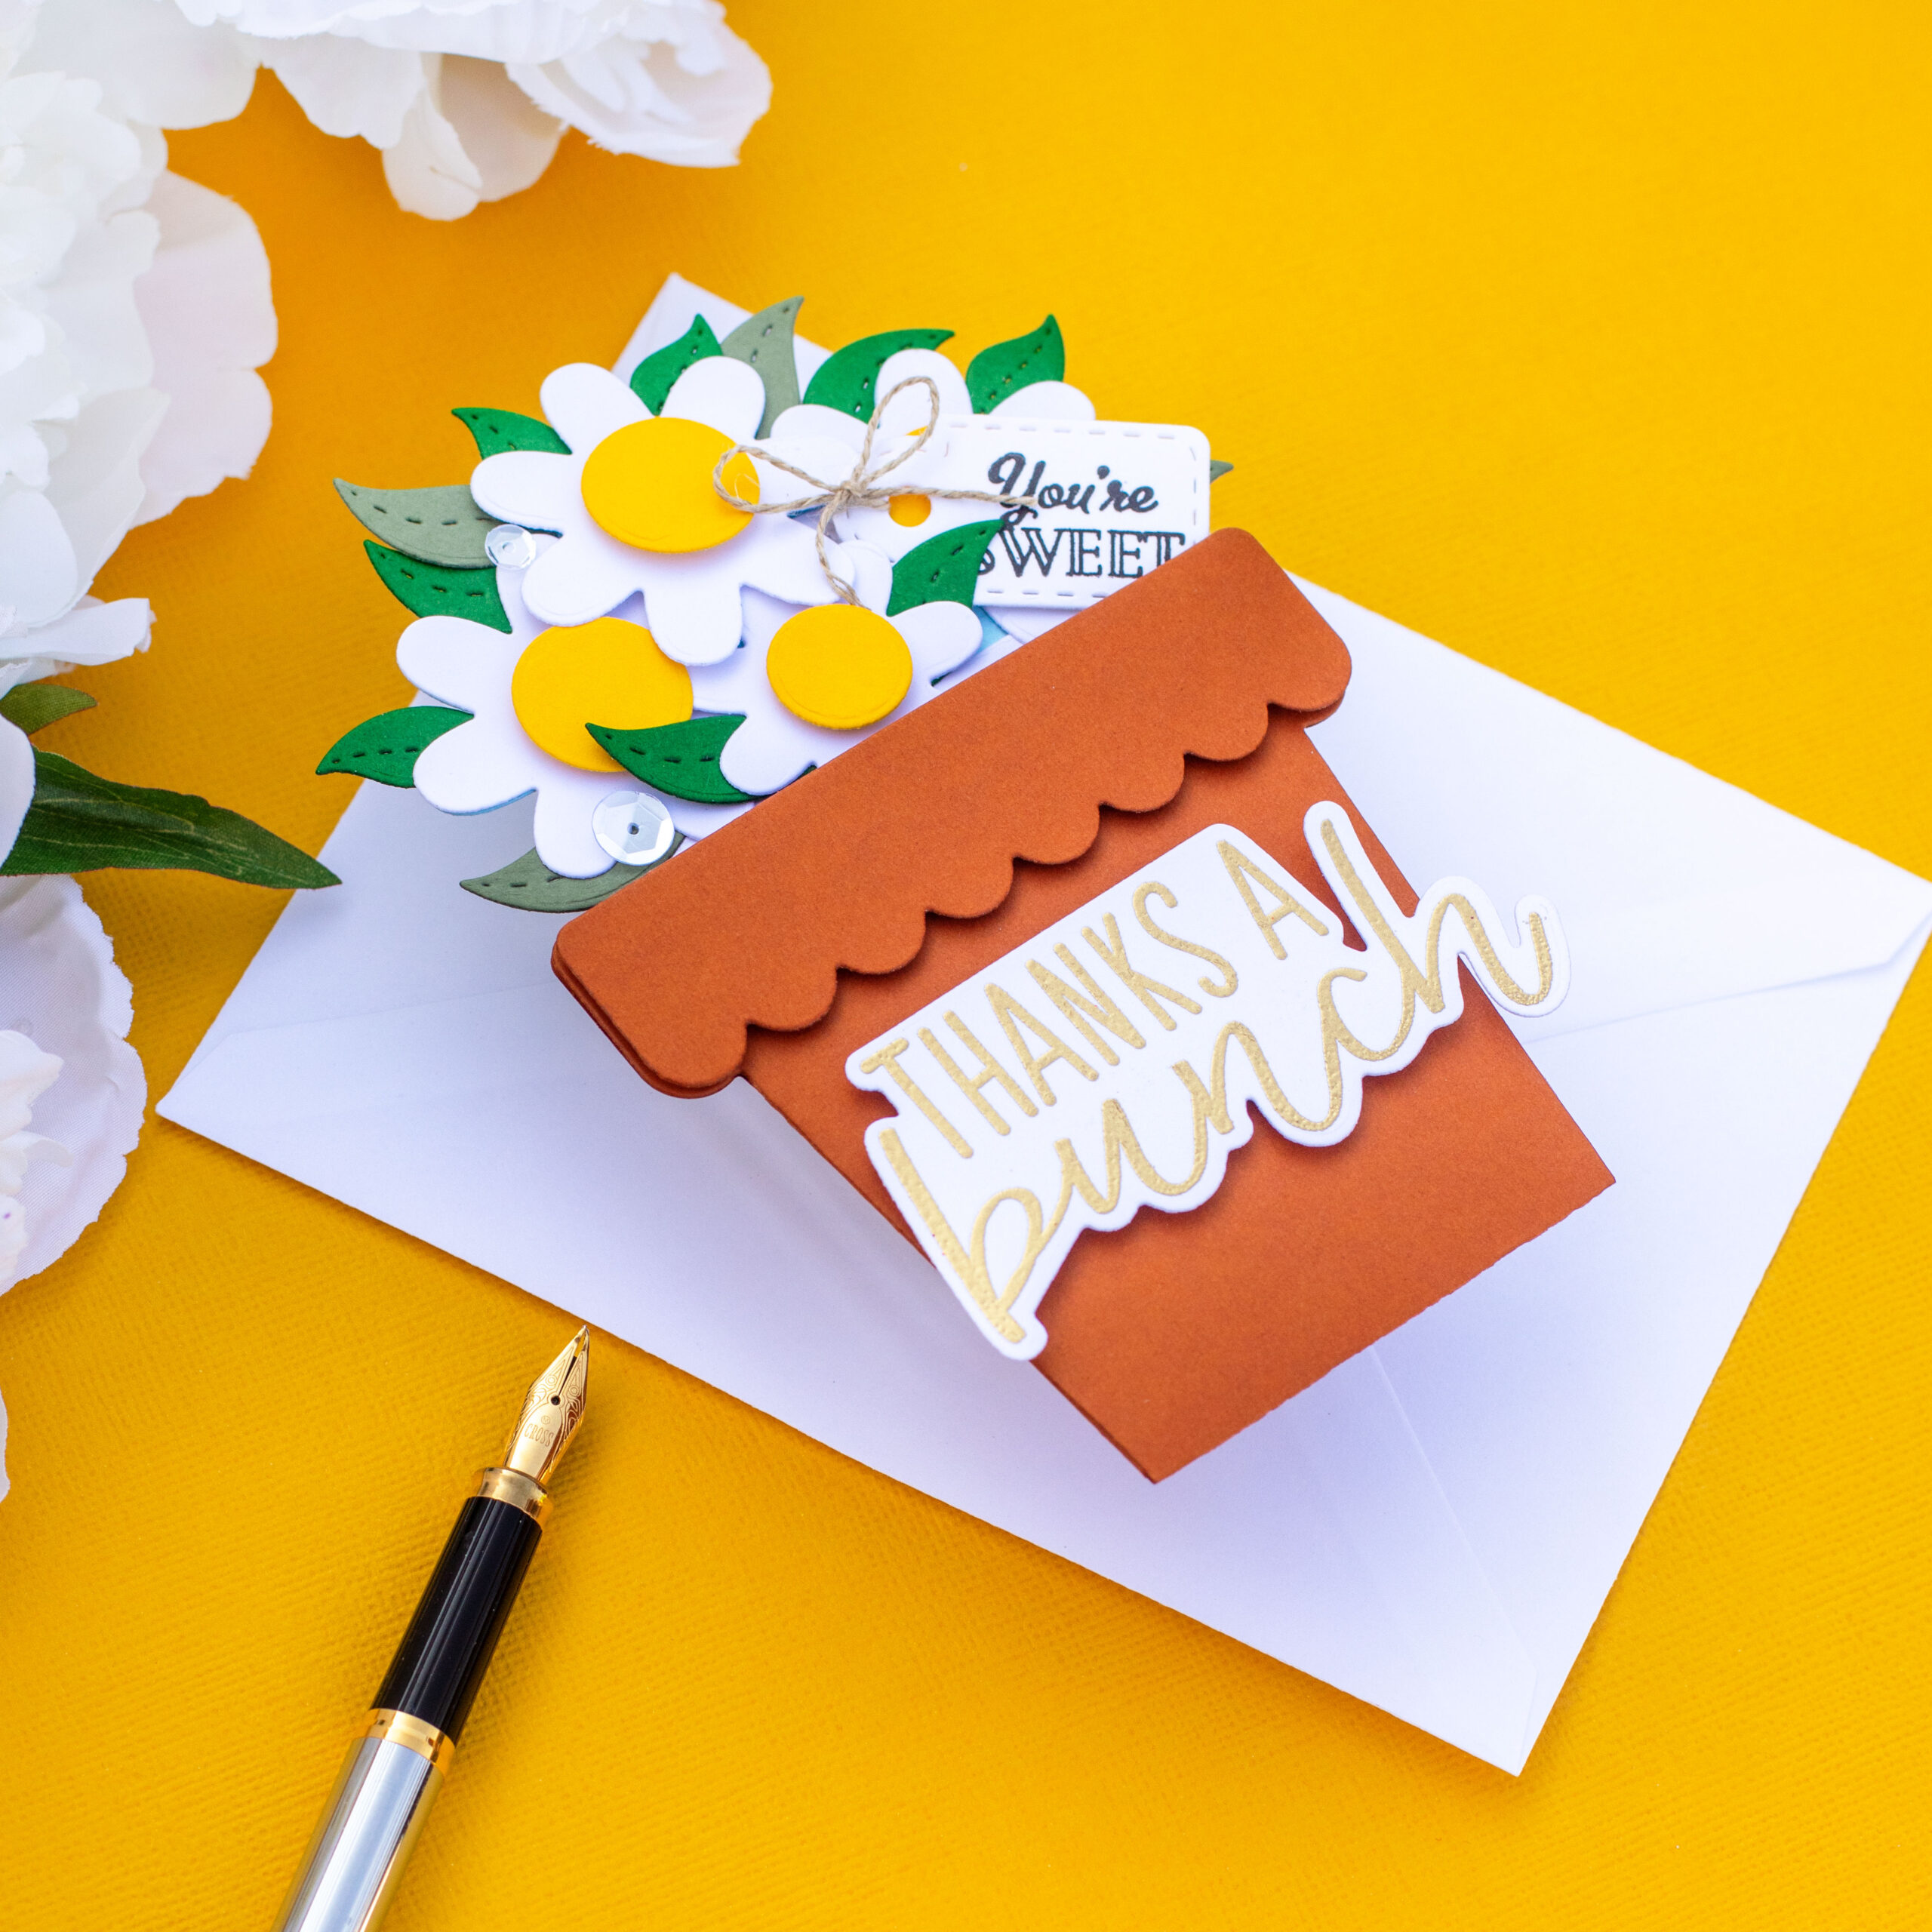
The Sentiments
I heat embossed one of the sentiments from Honey Bee THANKS A BUNCH Clear Stamp Set on white and black and I die cut it using Thanks a Bunch coordinating die set.
To do this, I used Versamark ink and WOW White and Gold Rich embossing powders from the Wow started kit here!
whatch the card in action in the video below…
Featuring
- FLOWER POT CARD Die set
- THANKS A BUNCH Clear Stamp Set
- Thanks a Bunch coordinating die set.
- Concord & 9th PLAID BACKGROUND Clear Stamp Set.

The flower pot shaped card can also be used as the topper of a card.

- I decided to stamp the front panel of a C6 card base using Concord & 9th PLAID BACKGROUND stamp and Versafine Onix Black Ink.
- Then glue it over the shaped card so that it can hide a message or a gift card.

That’s all for today,
I hope you enjoy this post.
Happy Crafting.
X
Bibi
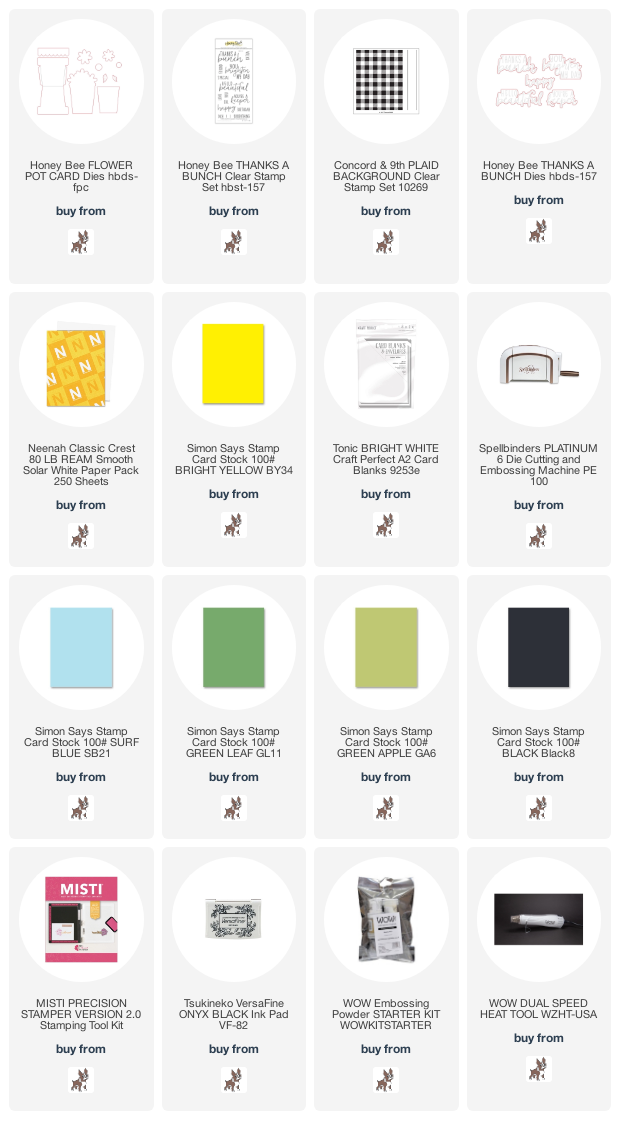
Supplies List
Affiliate links apply at no extra cost to you. Thanks for your support.


What a delightful way to give a gift card this summer! Love the clean, fresh look of this card. This die set will definitely be on my wish list. tfs-stay well.