
Hello there, I totally love “Giant Hugs Card Wrap die set by Simon Says Stamp” and today I’m sharing four super duper easy ideas to get creative juices flowing.
Giant Hugs Die Set

- SSS Giant Hugs is a large die set that includes 2 dies that will partially die cut the paper.
- You can die-cut the hands out of any cardstock colour.
- Designed to fit A2, A7, slimline and other popular card sizes (any handmade card size)
- Versatile, easy to use, and incredibly cute.
I made C6 cards today but the sky’s the limit.
Paper Used
- You will find me using Pre-scored card blanks by Tonic very often.
- These are made out of thick smooth cardstock (300 grams) and this paper is great for stamping and ink blending.
- For all the cards in this post, I used an A2 Bright White pre-scored card blanks by Tonic.
- These card bases measure 5-1/2″x 4-1/4″ inches ( C6 American Size)
- All the white paper used to create background panels is Neenah 80L which happens to be a perfect match to the Tonic Bright Withe card blanks range (The colour of these papers are pretty much identical).
Giant Hugs 4 Ways
Giant Hugs Envelope Latch Card

This top folding card features a fun closure in which the right-hand index finger latches on underneath the thumb of the left hand.
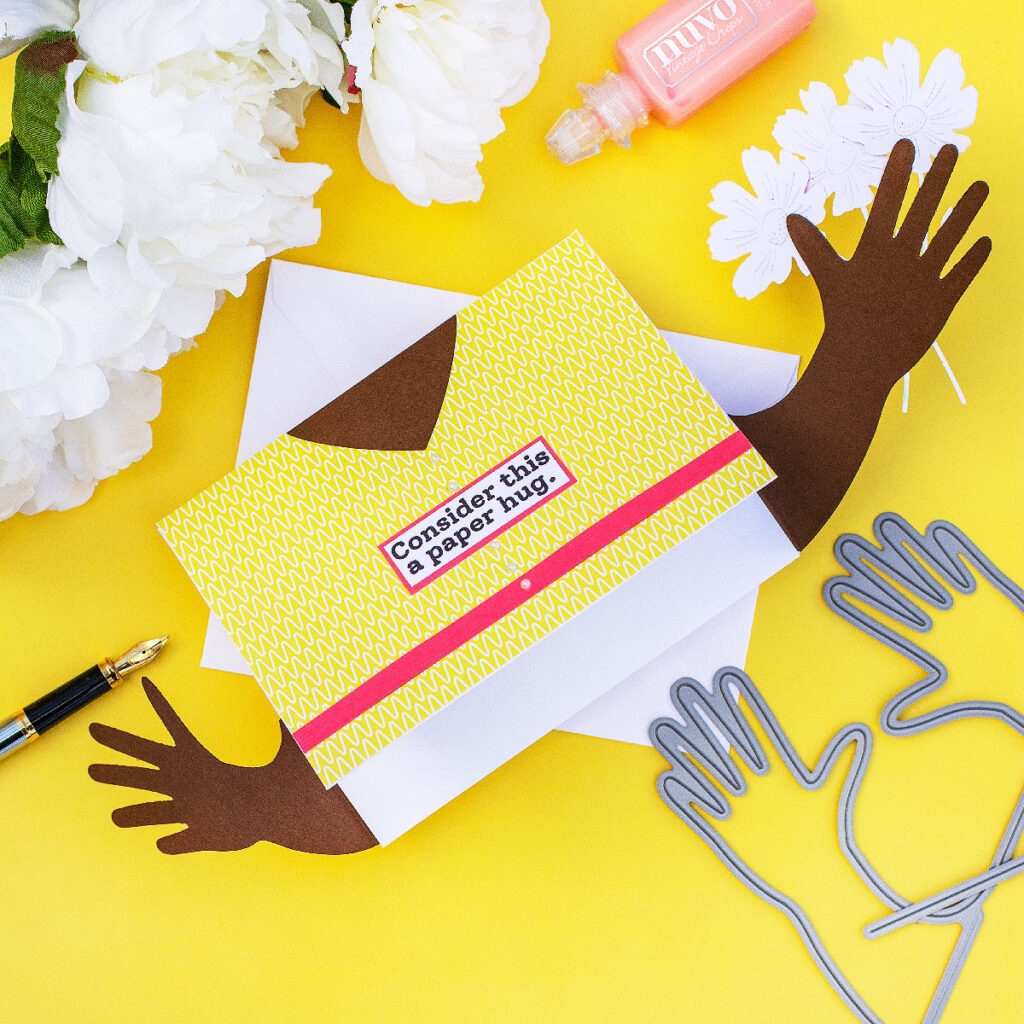
The die-cut arms are glued to the interior side of the card base back panel and to cover the raw edges I glued a panel made out of Neenah 80L cardstock over.
When folding the die-cuts forwards they completely hug the card so it can only be opened by unlatching them.
This is hard to explain but easy to do.
- To make the flowers, I used Cosmos Stem Wafer die and I die cut watercolour paper previously painted using Altenew watercolour paints.
- I ended up decorating the front panel of the card using scrapbook paper.
- For the sentiment, I used one stamp from the “Just Miss You stamp set” and Versafine Onyx Black Ink.
- I help myself using the Misti to do precision stamping.

Giant Hugs Gift Card

- This card includes a small envelope ( no glued to the front panel) in which you can add a gift card to any small detail.
- In the video here I show how to make the envelope using the largest die from Stitched Scallop Squares by Honey Bee Stamps.
- The arms are glued behind an embossed panel adhered to the side fold card base.
- I used the Pinpoint Starlets embossing folder to emboss the panel.
- The die-cut arms hold the envelope (that can be glued to the back panel).
- I used the Misti and Versafine Onyx Black Ink to stamp the sentiments from the “Just Miss You stamp set”.
As this card is a prototype ( a draft) so the inner edges of the die-cut arms are not perfectly aligned.
I glued them after making the whole card.
I wanted to see if by adding an extra die cut at the back (extra weight and sturdiness) to the die-cut arms they would stay in place and they did.
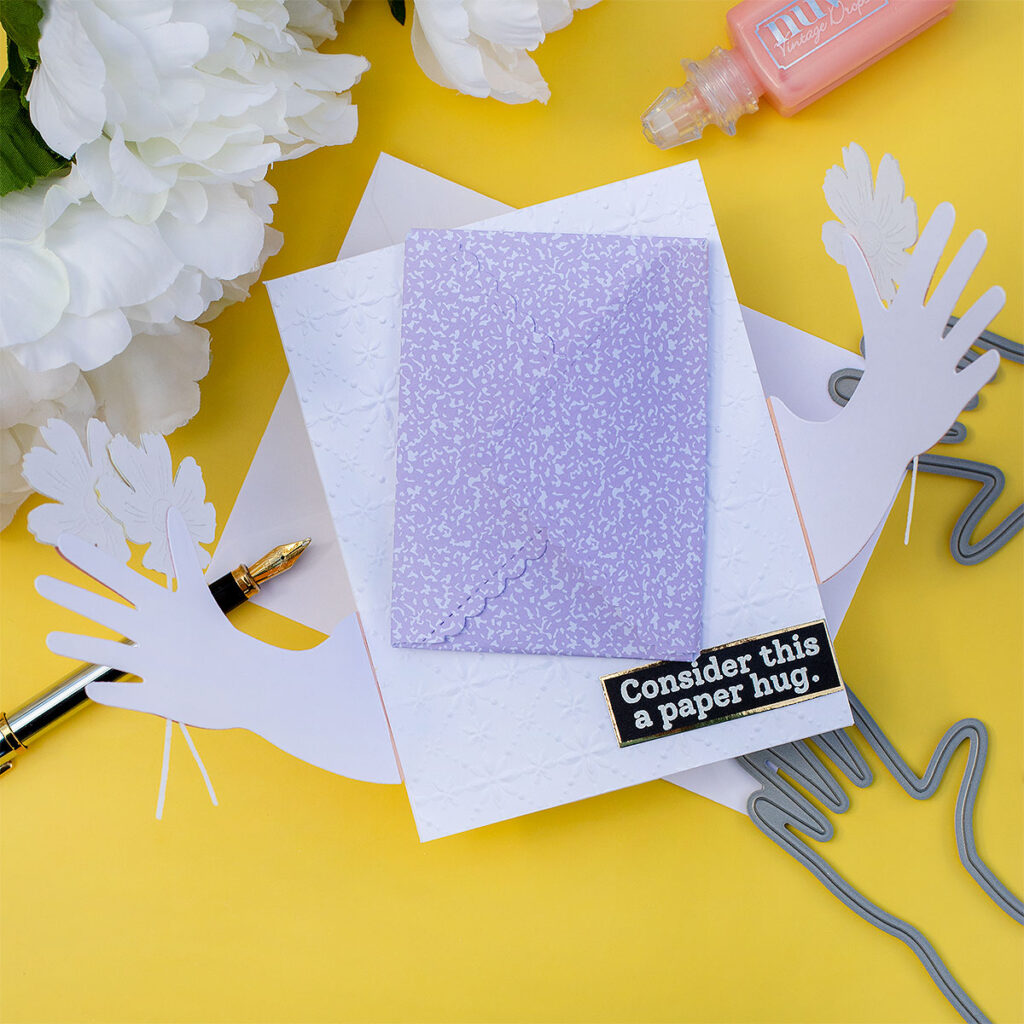
So you can glue all the pieces first making sure all the areas are properly aligned and covered.
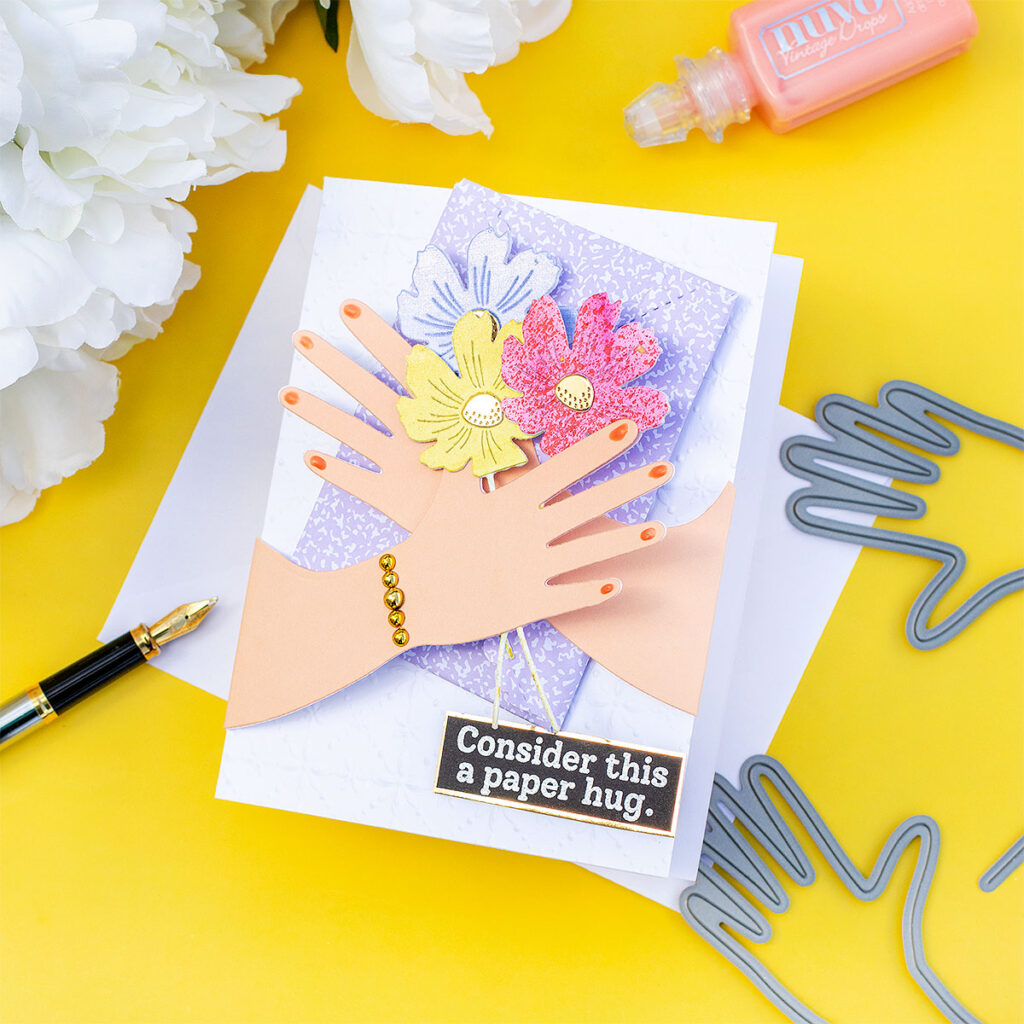
You can use a glue dot, magnets, or any other resource to keep the arms closed.
Alternatively, you can place the die-cuts in a way in which you can latch on the fingers as the first card in this post.
Giant Hugs Teacher Thank You Card
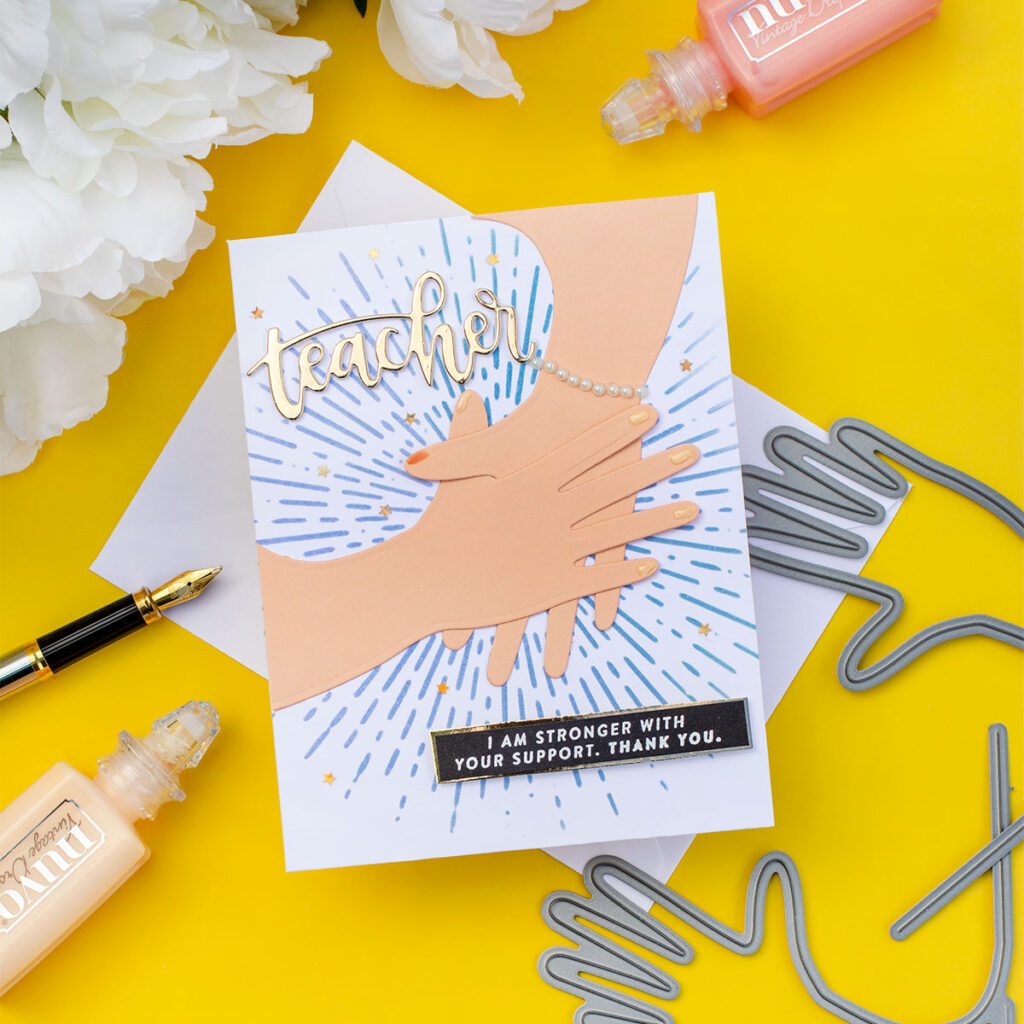
Easy and quick this card features another layout and a different way to use the die-cut hands.
This time I create a Thank You Teacher Card.

I mixed and matched supplies to complete this card and to keep it simple l glued all the die cuts directly to the front panel of the card base.
Making this card sample perfect for mass production.
For the sentiments, I used Heffy Doodle Teacher die and I also white heat embossed in black a sentiment from the ” Thankful Flowers stamp set“.
Giant Hugs First Communion Card

Here is a simple idea to show you how easy could be to customize the hands/arms to make cards for different occasions.
By die cutting the hands out of vellum I also made some cute gloves that totally transform the die cuts and repurpose them.
To add a pattern to the vellum, I embossed the paper after die-cutting it using the “Pinpoint Starlets embossing folder” and using this embossing folder I also embossed a background panel for this card.

I also added other elements such as a die-cut cross, a die-cut sunburst, and I folded a piece of black cardstock to make a little bible.
All the die cuts are glued to the front panel to keep it easy.
I started with the idea to make a wedding card. A male and a female hand could rock in a very simple “holding hands” design as well.
I changed my mind and I opted for a first communion-themed card which I regret as the nail polish is to dark for a little girl and once I finish playing with ideas I noticed that I don’t have stamps for this Catholic celebration! Nooo.
I was born in a catholic family so I experienced the first communion and it was beautiful but my beliefs changed as I grew and now I’m Christian… I had. a mix of feeling tho as I was raised by nuns and I love them.
Anyways… to complete this card, I then used a stamp from “All the Thanks stamp set“, I gold heat embossed on black the word “blessings” and I die-cut the sentiment using a coordinating die.
Voila!
Extra idea 🌟 You can add black gloves to make Santa arms or use striped paper to create elf or gnomes gloves to make Xmas cards as well.
And The Nails Bibi?
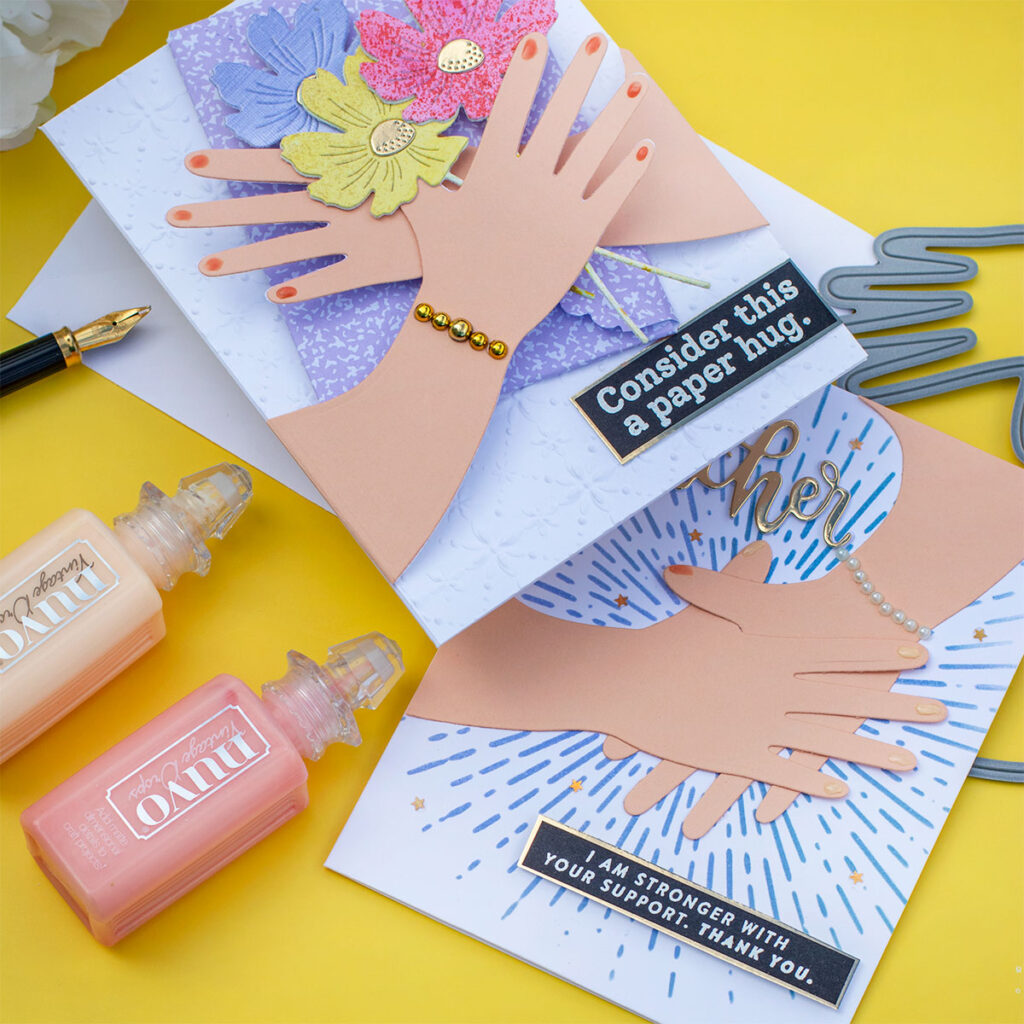
You might be wondering how I added nails to the die- cuts.
This was easy peasy!
As the Nuvo Vintage Drops look like nail polish when dried, I added Coral Blush and Vanilla Milkshake to the fingertips. This was an easy and fun way to add nails.
You can also add jewelry/bracelets by using embellishments as stick-on pearls or Fashion Gold embellishments by Spellbinders.
To make tiny rings, you can also use gold mirror cardstock or gold mix gems.

That’s all for today.
Sending Hugs
Thank you very much for stopping by.
X
Bibi
Supplies List
Affiliate links apply at no extra cost to you. thanks for your support.


Mind. BLOWN. Love these, Bibi!