
Hello there, I’m passing by to share a couple of super easy San Valentine’s papercraft projects made using the new Light Me Up Stamp Set designed by Cathy Zielske for Simon Says Stamp.
I’m also featuring a super duper easy to add colours to stamped images using distress inks!
LIGHT ME UP STAMP SET
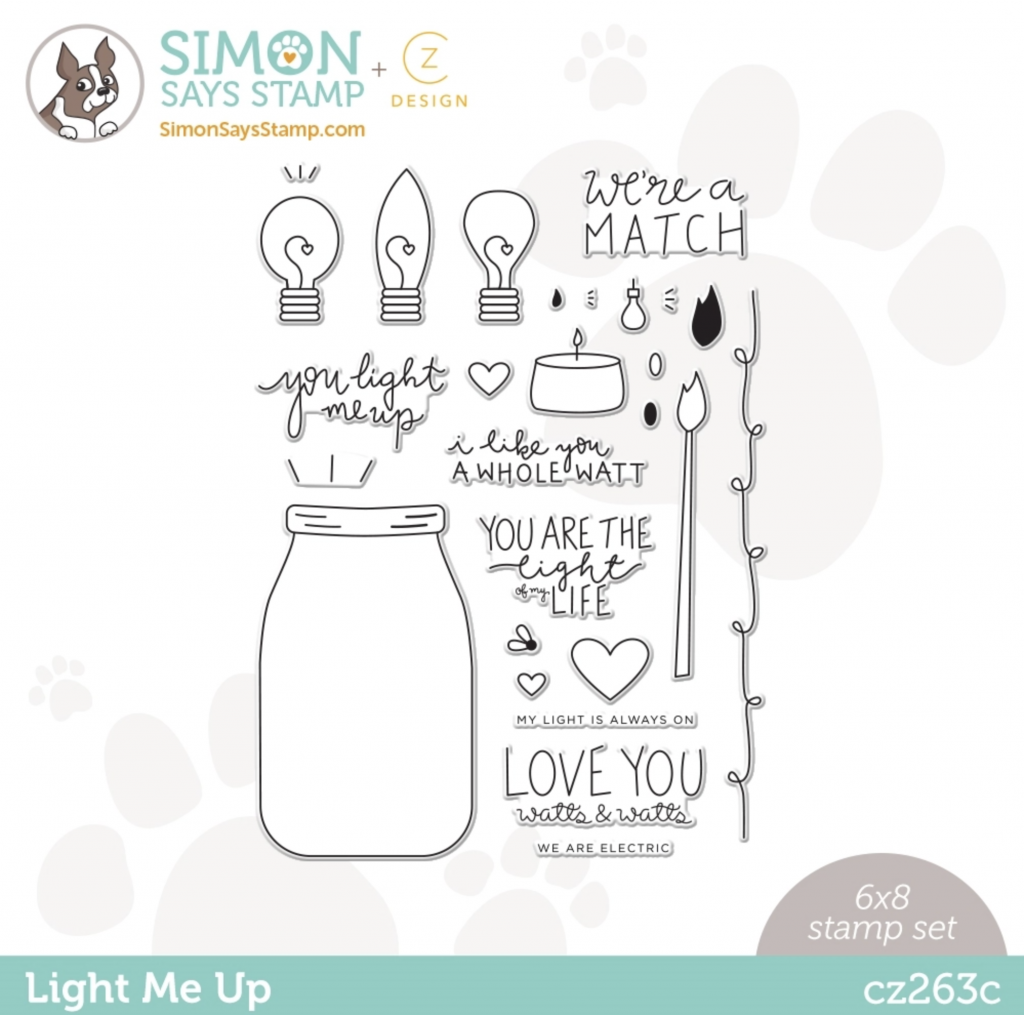
- This 6×8 inches stamp set is super versatile
- It is great to make Love/ Friendship cards but mixed with other supplies it will be great to create projects for any occasion.
- It includes 27 individual stamps to create endless compositions.
- The largest image in the set is a “jar” that measures about 3 – 1/2″ x 2-1/2 ” inches.
- Yes, you can make any size projects using any image from this set or a combination of them.
light me up card

This is a C6 card ( 5-1/2″ x 4-1/4″ inches).
- First, I simply scored a piece of colored cardstock to make the card base.
- Next, I sprayed the front of the card base using Old Paper Oxide Stain Spray and I stamped the image of the jar using Versamark Onyx Black Ink.
- I put to aside and allowed it to dry while making the other components of this card.
DISTRESS INK COLOURING
Find below a visual aid (step by step) to see how easy and quick is to apply colours to these images using Distress Inks and blending brushes.
COLOURING THE BULBS
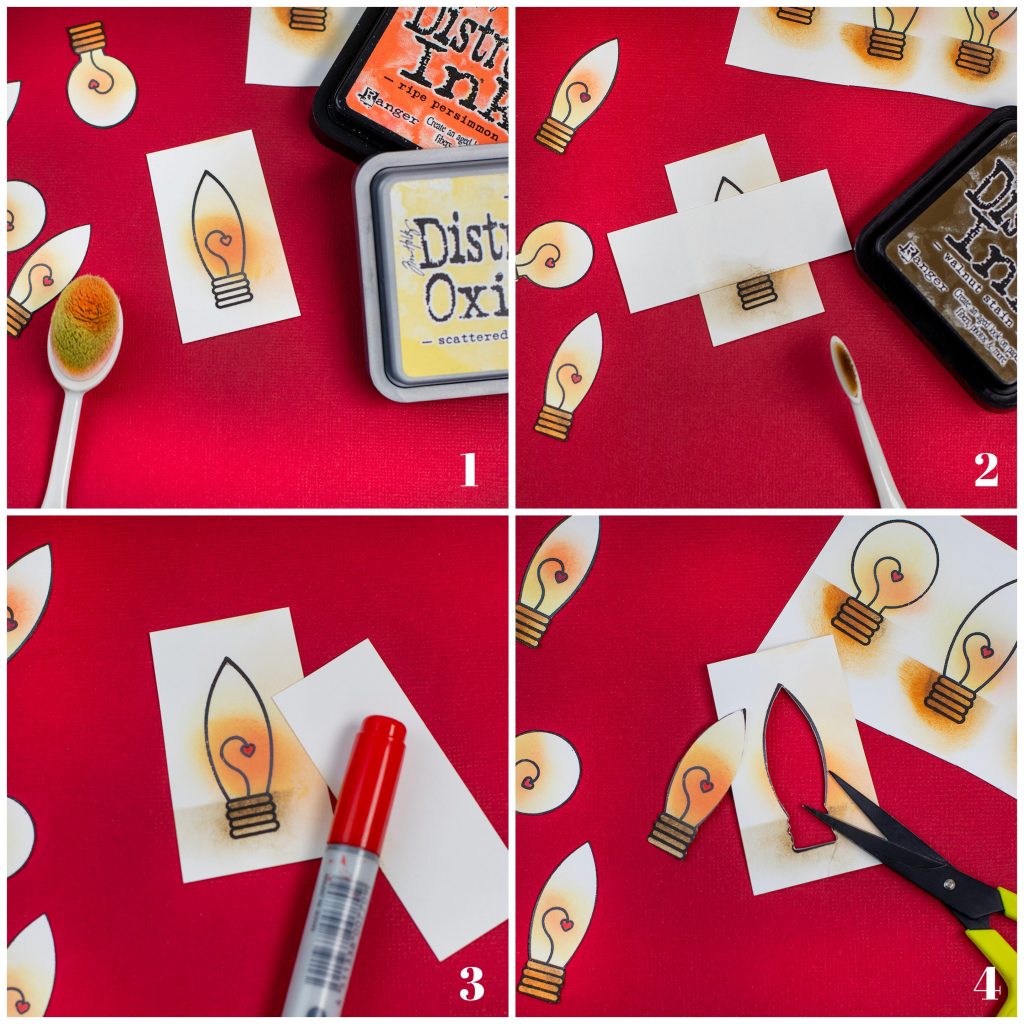
- Step 1. Use a blending brush to apply a little bit of Scattered Straw Oxide Distress ink in a circular motion over the bulb wire image. Then apply a hint of Ripe Persimmon ink over.
- Step 2. Cover the upper part of the image using a piece of paper and apply Walnut Stain and Rusty Hinge over the “screw thread contact part” of the image.
- Step 3. Use a red marker to add colour to the little heart in the centre of the bulbs. Apply Crystal Glaze over.
- Step 4. Trim the image.
COLOURING THE JAR
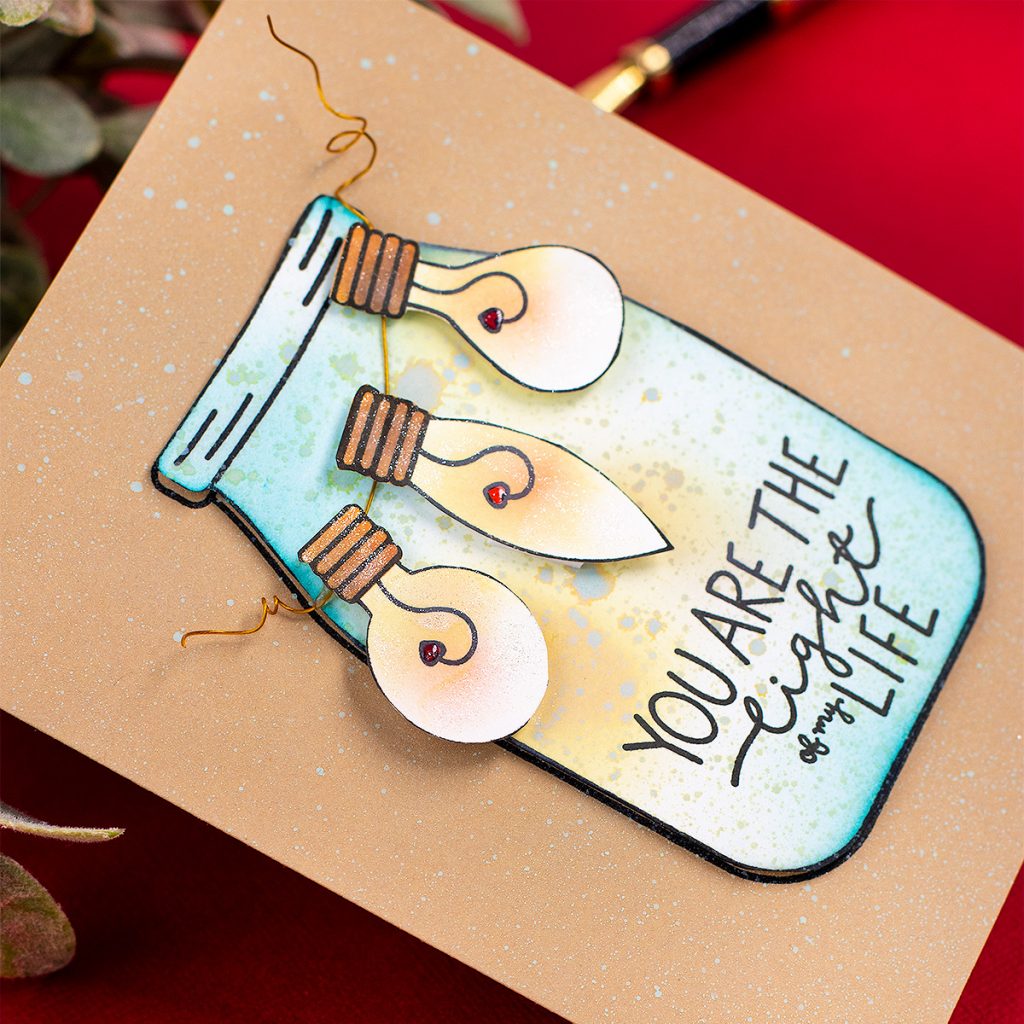
- I stamped the jar on Neenah Solar Crest 80 Lb using Versamark Onyx Black Ink.
- Next, I trimmed the image using scissors.
- Using a precision Blending Brush, I applied Peacock Feathers Distress Ink over the edges of the jar
- Then, I applied Scattered Straw Ink in a circular motion on the areas I would adhere the bulbs.
- To add some interest, I decided to spray the jar using Old Paper Oxide Stain Spray.
- Once the ink was dry, I stamped the sentiment using Versamark Onyx Black Ink.
I wanted to add a fun element to the projects so I curled the ends of a piece of jewellery wire and I adhered the bulbs over it using glue dots.
To finish, I foam mounted the colored image over the image previously stamped in black on the card base.
TAG
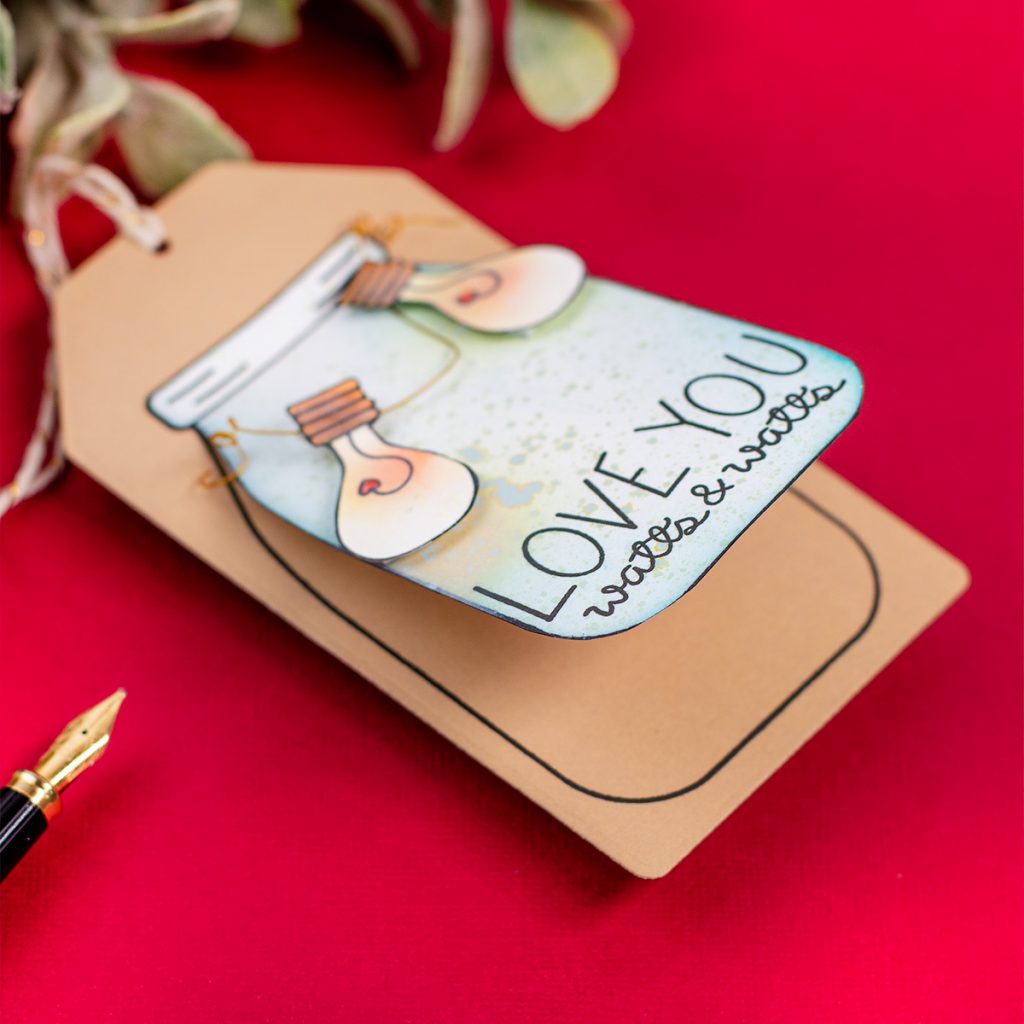
This is a large tag made using Nested Tags die set. It measures 2-3/4″ x 5″ inches
To make it did exactly the same as for the card above. Although, I skip the spraying for a more simple look and feel.
I also decided to score a line over the neck of the jar to create a fold that allowed me to adhere the jar to the tag in a fun way. I thought that having some room to add a message behind the tag could be welcome.
That’s all for today.
Happy Crafting.
Bibi
SUPPLIES LIST
Affiliate links applies at no extra cost to you. Thanks for your support.


Leave a Reply