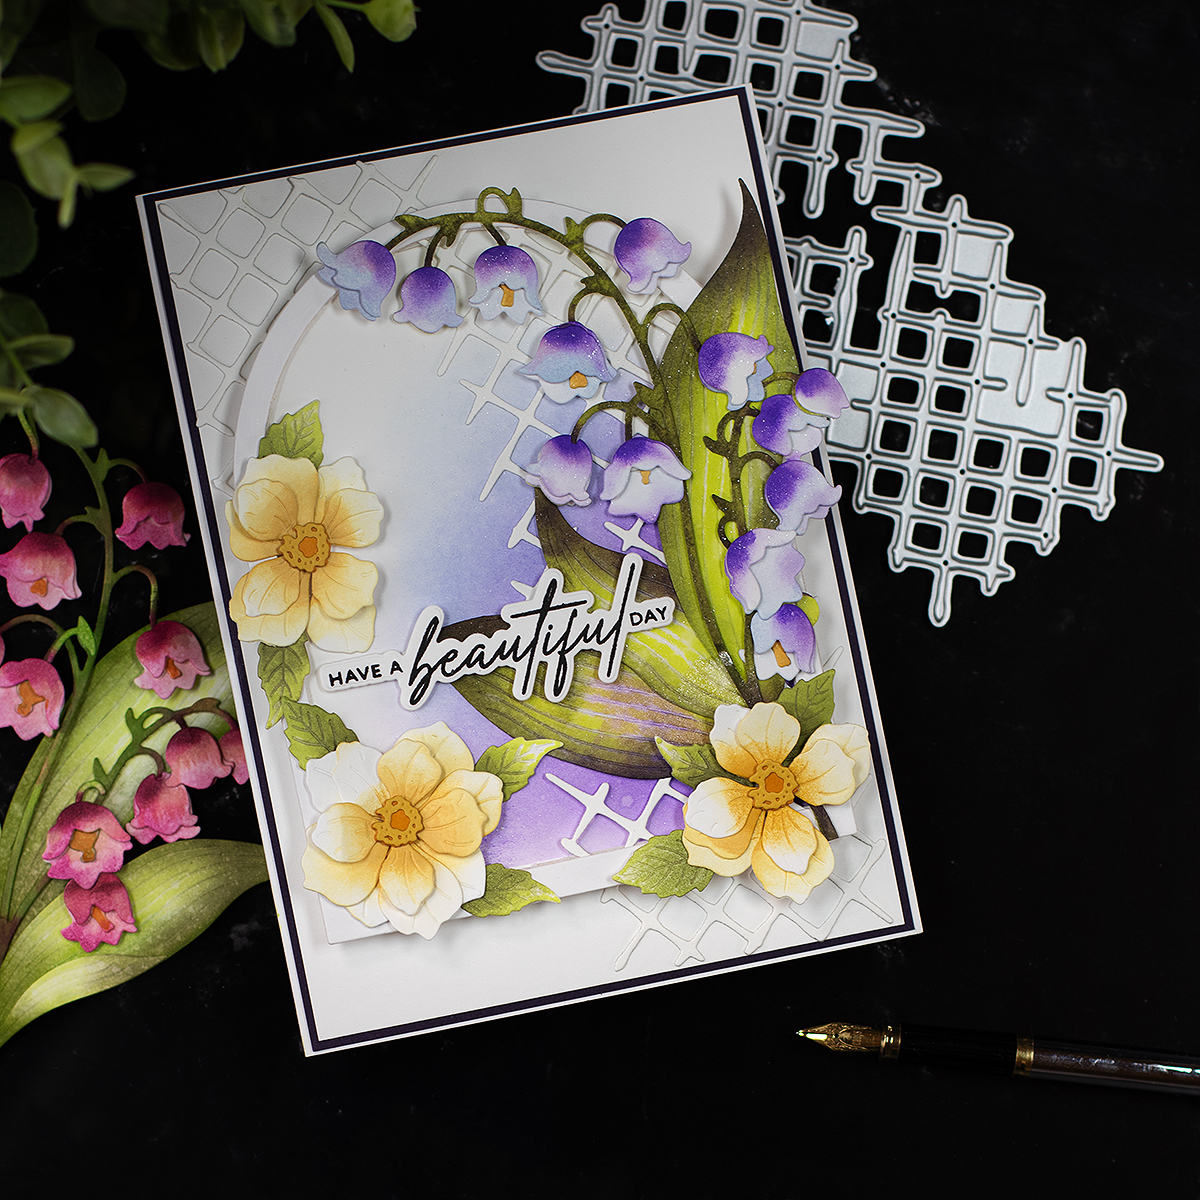
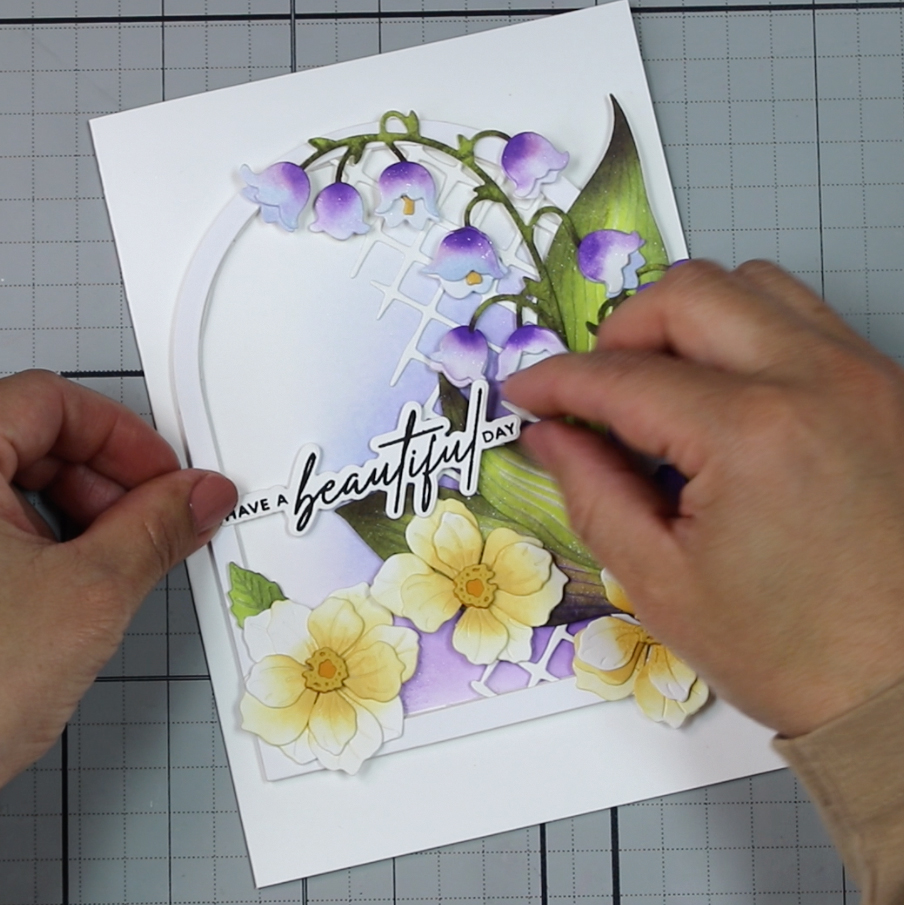
Hello crafty friends! I’m sharing easy di-cutting tips and striking die-cutting inspiration featuring the beautiful new Altenew Lily of the Valley Layering die set.
For today’s card, I created a charming garden scene by pairing it with the Cute Open Rose Layering Die Set — and to create smaller roses, I used only three of the four layered petals.
I also used one of my latest favourite layouts, which features an arched die-cut frame that serves as a guide for adhering elements neatly within its area. It also includes a die-cut texture, a softly inked focal point, and dimension.
To tie everything together, I added the Piped Waffle texture—a lovely detail that helps anchor all the elements beautifully.
For colouring, I went with my go-to combo (you might be tired of it, but I just can’t resist it!): a dreamy blend of purple and yellow inks, using a soft ink bleeding technique for a gentle, artistic finish.
Let’s take a closer look!
Watch the Lily of the Valley Layering Die Set in action
Card Recipe
- Crafty Necessities: Andromeda Cardstock
- 80 lb white cardstock for all the die-cuts
- 110 lb cardstock – For the card base
- Craft-A-Flower: Lily of the Valley Layering Die Set – purple flowers
- Cute Open Rose Layering Die Set – Yellow flowers
- Spellbinders Arches Etched Dies – Nested Arches die set on Sale 50% off
- Piped Waffle Die – Background texture
- Build-A-Garden: Tranquil Trail – For the sentiment
- Mini Blending Brush Set (Flat Bristles)
- Micro Blending Brush Set (Flat Bristles)
Altenew Fresh Inks Used:
Purple Flowers: Iceberg, Pink Crystal, Ultraviolet, Soft Lilac.
Yellow Flowers: Buttercream and Pumpkin Pie.
Leaves: Limeade, Silver Stone, Oak Moss.
Background: Ultraviolet, Iceberg.
Lily of the Valley 5×7 Card

The Process
- First, I die-cut all the pieces out of 80lb white cardstock.
- Then, I applied colour to the flowers and leaves using Altenew Inks and Altenew Blending Brushes.
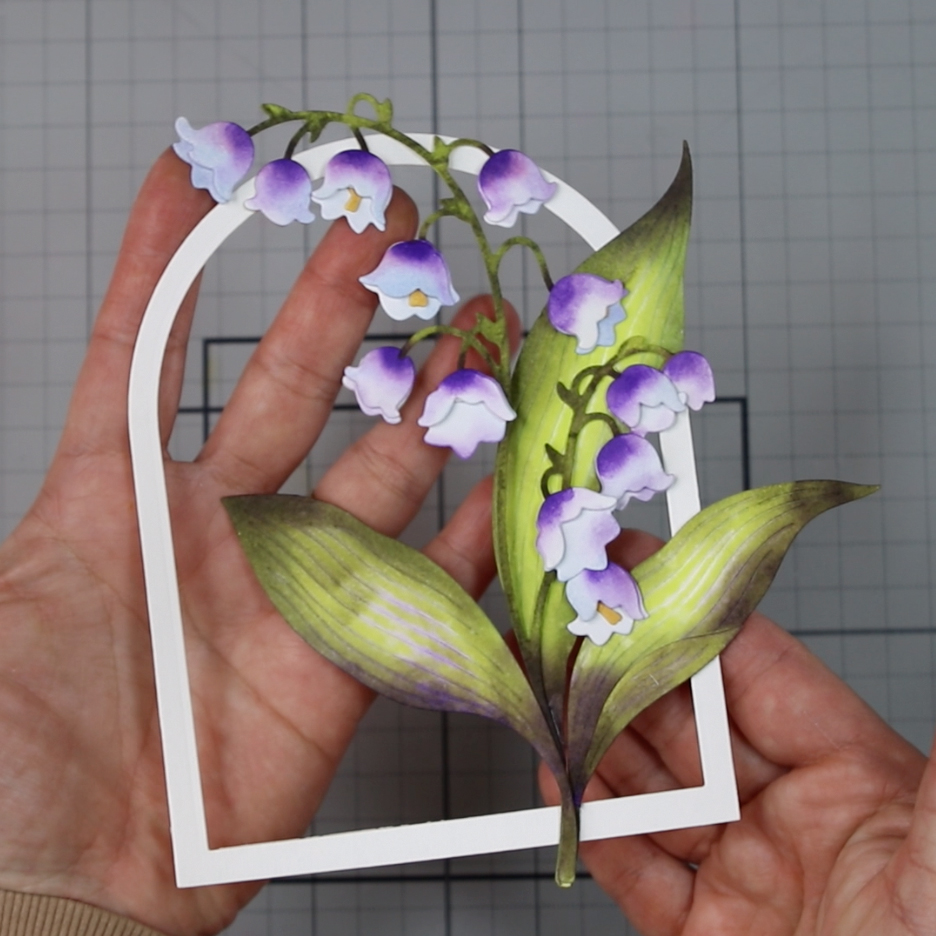
Assembling a die-cut image first is essential to then exploring the design possibilities.
The Craft-A-Flower: Lily of the Valley Layering Die Set features a keyhole system that makes assembling the image easier.
The parts for each flower are grouped into single dies, so when die-cutting, try to keep the pieces for each flower together. Placing them on a sticky mat makes it much easier to identify, and the assembling process is also quicker.
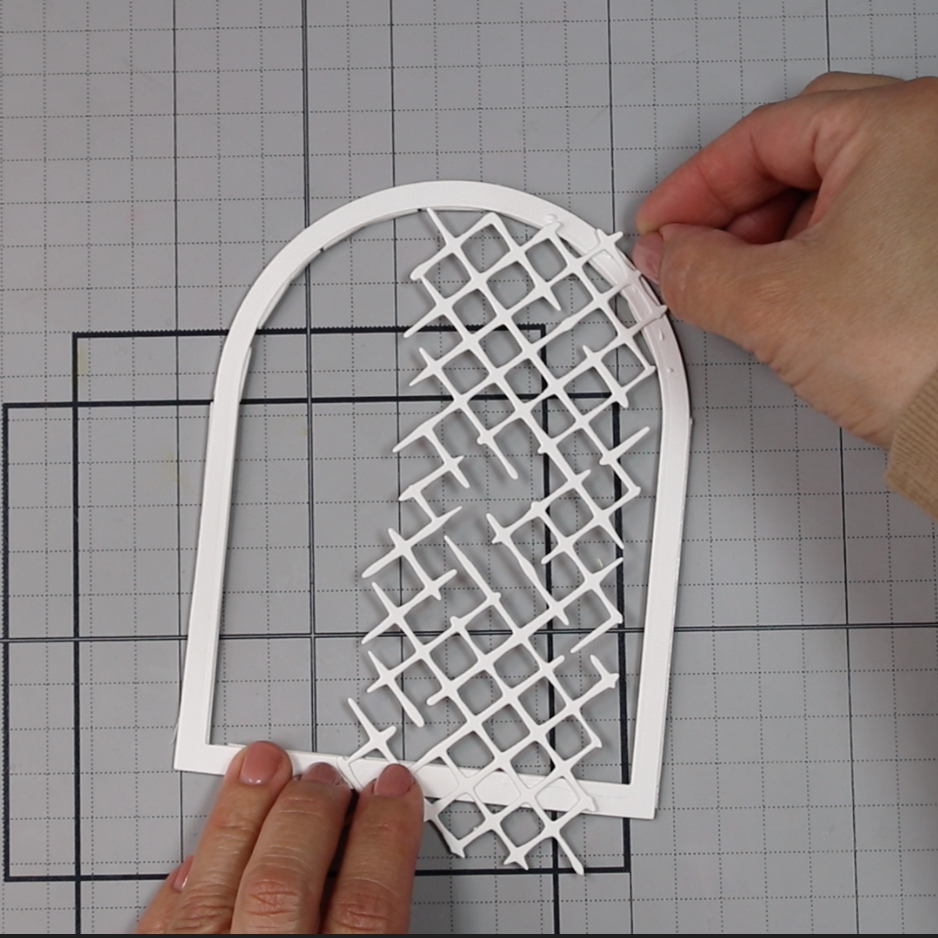
Once the image was assembled, I adhered the Piped Waffle texture behind the arched frame die-cut, I trimmed any excess and set it aside.
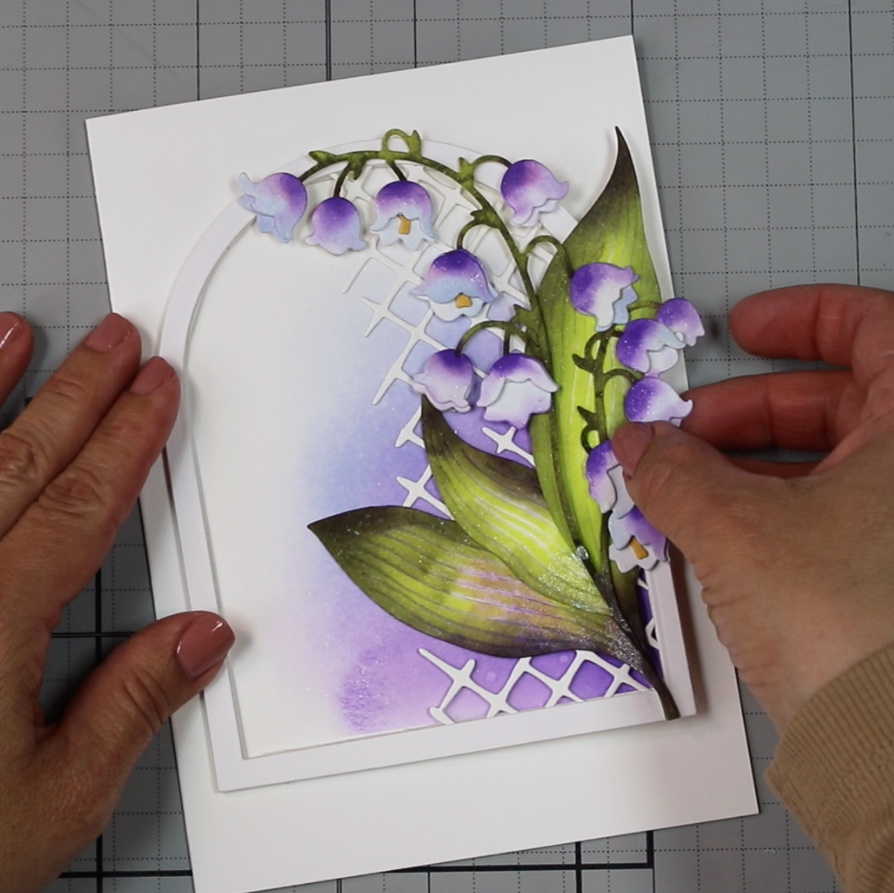
I masked the card base and applied ink to the area behind the arched frame. Then, I adhered the frame using ¼” Instant Dimension Foam for added depth.
I stamped and die-cut a sentiment from the Tranquil Trail set and decided to add a few flowers made using the Cute Open Rose Layering Die Set.
The flowers were coloured with Pumpkin and Buttercream inks.
Clean and simple looked good, but I also wanted to play with mat layers and more texture.
The sky’s the limit.
That’s all for today.
Hope you like this idea.
Hugs Bibi
News and Discounts


Thirsty for more?
Supplies
Affiliate links apply at no extra cost to you. Thanks for your support.


Leave a Reply