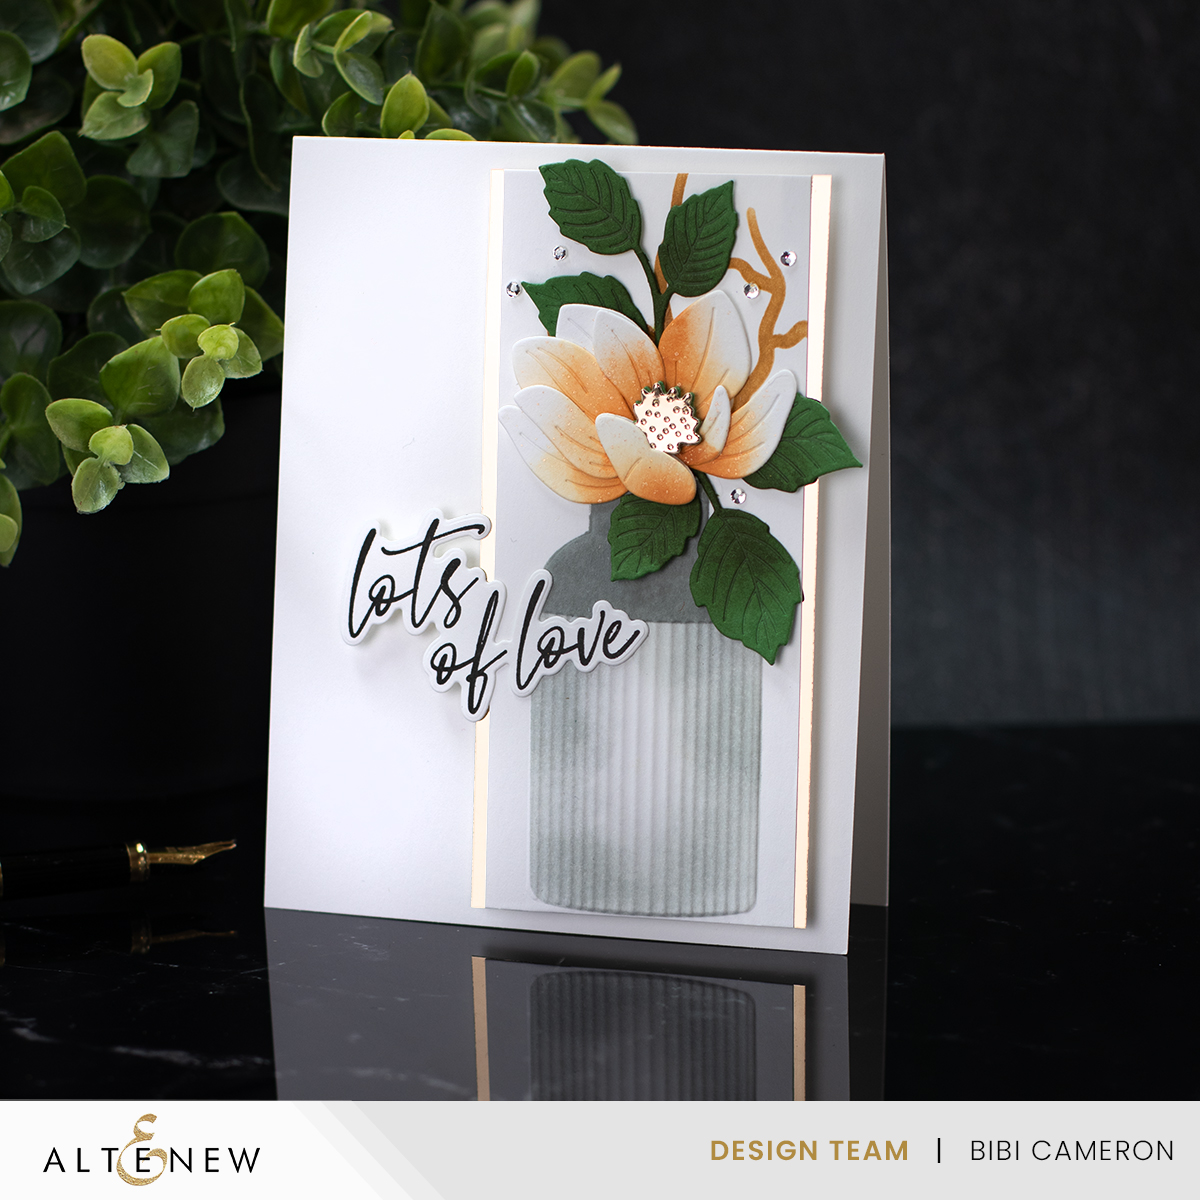
Hello! Im passing by to share easy cardmaking ideas using the new Craft Your Life Project Kit: Magnificent Magnolias by Altenew—and I love it!
This super versatile kit includes:
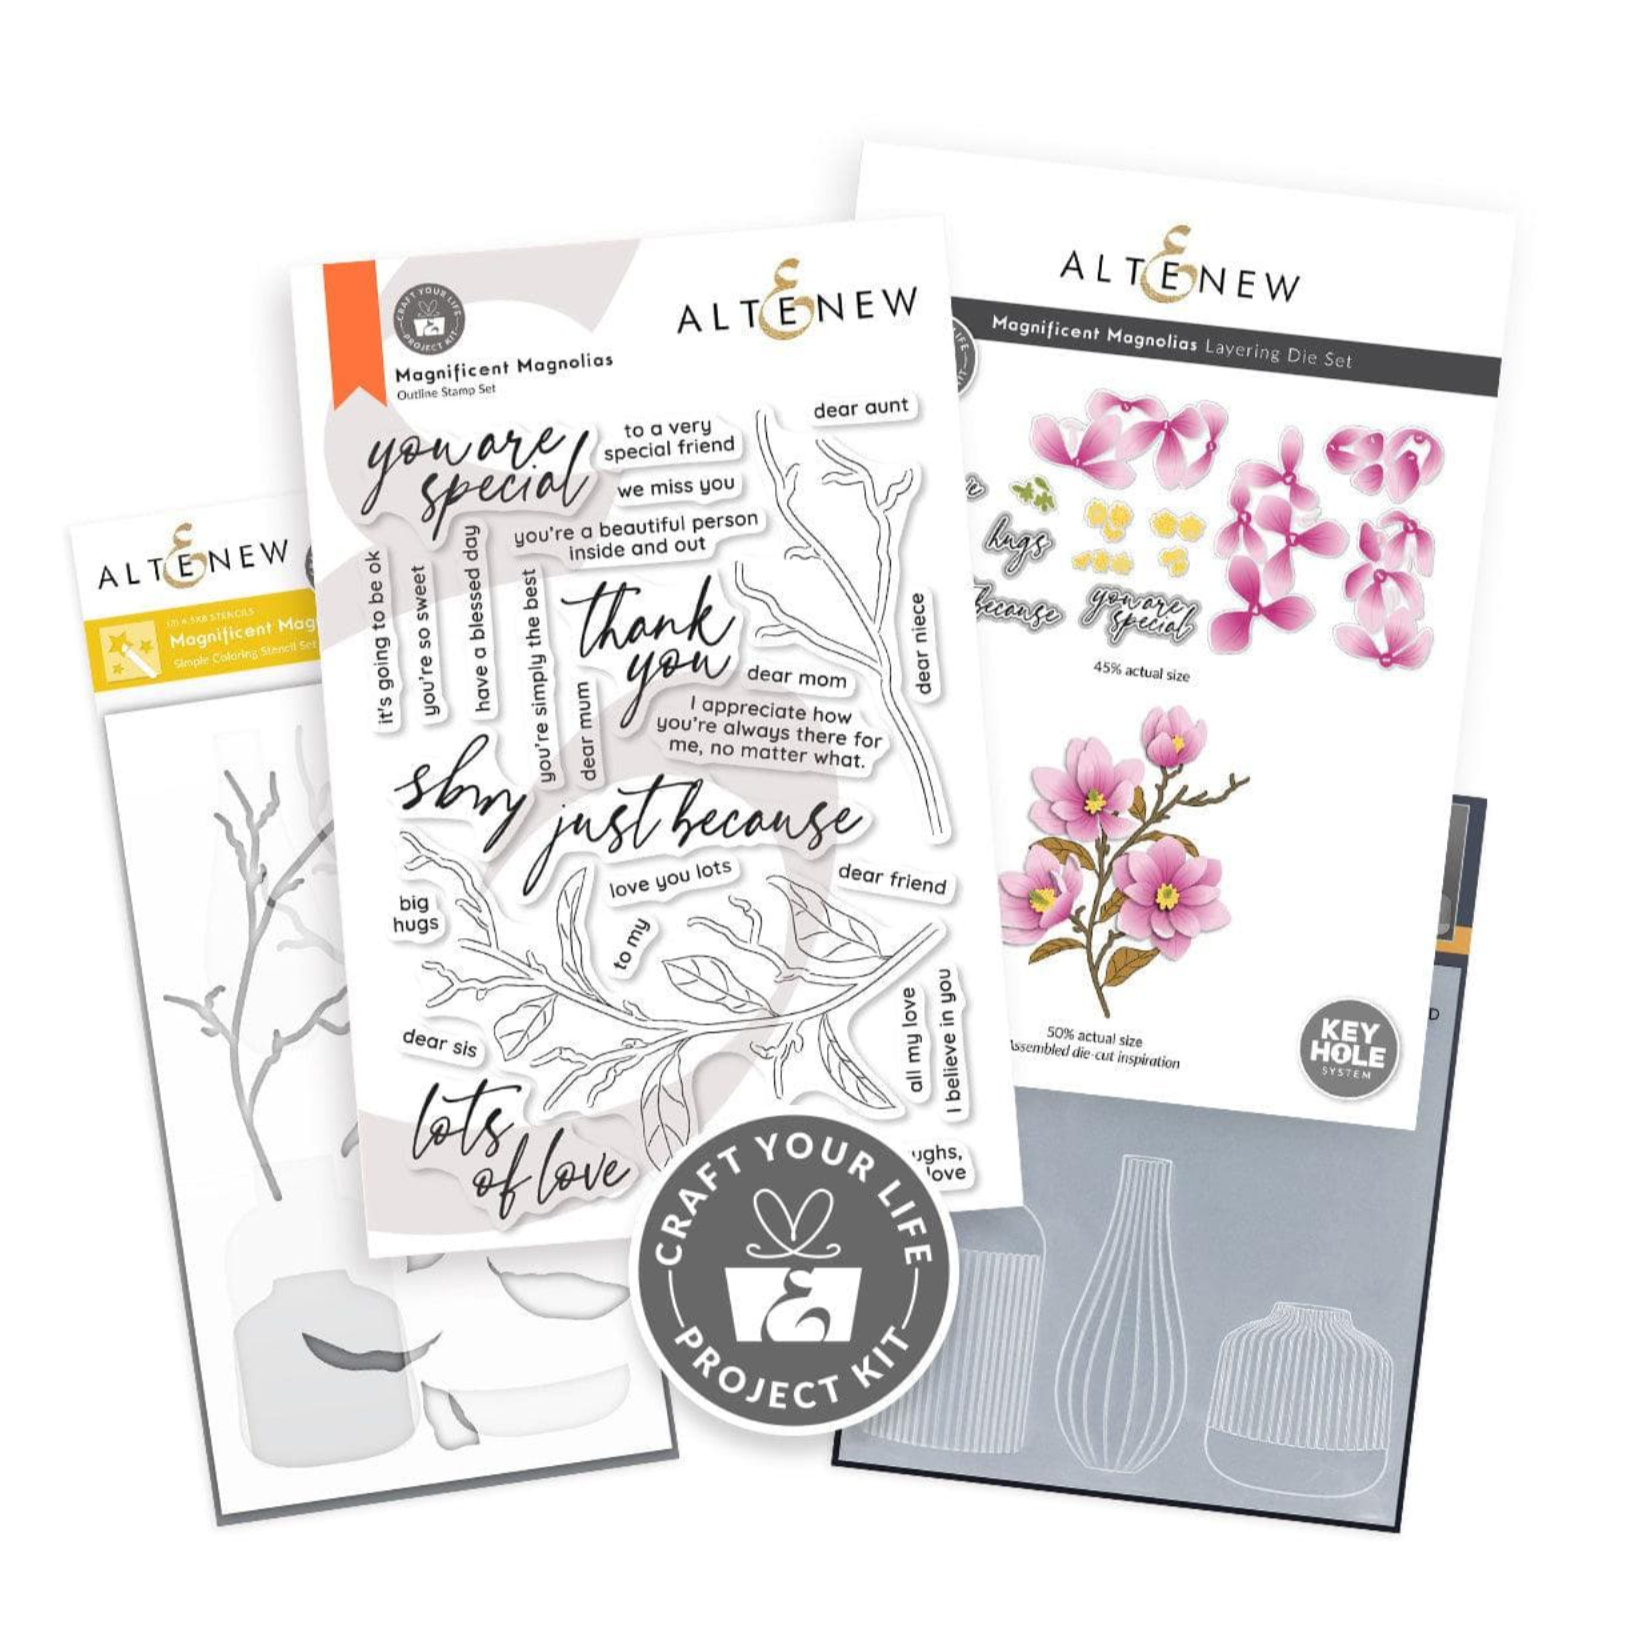
- A stamp set with coordinating stencils
- A die set that cuts four beautiful layered magnolia designs, plus the sentiments from the stamp set
- An embossing folder that coordinates with the stencils
Today, I used the die set to cut the magnolias, the stencils for the magnolia branches and flower vases, and the embossing folder to add texture to the stencilled vases.
The die-cut leaves in all the projects were made using a die from the Altenew Prairie Roses die set.
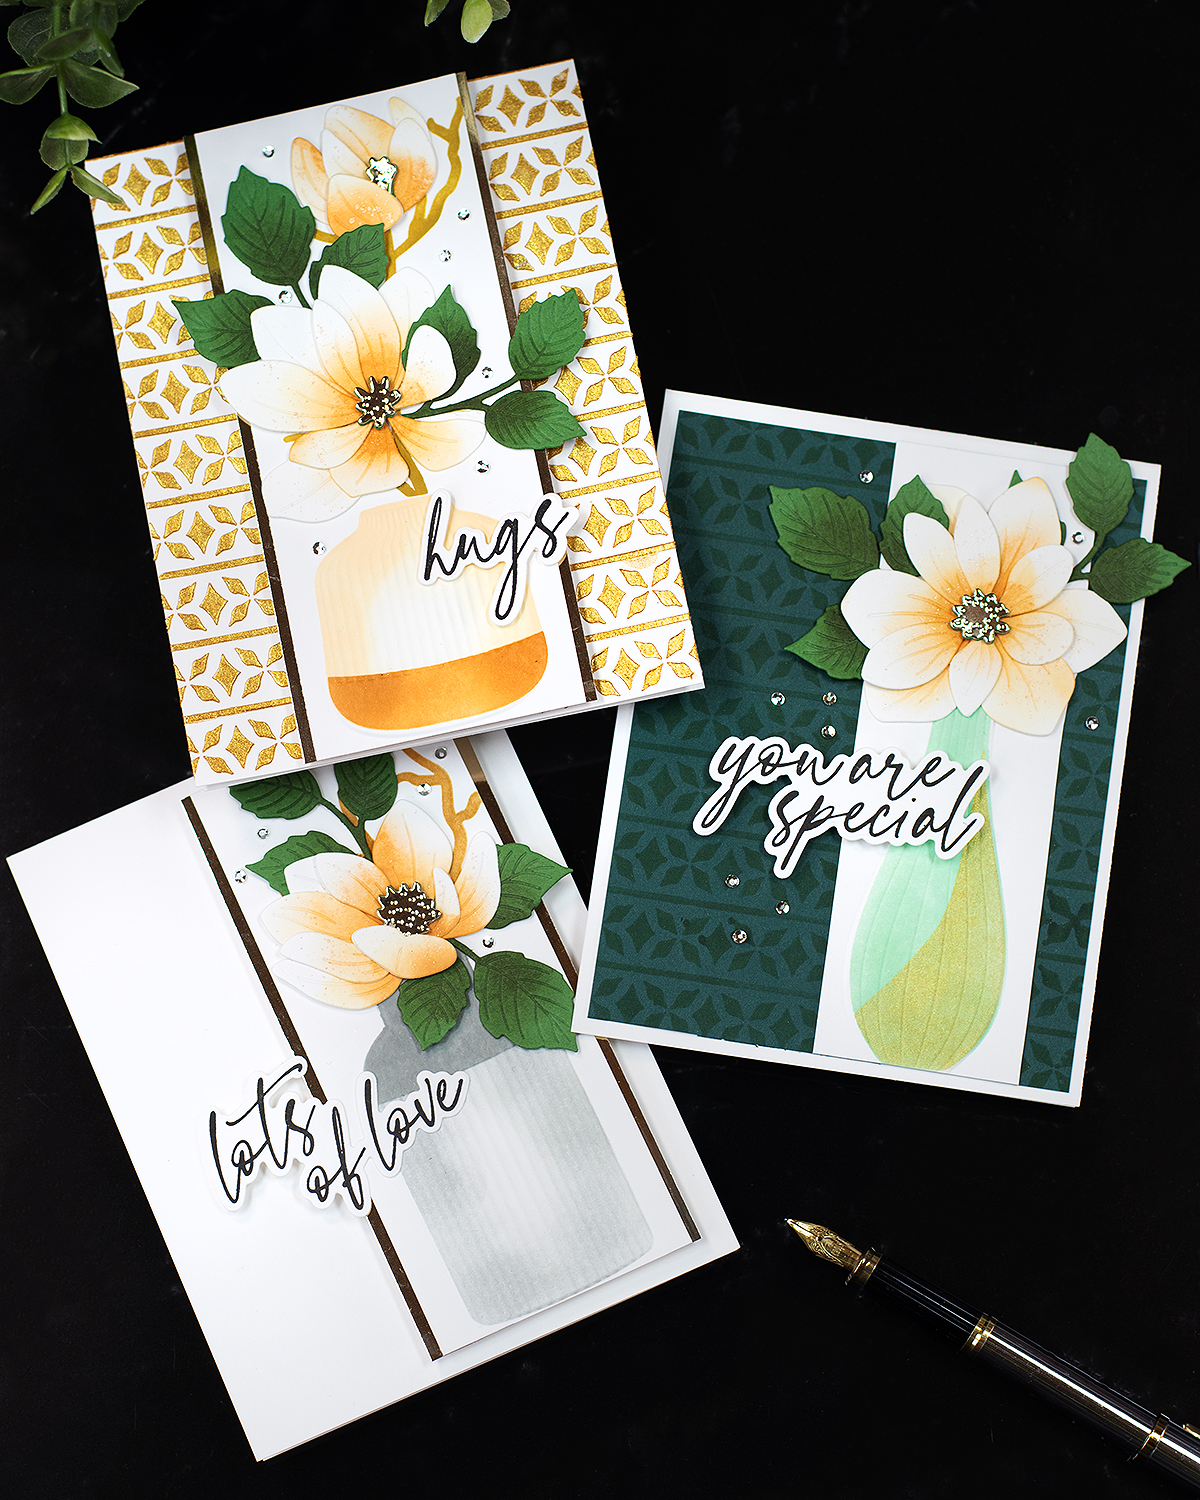
I made three similar A2 cards, each with small variations to achieve completely different looks!
Watch the products in action
Cards Recipe
- Altenew Craft Your Life Project Kit Magnificent Magnolias
Available at Simon Says Stamp here or Altenew here - Prairie Roses Layering die set – for the die-cut leaves added to the vases.
- Heritage Chevron Weaves Stencil
The Process
First, I worked on two stencilled backgrounds.
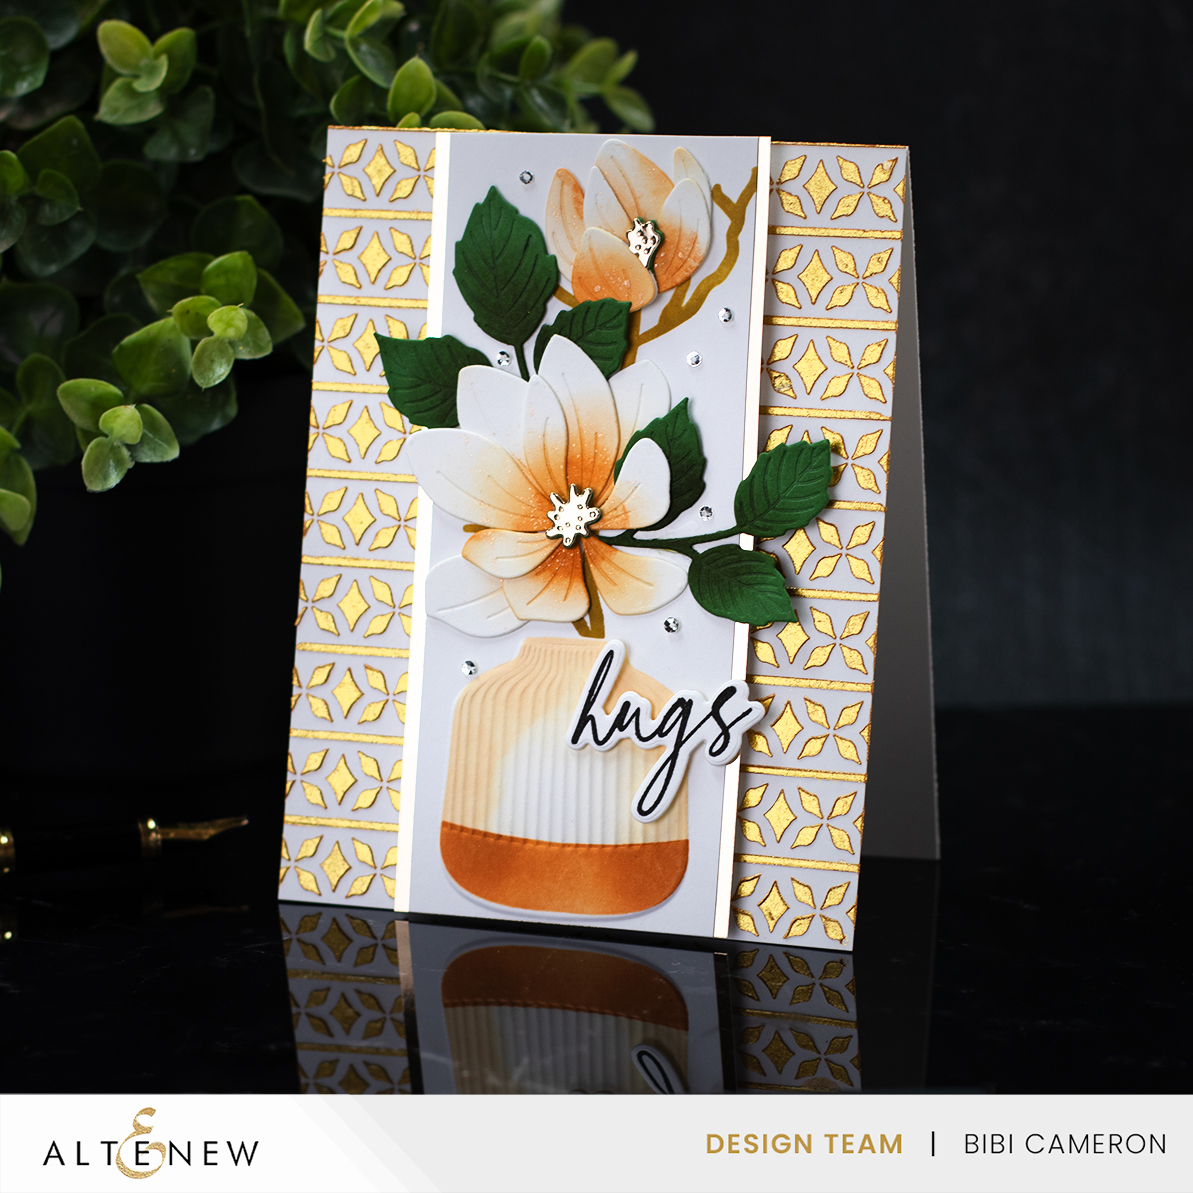
I used the new Heritage Chevron Weaves Stencil. For one of the backgrounds, I used Mayan Gold Relief Paste on white cardstock. For the other, I applied Oak Moss ink on Evergreen cardstock.
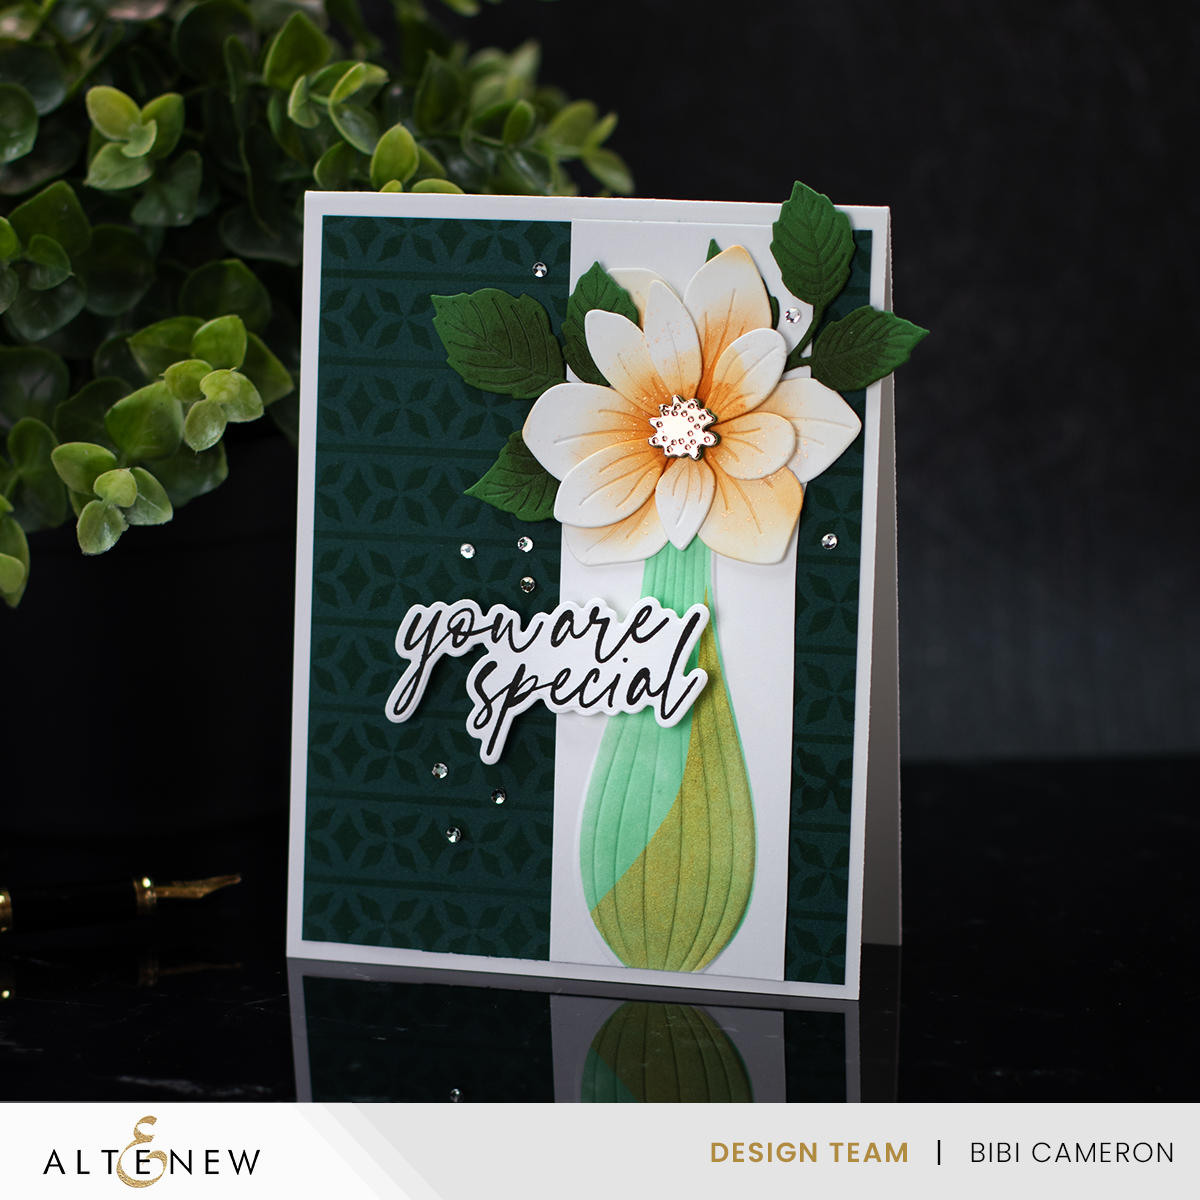
Next, I die-cut the magnolias out of white cardstock and inked the flowers using Vanilla Cream and Melted Butterscotch. Inks. I assembled the flowers and set them aside.
To create the flower vase, I first stencilled the vase image onto a strip of paper wide enough to capture the full design. For some of the cards, I also added stencilled branches. Then, I embossed the vases to add texture.
Once that was done, I glued the die-cut magnolias over the vases and also added small leaves from the Prairie Roses Die set.
After finishing each of the three small panels, I glued two of them onto the stencilled backgrounds.
For two of these, I added a gold mirror cardstock mat layer and used Instant Dimension Tape behind it to make it pop.
For a minimalistic look, I adhered the third panel directly onto the card base.
To finish, I used stamped and die-cut sentiments from the stamp set and coordinating dies included in the kit.
That’s all for today.
I hope you enjoyed this post.
Hugs
Bibi.

Thirsty for More?
Check my previous post featuring the same kit and a completely different look and card format
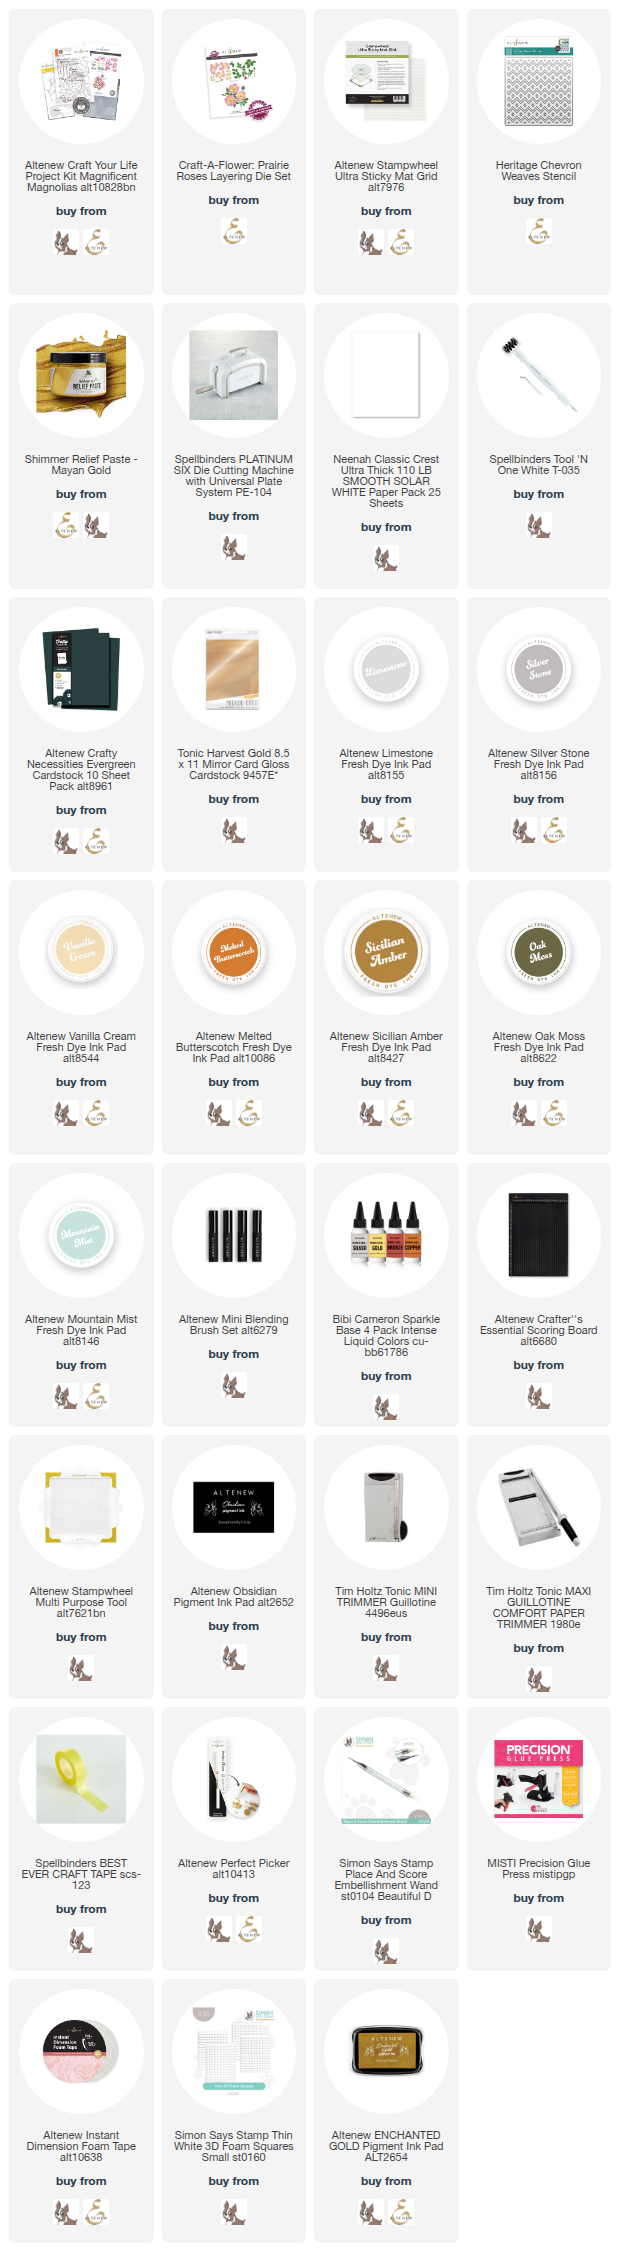
Supplies


Leave a Reply