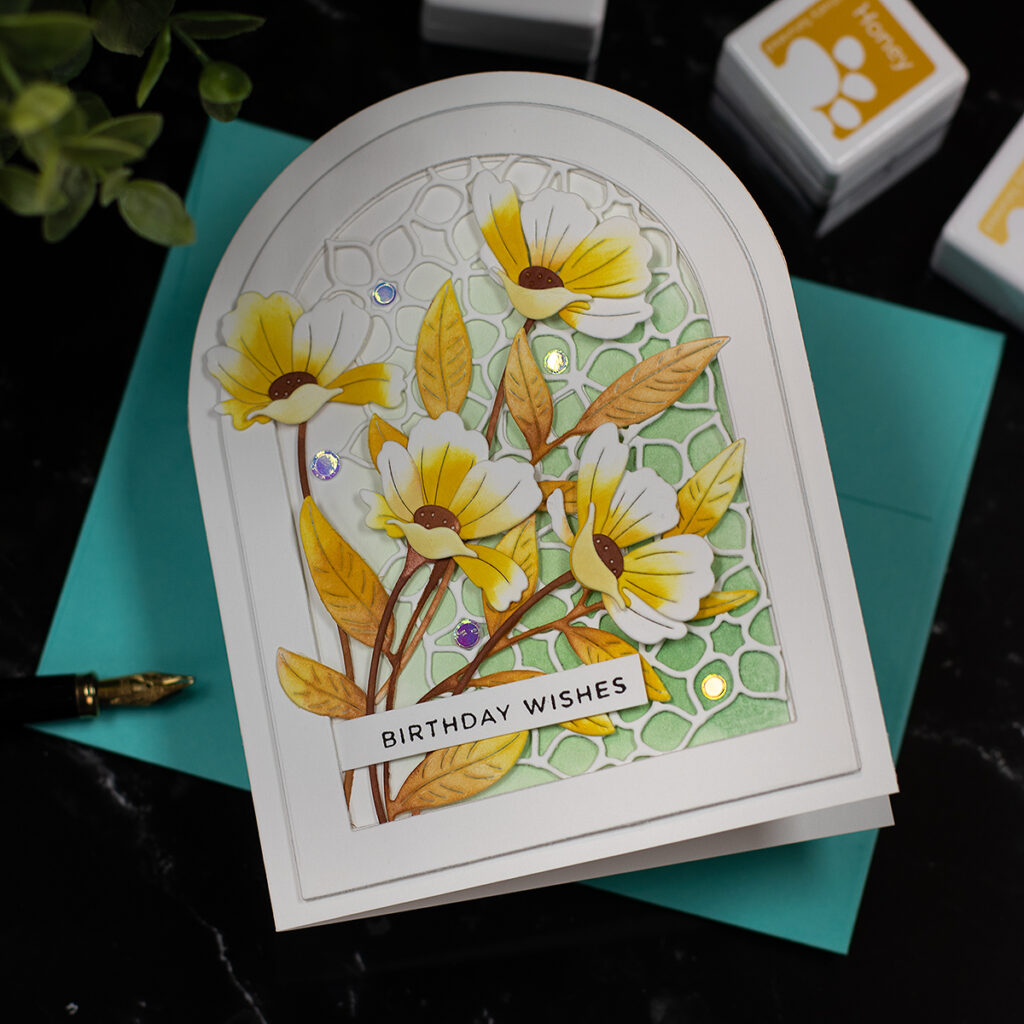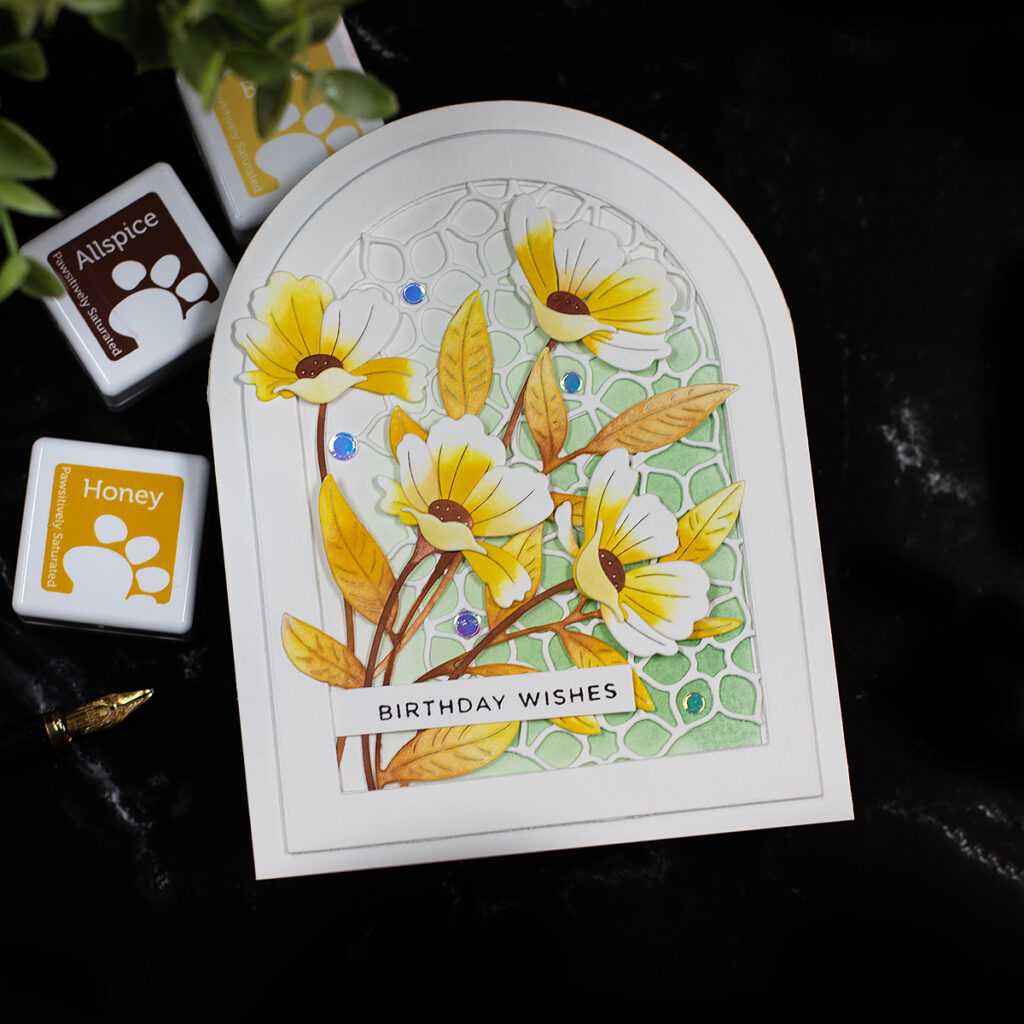
Hello Crafty friends, Today, we’re are diving into an exciting, easy-to-assemble card Arched Frame Card using Simon Says Stamps Dies.
An idea to mix and match die sets to create different components for your projects, to add texture, dimension, and colour.
Arched Frame Card Video
Card Recipe
- Nested Domed Arches Frames Wafer Dies – To make the arched frame.
- Arches Essentials die set– To make the shaped A2 card base
- Iceland Poppies Wafer Dies – Small Florals
- Privet Branch Wafer Dies – Leaves
- Flowerful Medallion Wafer Dies– Background die -cut texture
- CZ Simple Sentiments 2 – Stamped Sentiment
- Simon Says Stamp Pawsitively Perfect Craft Tacky Mat
- Pawsitively Saturated Inks:
–Butter, Honey, and Allspice – for the flowers and branch
–Sage – For the Background - 110lb ( 300 gsm) White Sooth Cardstock
- Spellbinders Die-cutting Machine
- Detail Ink Blending Brushes
- Misti Glue Press – Nuvo Deluxe Adhesive.
The Process

Die-cutting is one of the most versatile and enjoyable techniques in card making. The precision and intricate details you can achieve with wafer dies make it easy to create stunning designs, even for beginners.
Step 1: Die-cut all the pieces for your card
I use a Spellbinders Die Cutting Machine.
Top Tip: To avoid transfering the marks of the cutting plates to the back of the paper, I use an A5 self healing craft mat insted of the cutting plate that goes underneath the paper.
The mat applies less pressue. during the cutting process, so it is imporant to run the paper various times through the die-cutting machine to get the cut done specially when cutting card bases made out 300grams cardstock ( Thick).
Step 2: Color Your Die-Cuts with Pawsitively Saturated Inks
The key to making your card pop is adding color! Simon Says Stamp’s Pawsitively Saturated Inks in Butter, Honey, and Allspice are perfect for creating a warm, inviting color palette that complements the floral theme.
- Iceland Poppies: . Blend Butter and Honey inks on the petals centre and apply Allspice on the centers, and steams.
I used the same brush to do this and I started by apply the lightes colours of ink to avoid colour contamination. - Privet Branch: to start with, I used the ink that was left in the brush after coloring the flowers – started applying ink in the centre of the branch ( the brush was loaded with Allspice ink colour) and I moved towars the leaves as the ink was getting more yellow.
Then I reinked the brush with Honey Pawsitivey Saturaded ink to apply mor colour to the leaves and then I re-inked using Allspice ink to apply colour to the steam.
Step 2: Create the Arched Card Base
Start by using the larger die in the Arches Essentials die set by Spellbinders to create an A2 curved card base.
- Cut, score and fold a side fold A2/ C6 card base ( 4-1/4″ x 5-1/2″)
- Then place the cardbase withing the die baldes, use low tack tape to keep the die in place and partially cut the top.
- Use scissors to finish the cut if needed.
Step 3: Die-Cut Background Texture
Now it’s time to create a littke texture for the background.
Use the Flowerful Medallion die to cut 2 pieces and glue them by aligning one of the floral shapes at the edges.
In this way you will create a delicate, intricate floral backgournd pattern. You can cut this die out of a contrasting color of cardstock (or the same white as your card base for a more subtle effect).
You can add more die cuts if you want to create a larger backournd. I found 2 die cuts to be more than enought for this small project.
Step 5: Assemble the Card
Now that all your die-cut pieces are ready and colored, it’s time to assemble the card:
- Start by gluing the Flowerful Medallion die cuts behind the arched frame die.
- Then, glue the Privet Branch in the front and add a floral cluster over the branch using the Iceland Poppies die-cut – Use square foam adhesives behind the little flowers.
- Add an addition Arched Frame die-cut behind for paper stability and dimention.
***Use liquid glue for a clean finish. - Set teh arched card topper appart.
- Use post it notes or marsking tapes to protect the edges of the card base and add a hint of Sage Pawsitively Saturated Ink colour on the area that will go behind the topper.
- Remove the post it notes and glue t he topper over the card base.
- To add sparkle use crystal sequins
- Done!

This card showcases how you can mix and match dies to create one-of-a-kind designs.
I hope you like this idea.
That’s all for today.
thanks for stopping by.
X Bibi
Thirsty for More?
Supplies
Affiliate links apply at no extra cost to you. Thanks for your support.


Leave a Reply