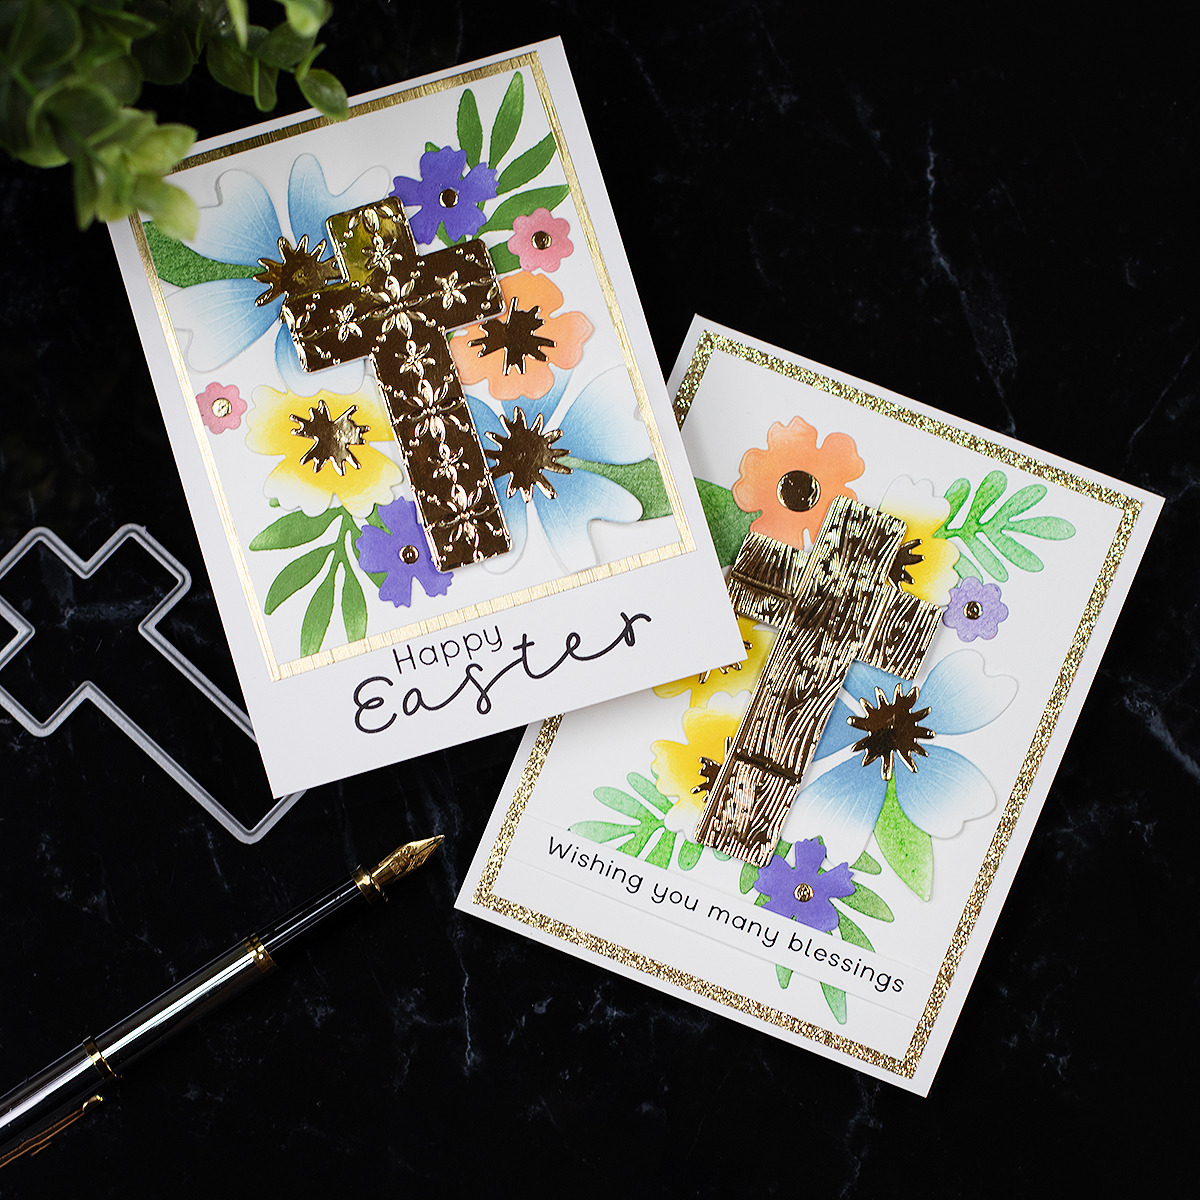
Hello crafty friends, I am passing by to wish you a Happy Easter and I’m also sharing a couple of Cross Easter card ideas using the Aurora Blooms and CZ Inlaid Cross die sets.
The Aurora Blooms die set is very versatile so I have been using it quite a lot. I think the blooms make a beautiful background for the embossed crosses.
These cards involve some easy ink blending and loads of gold metallic accents.
The Process..
Easter Card Ideas

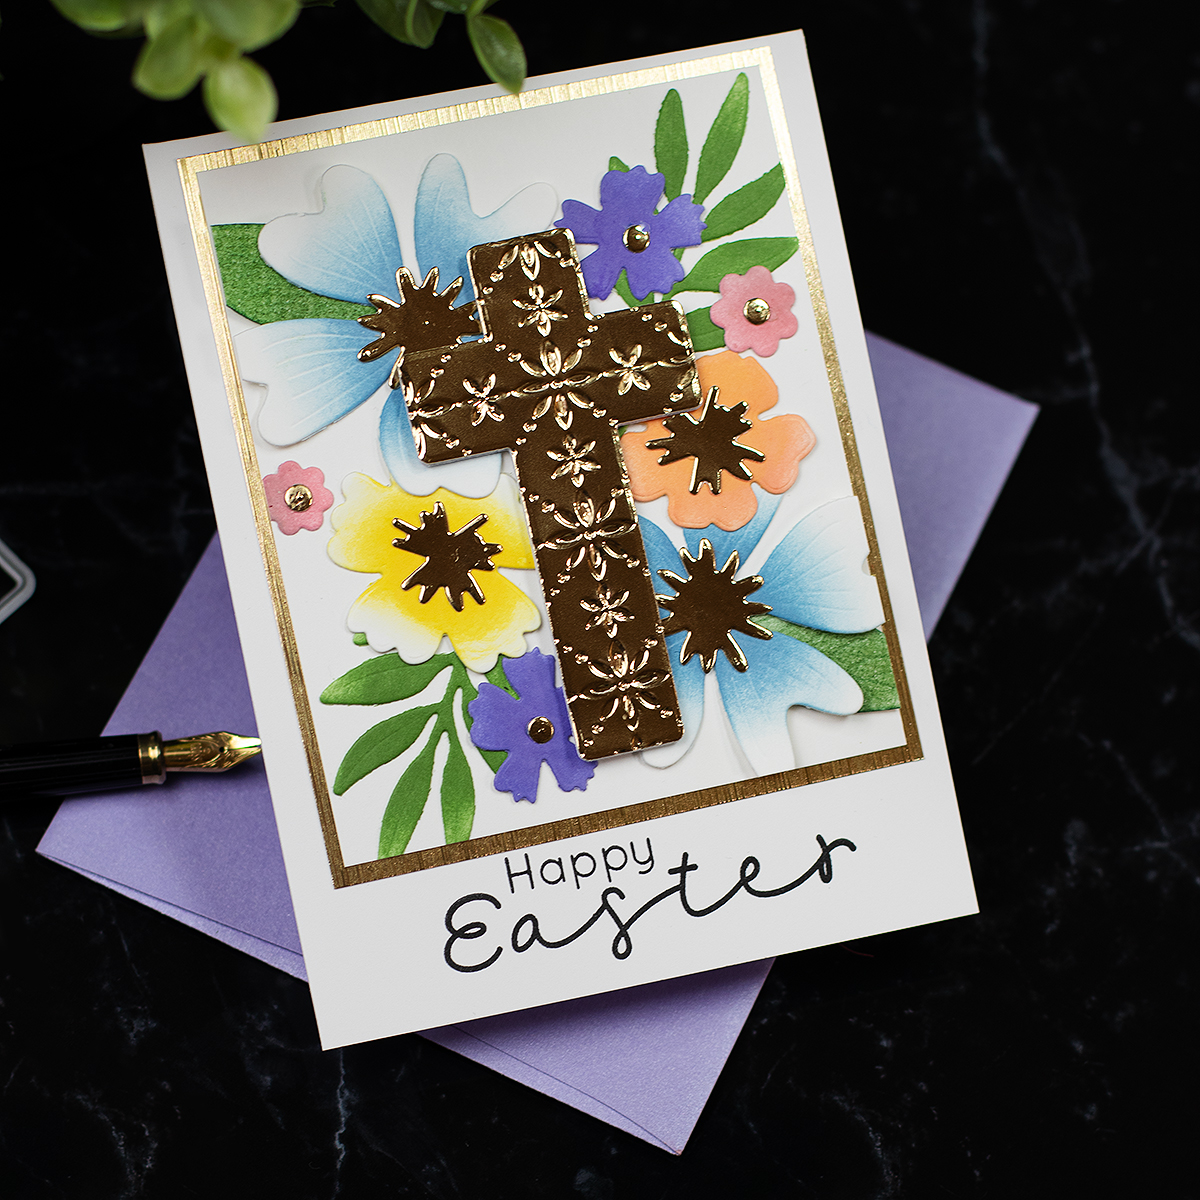
This is a top folding C6 Card it measures 4-1/4″ x 5-1/2″
To make it I used the supplies listed below:
- For the card base and die-cuts, I used white Neenah 110lb cardstock.
- Gold mirror cardstock was used to add accents.
- The crosses were made using a CZ Design Inlaid Cross die set.
- To emboss the cross I used Pinpoints Srarlets Embossing Folder. I just realized that this folder has been discontinued but there is a similar one called Cris Cross Floral.
- The florals and leaves were made using dies from Aurora Blooms Wafer Dies
- For the sentiment I used a stamp from the Bunny Blessings stamp set, Versafine Clair Nocturne Ink and the Misti stamping tool.
- I used Simon Says Stamp Pawsitively Saturated Inks and Simon Says Stamp Blending brushes to add colour.
- INK COLOURS USED: Morning, Violet, Cheky, Peachy, Sunbeam, and Field.

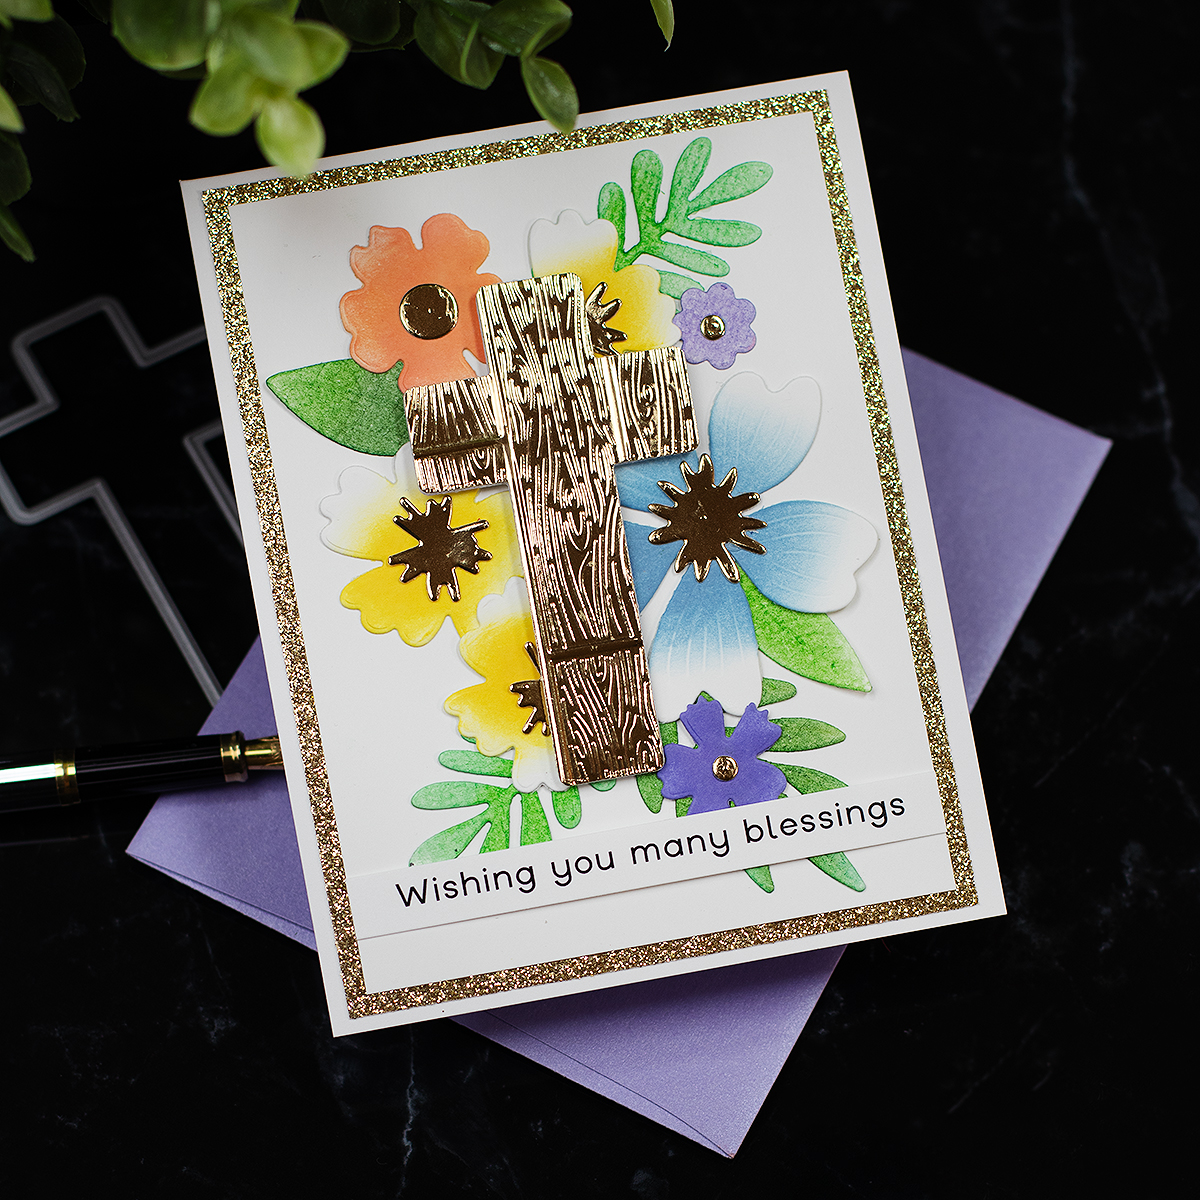
This is also a top folding C6 Card it measures 4-1/4″ x 5-1/2″
To make it I used the same supplies as for the card above.
I used a gold glitter cardstock for the back layer and added a pre-printed sentiment from the Easter Sentiment Strips.
Using Gel Plates To Hold Die-Cuts or Stencils

- I also use a gel plate to hold the die-cuts in place while applying inks.
- The plate used in the video is a 6 x 6 circle gel plate.
- it is one of the most affordable. you can get them in different sizes and shapes here
- The gel plates are not super sticky so it is easy to remove the die-cuts from them and they are also very easy to clean.
That is all for today.
Happy Crafting.
x
Bibi
Thirsty For More?
Supplies list
Affiliate links apply at no extra cost to you. Thanks for your support.


Leave a Reply