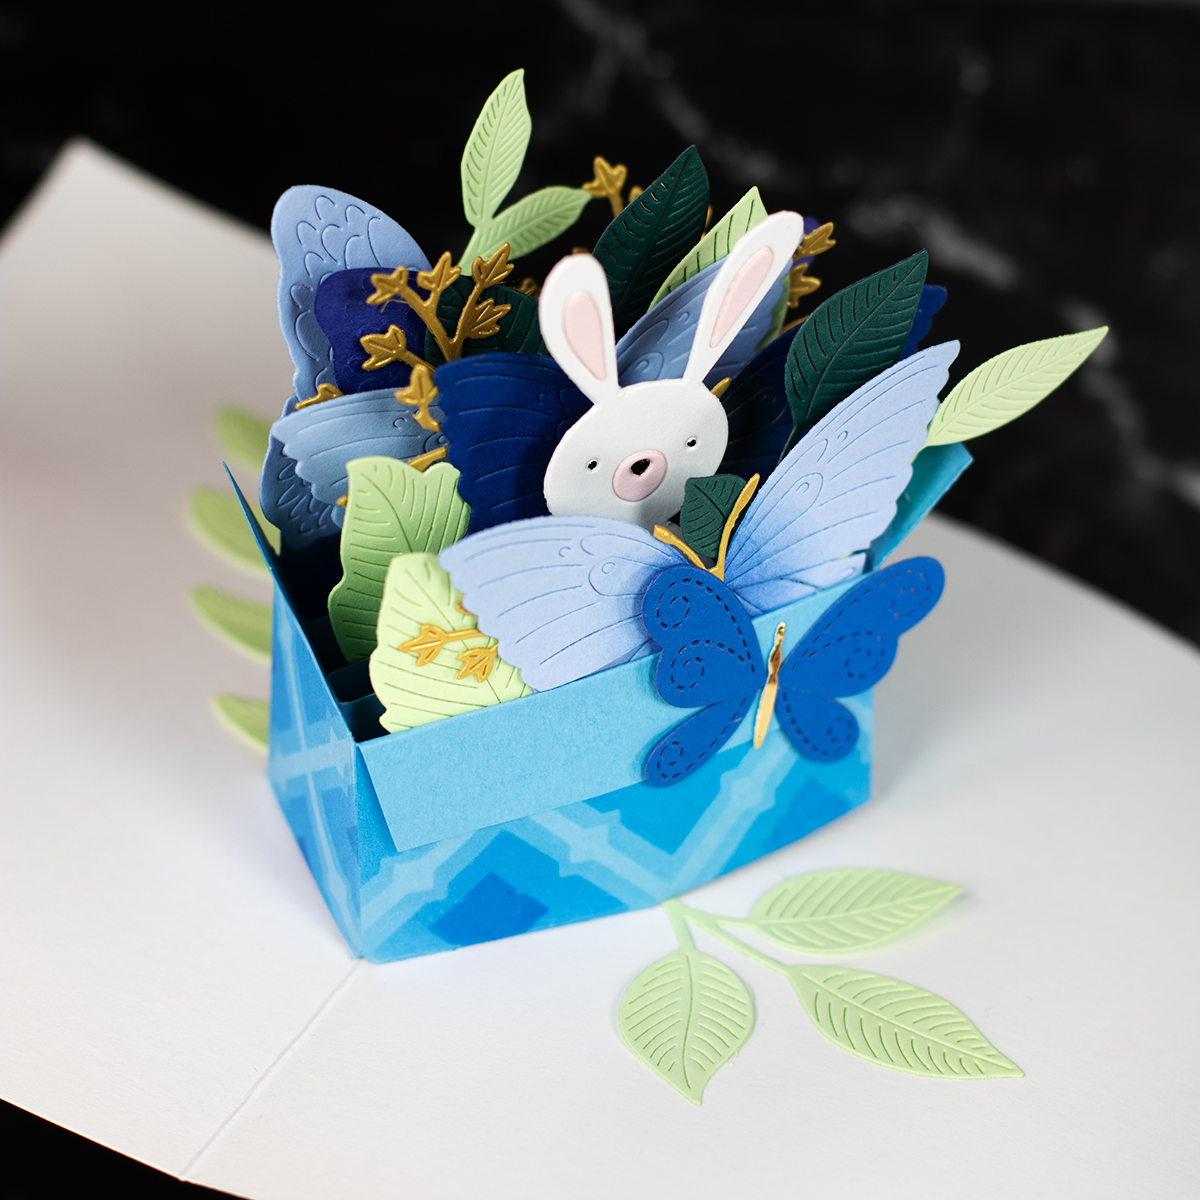
Pop-ups are fun and easier to make that you might think. I’ve been experimenting and came up with a must- try formula to create your own DIY pop-up box —perfect for cardmaking or papercraft!
So you wot need dies to create this card but you can use dies to create fillers.
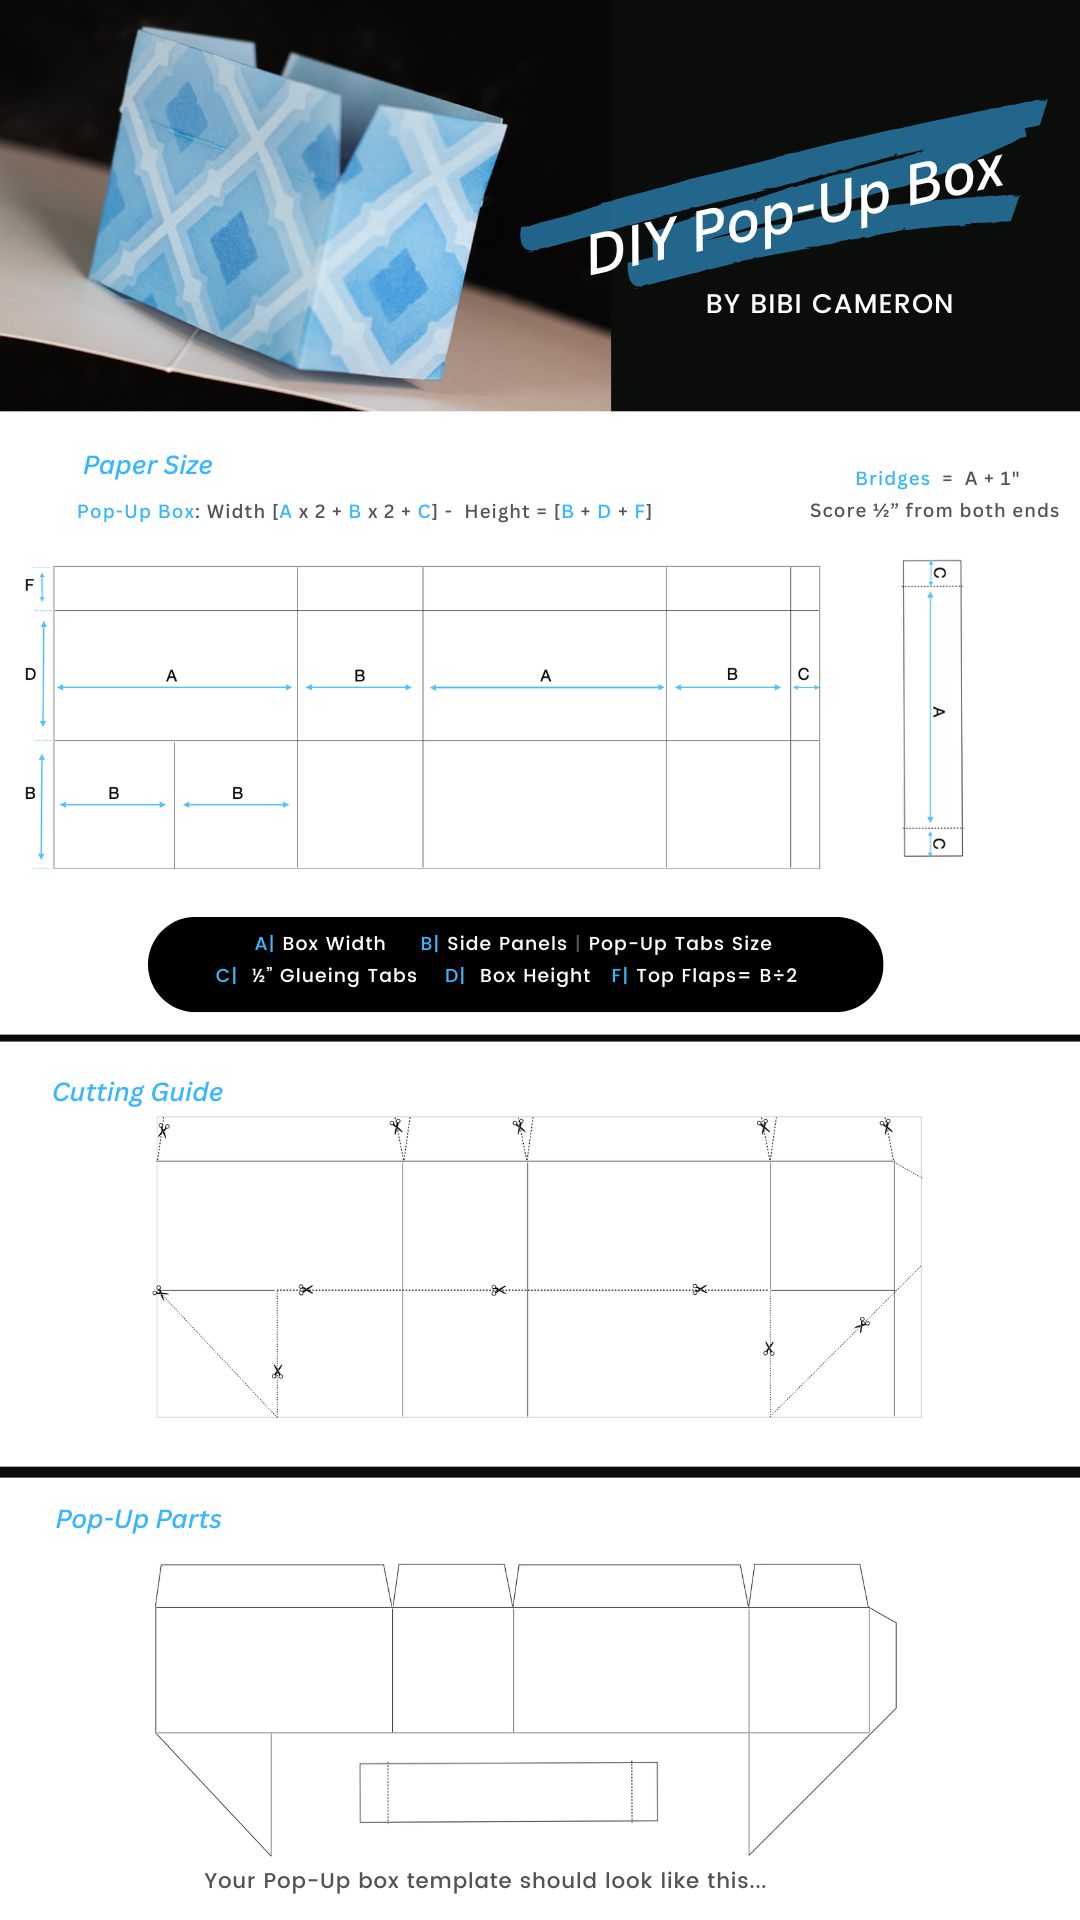
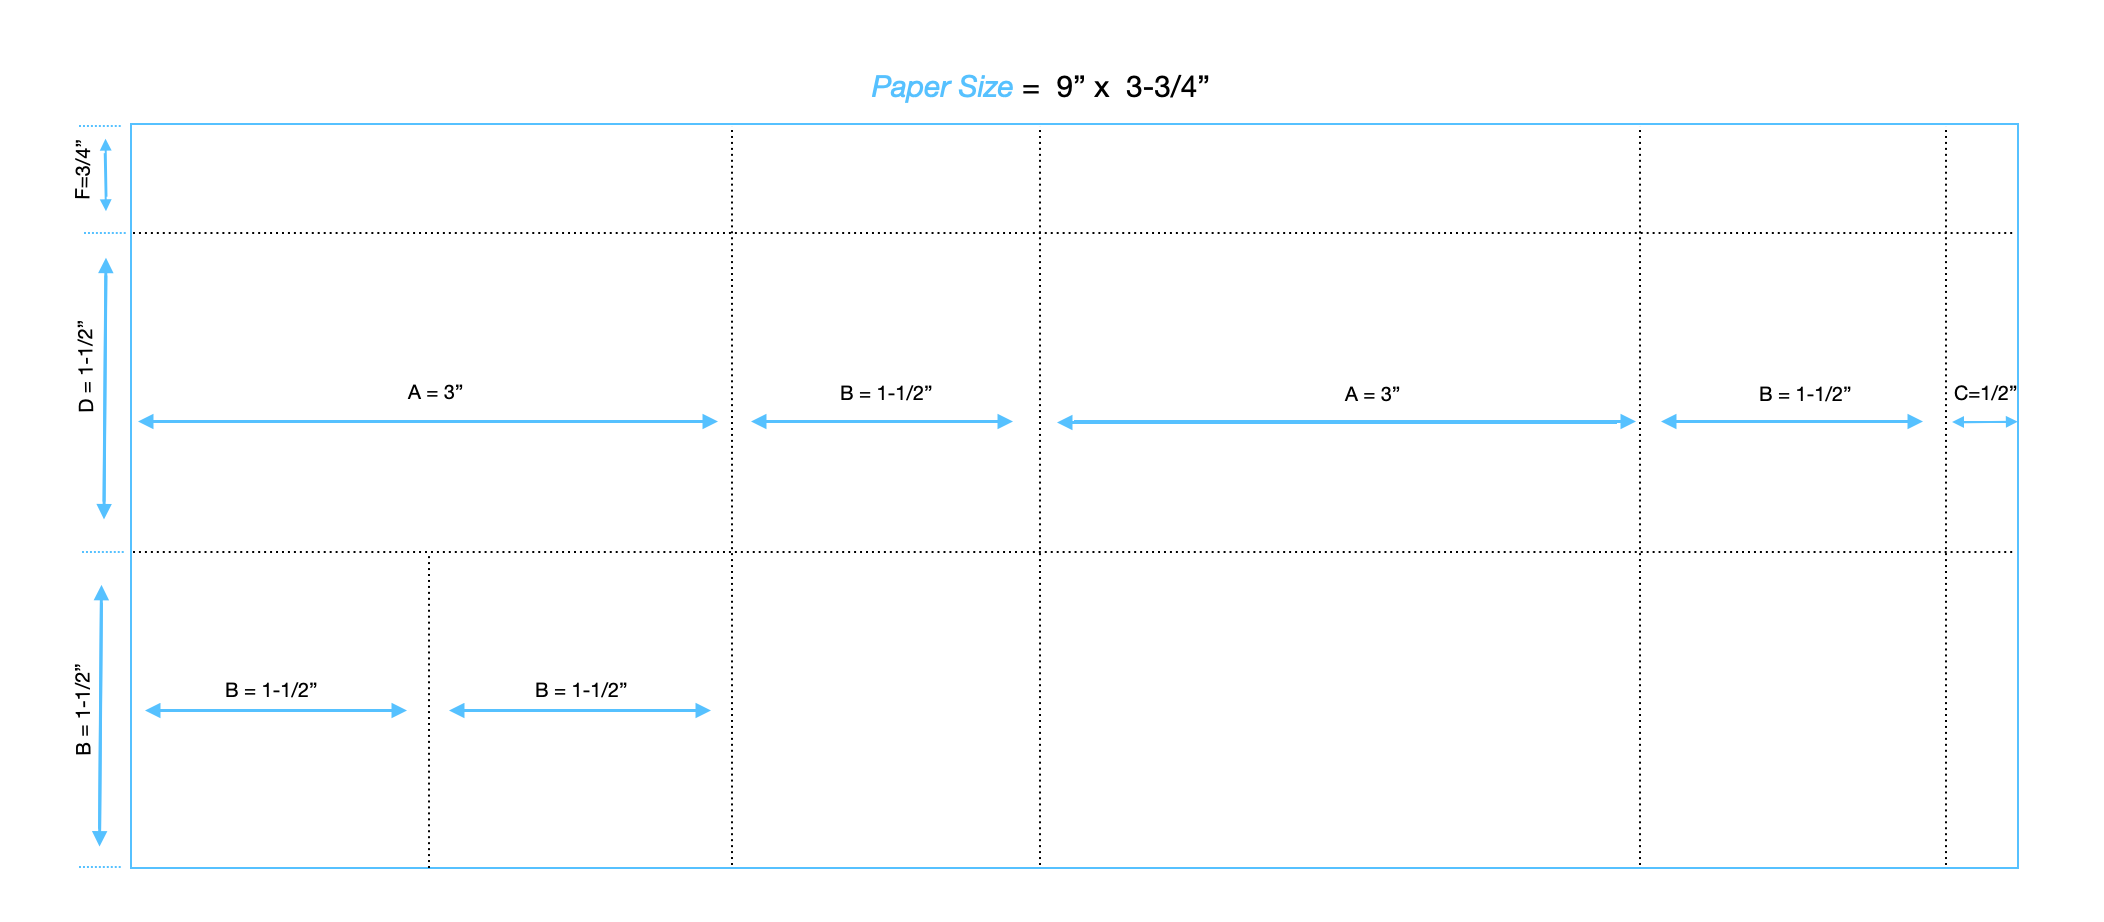
All you need to create this pop-up box is to use the template below and replace the letters with your desired measurements to calculate the pop-up paper size and scoring lines.
Bear in mind
Use thinner cardstock for the pop-up elements to reduce bulk.
This formula lets you create pop-up boxes in any size, so you can easily adjust them to suit your card base or project dimensions—whether you need something smaller or larger.
When adding die-cut fillers, make sure they don’t peek out from the edges of your card.
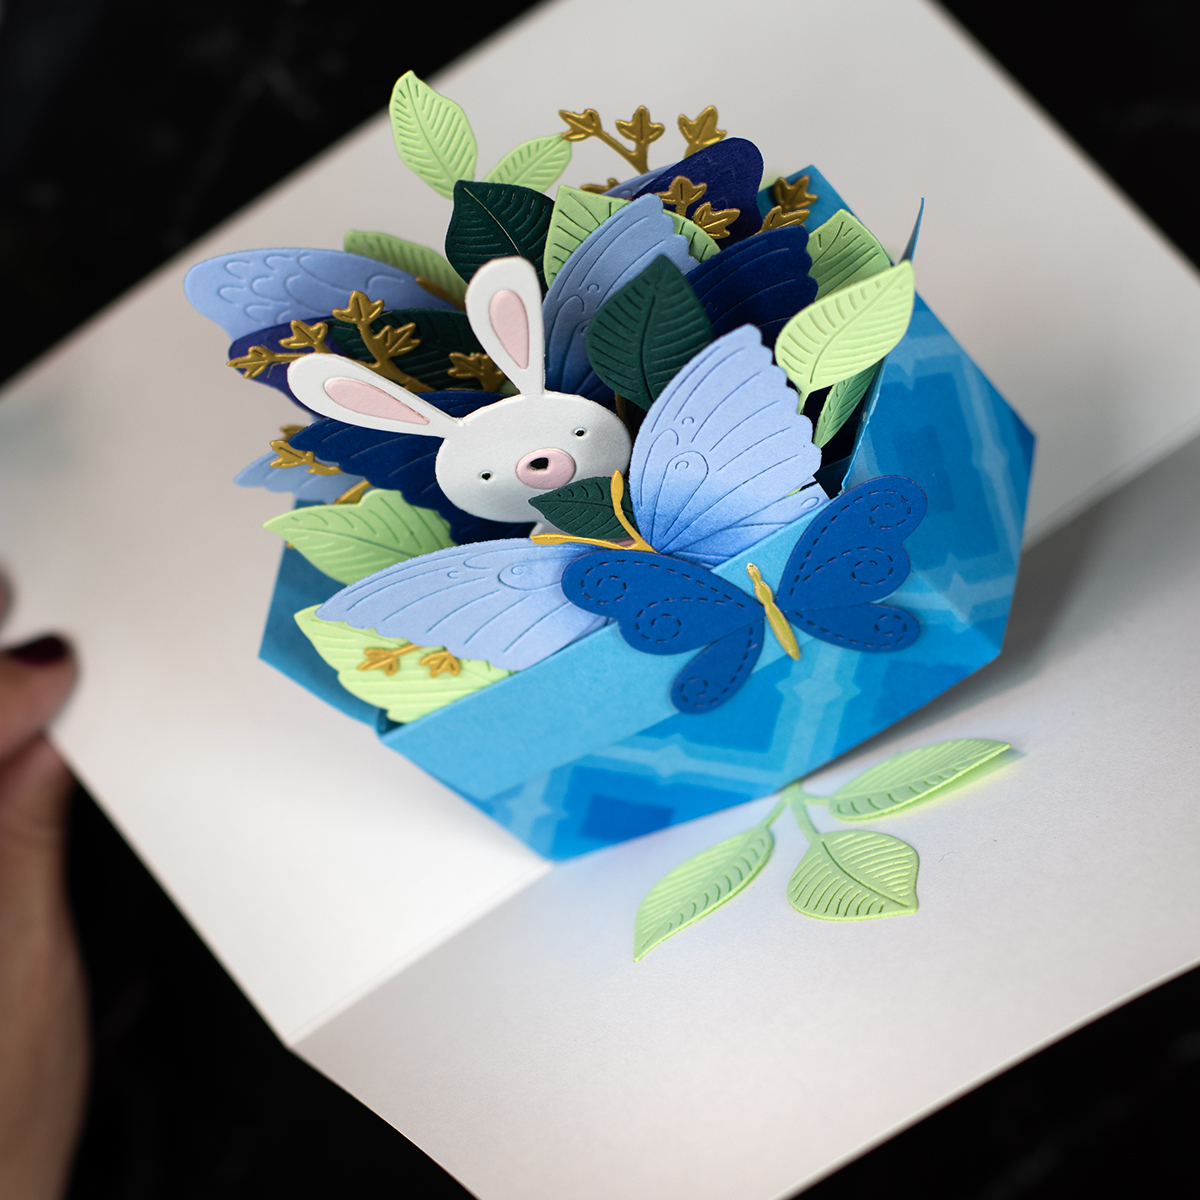
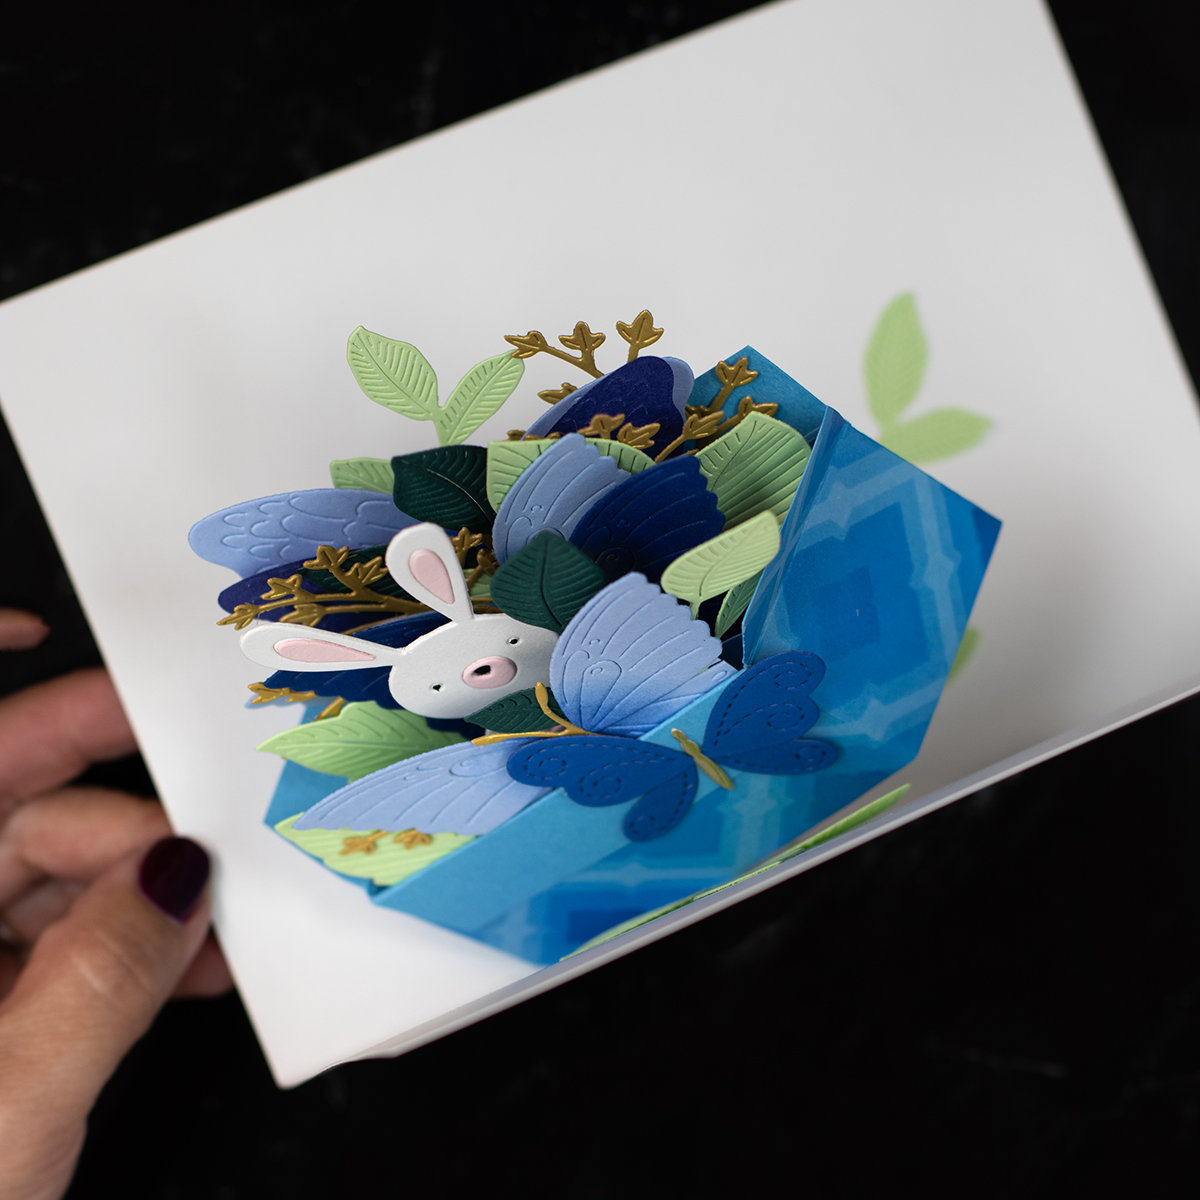
The pop- up Box in the pictures
You can create, square or rectangular pop-up boxes.
I made a rectangular pop-up box to accomodate certain die-cuts I was planning to use. It measures” 3″ x 1-1/2″ and is 1-1/2″ depth.
This pop-up box size will fit in a 5×7″ card.
So this card is 5×7″, for smaller cards, you can create smaller pop-ups.
According to my formula to make this pop- up:
Paper Size: I cut a piece of cardstock measuring 9½” x 3¾”.
Scoring:
Score at 3″, 4½”, 7½”, and 9″ along the longer side.
Score at 1½” and 3″ along the shorter side.
Pay attention!! I started scoring the longest side of the box
Key Knowledge
The way you start scoring the paper and the way you glue the pop -up affects how your pop-up aligns when glued in different ways.
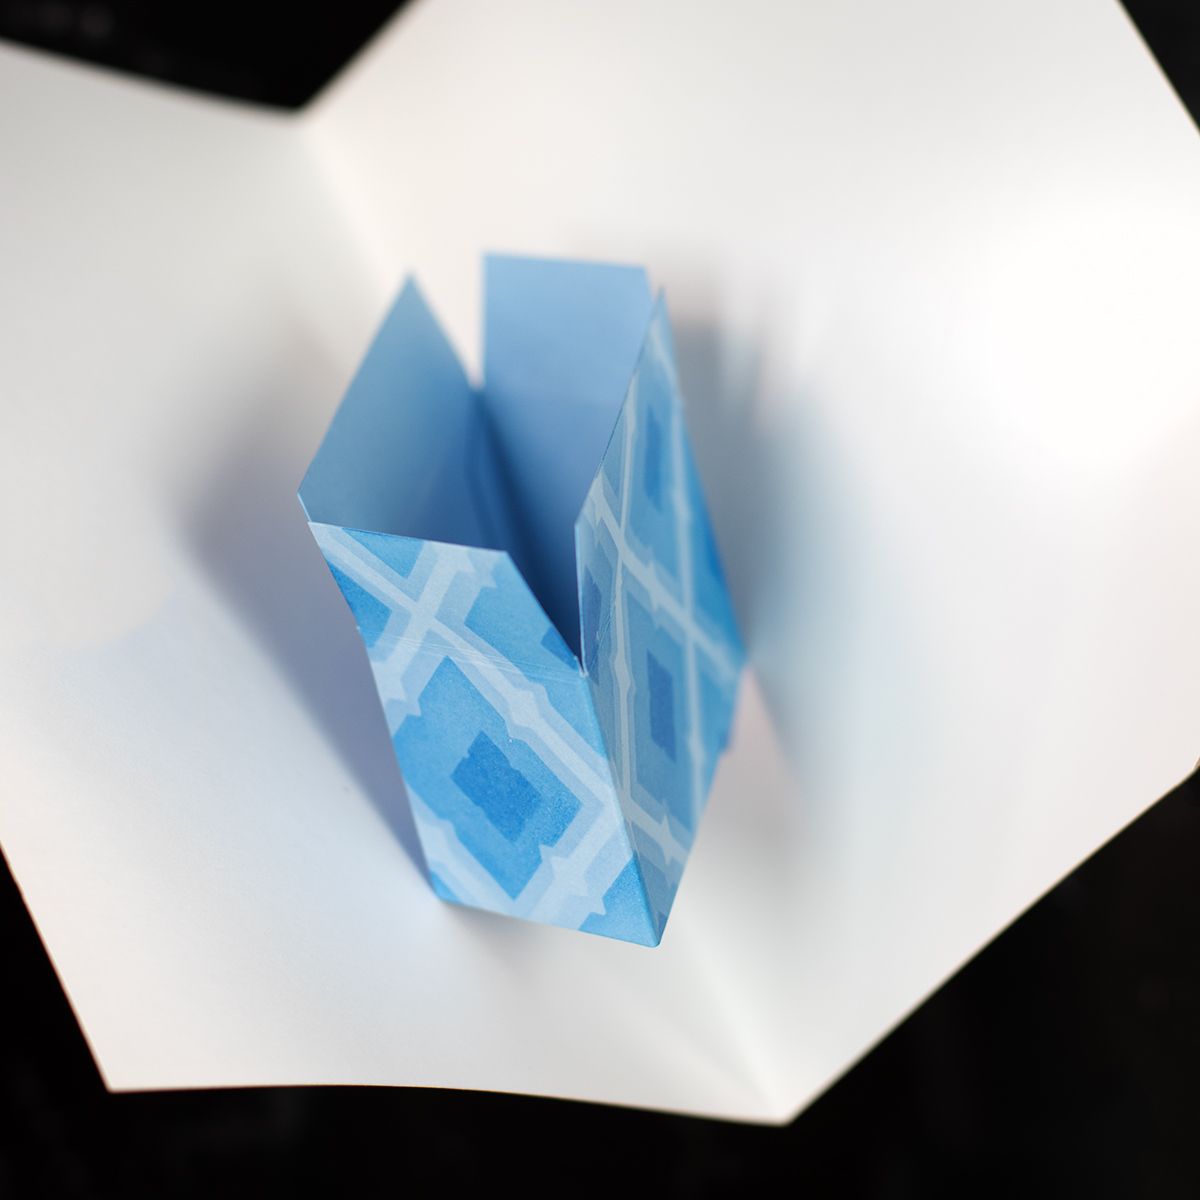
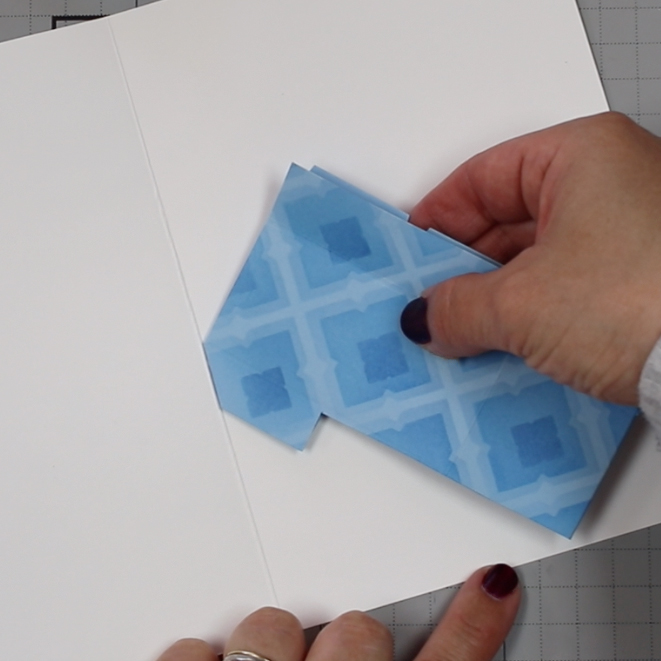
In all cases, I would advice to glue the pop-up box to the center bottom of the card base making sure it won’t be seen at the edges of the card and leaving room for adding fillers.
By scoring and cutting the paper as indicated we will create the correct angle for the pop-up gluing tabs.
If you don’t want the tabs to look like long triangles, you can trim the bottom portion and align the outer edge with the card base’s score line before adhering them in place.
Do not cut any further the tap diagonal sides.
Gluing the pop-up
So I scored the longer side first, put the box together and then I glued it to the card base facing downwards.
The pop-up aligna diagonally towards the top right corner. Appear more centered and neat. However, this limits the height of your pop-up fillers, as there’s less space in the bottom corner to add them.
Now, If you start by scoring the gluing tab first, put the box together, and then you glue the box facing upwards, the box will sit lower in the card, and it will also align diagonally towards the top right corner.
This giving you more room for taller fillers. The downside is that the pop-up won’t look as centered, it will be positoned at the bottom of the card base and the visible corner of the box will lift slightly.
You can always jiggl things up and you can glue it facing downwards instead and the pop-up then will align diagonally toward the top left corner.
If you’re willing to experiment, you’ll quickly understand how this pop-up box works—and it won’t be long before you become a pop-up box pro!
Hope you enjoyed this post! Happy Crating.
Supplies
Affiliate links apply at no extra cost to you. Thanks for your support.


Leave a Reply