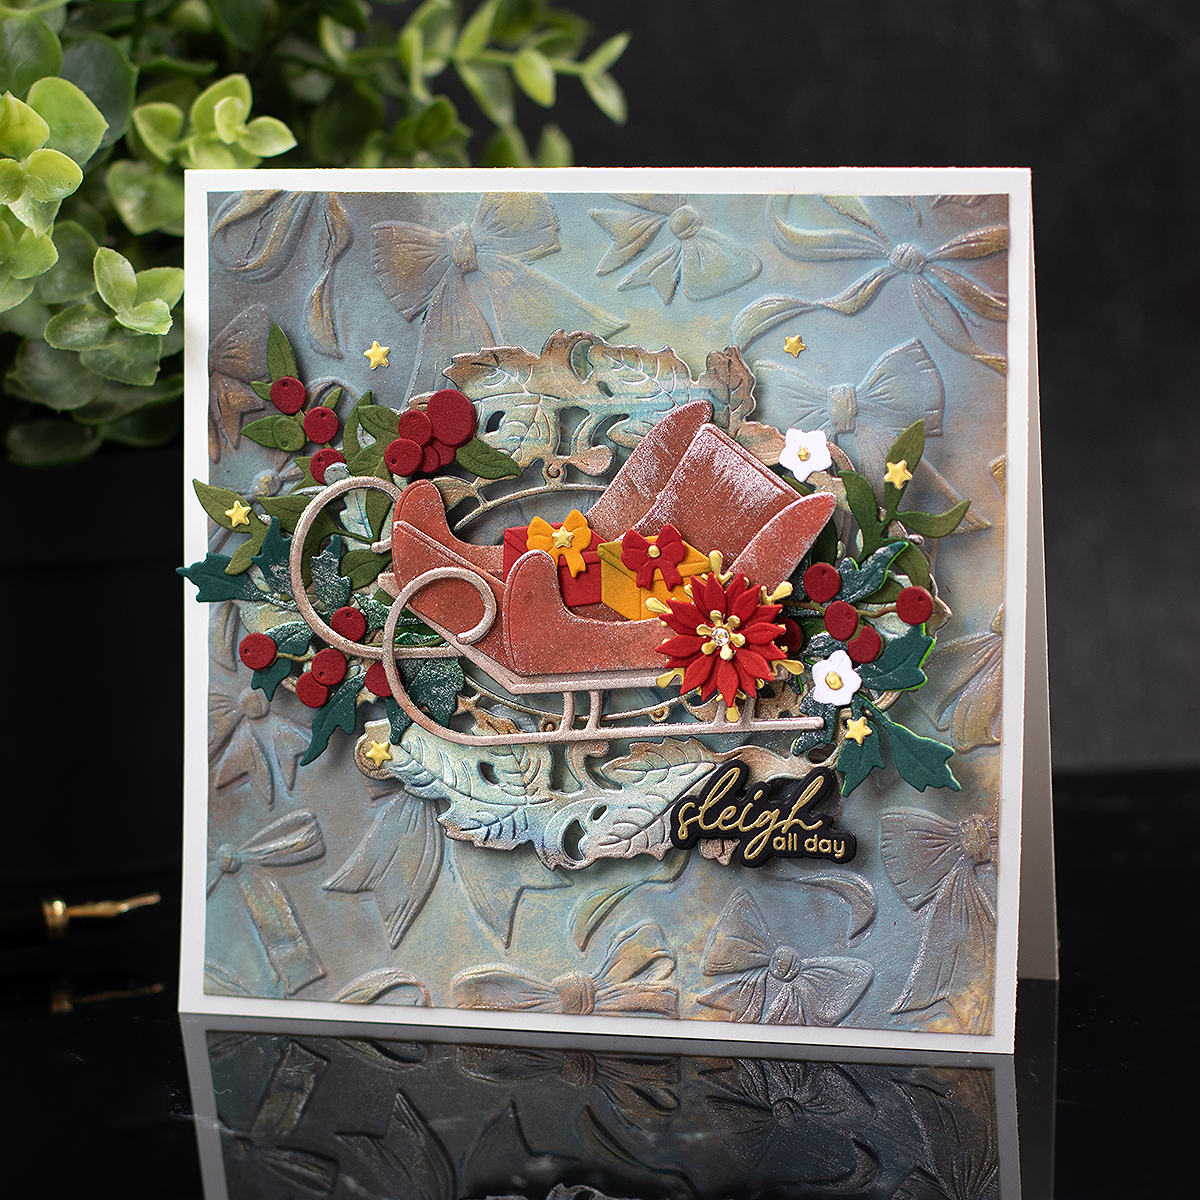
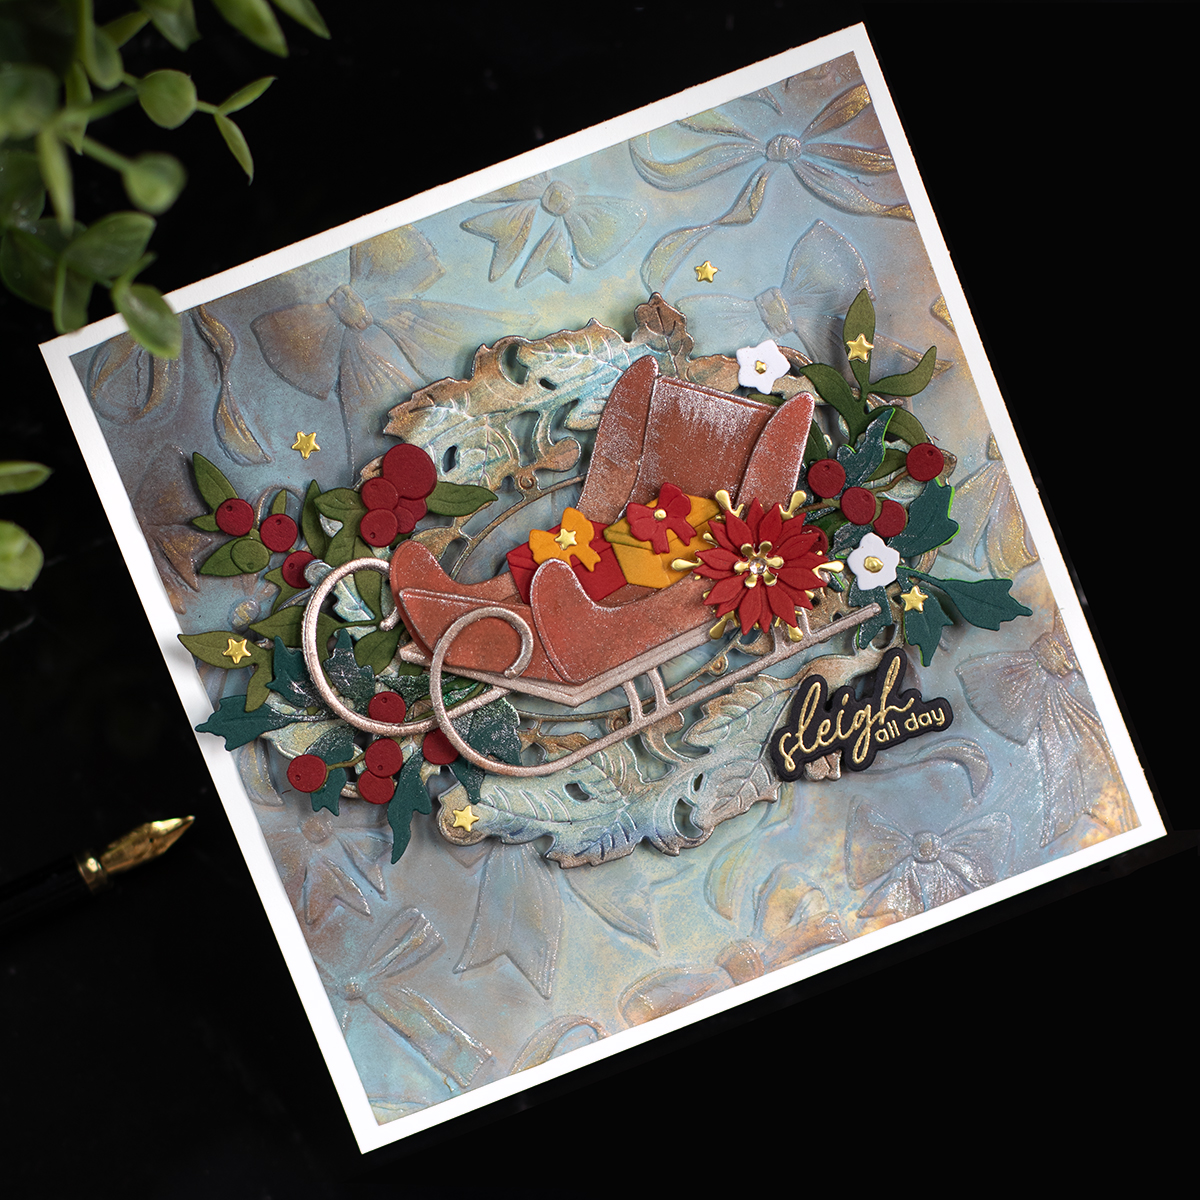
Hello Crafty friends, today I’m sharing a Christmas card full of texture and shine featuring the Timeless Sled Layering Dies and Elegant Bows 3D Embossing Folder and other goodies by Altenew.
I’m also joining an Instagram Hop filled with ideas an inspiration using rom the Altenew July 2025 release
Video Coming SOon
Card Recipe
This 6×6 inches card features a variety of Altenew products lited below:
- Timeless Sled Layering Dies
- Enchanted Mirror Die ( die cut background frame/ texture).
- Elegant Bows 3D Embossing Folder ( embossed background).
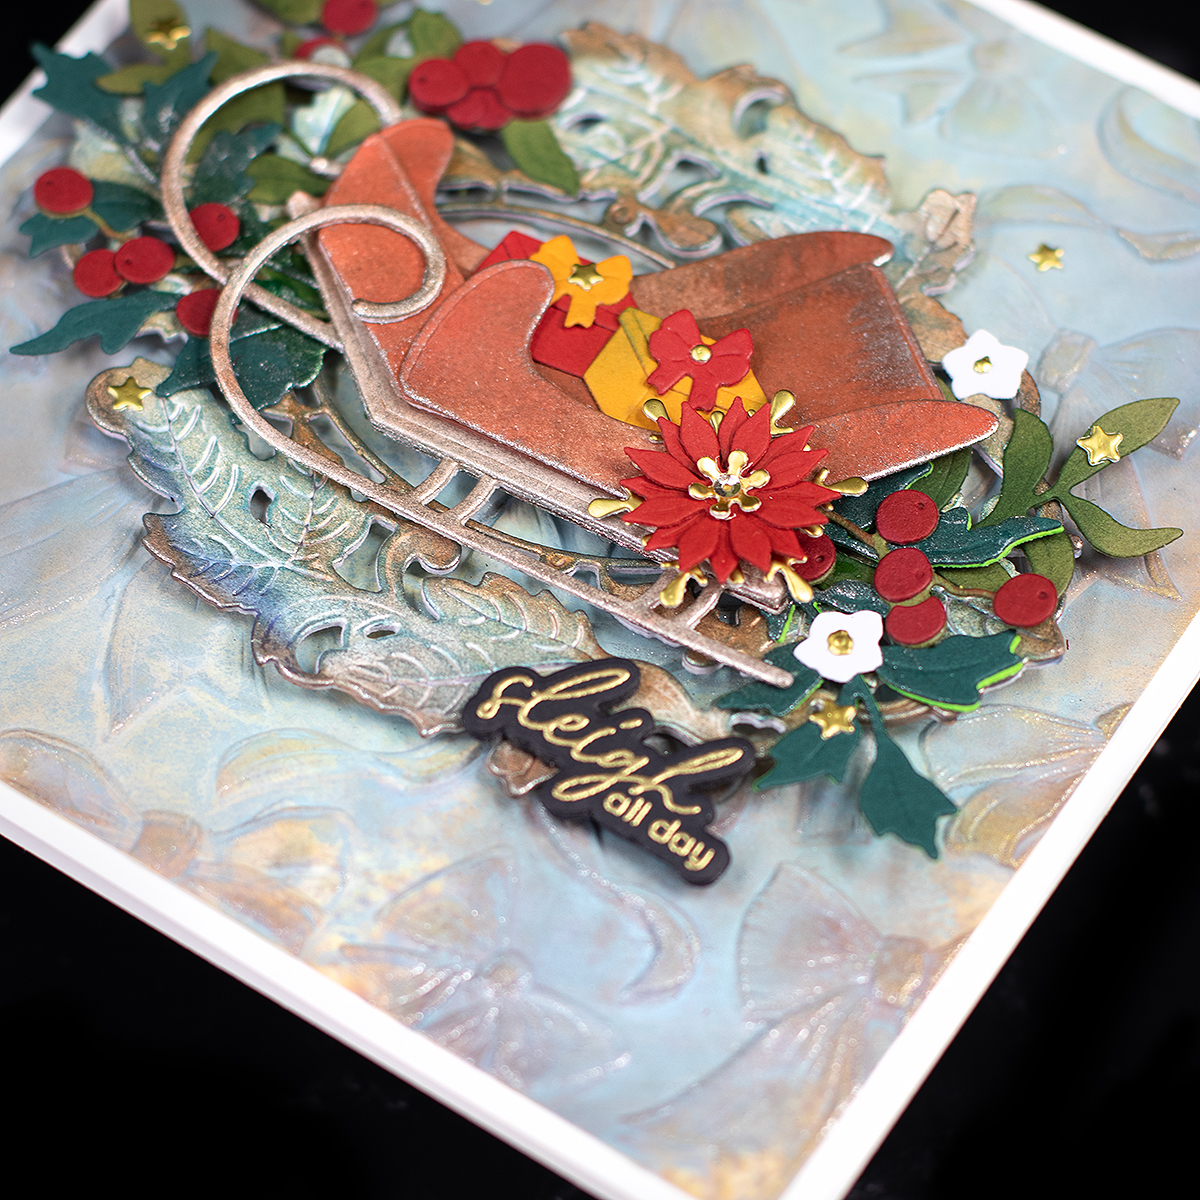
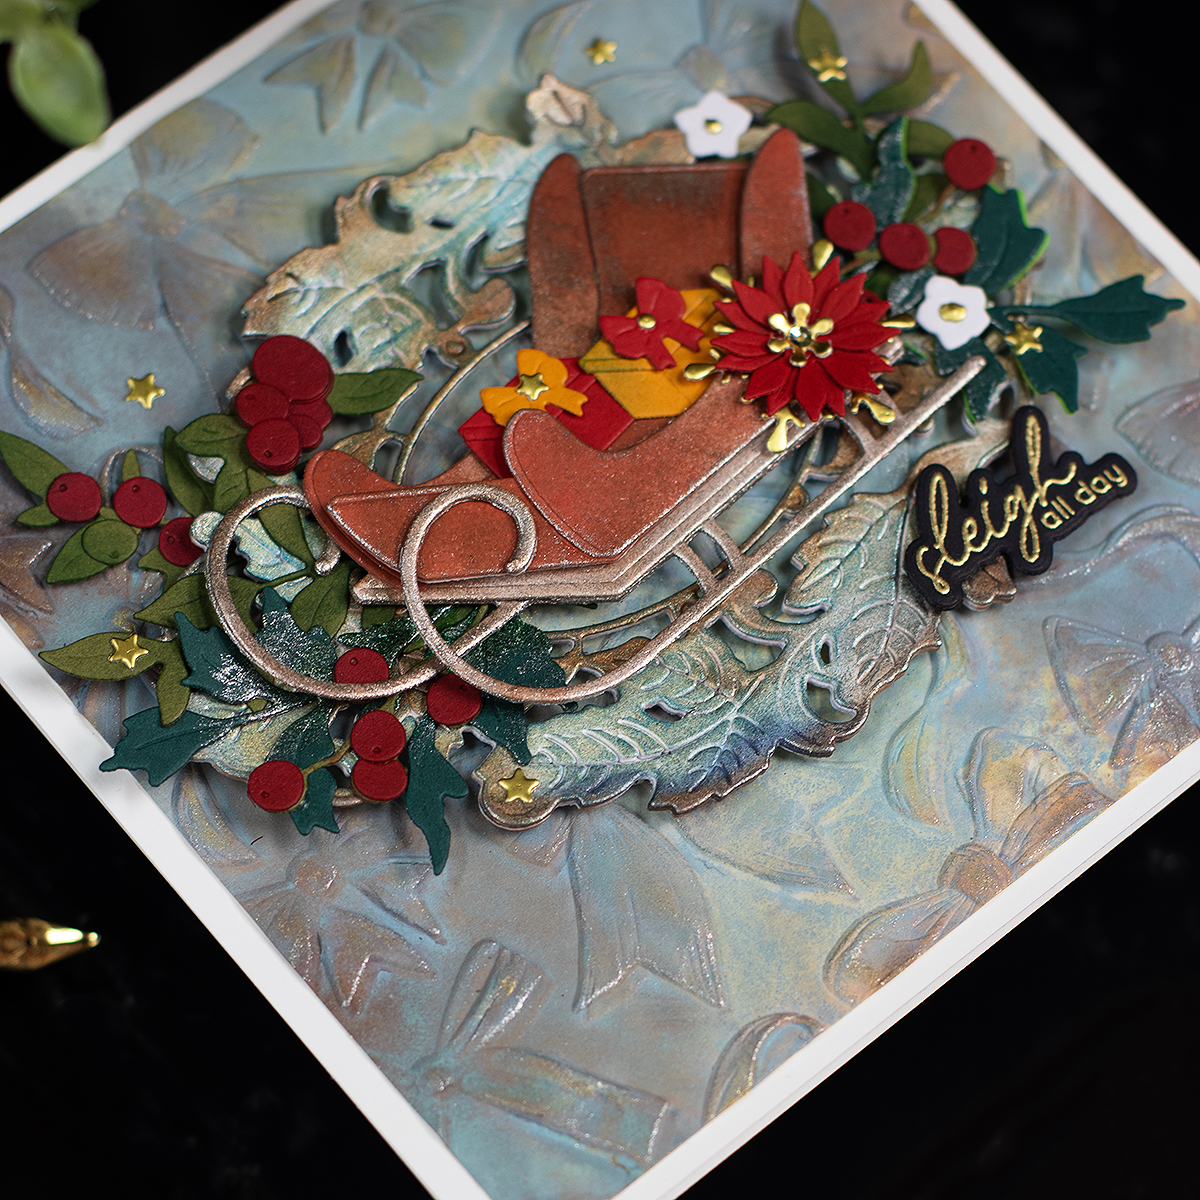
- Sleigh Ride Greetings Clear Stamp and Die Set ( heat embossed sentiment).
- ZeroWaste Ornamental Winter Pattern Die ( small flowers and branches).
- Zero-Waste Berries and Branches ( large berry leaves).
You can always die-cut everything oit of smooth coated white cardsock and add colour to your projects using a mix of mediums.
For today’s card, I used a combination of Distress Oxide Sprays, Altenew Inks, and Altenew Relief Paste.
The first step is to die cut / emboss everything using the Spellbinders Platinum die-cutting machine.
+I like to place the die-cuts over gelly plates or tacky mats.
Paper, Inks & Mediums
- Background – Spellbinders Classic White ColorWheel Cardstock
Spray Speckled Egg , Old Paper, Walnut Stain Tim Holtz Distress Oxide Sprays.
Allow to dry and then add Altenew Enchanted Gold ink over the edges and the raised areas. - Decorative frame – Neenah Classic Crest Ultra Thick 110 LB Cardstock.
Cut 3die-cuts using the Enchanted Mirror Die and stack together to give ut a cheapboard look and feel.
Applied a layer of Antique Silver Shimmer Relief Paste using a soft brissels flat brush.
Once deried, apply a little bit of Galactic Skies Shimmer Relief Paste here and there – also using a flat brissel brush.
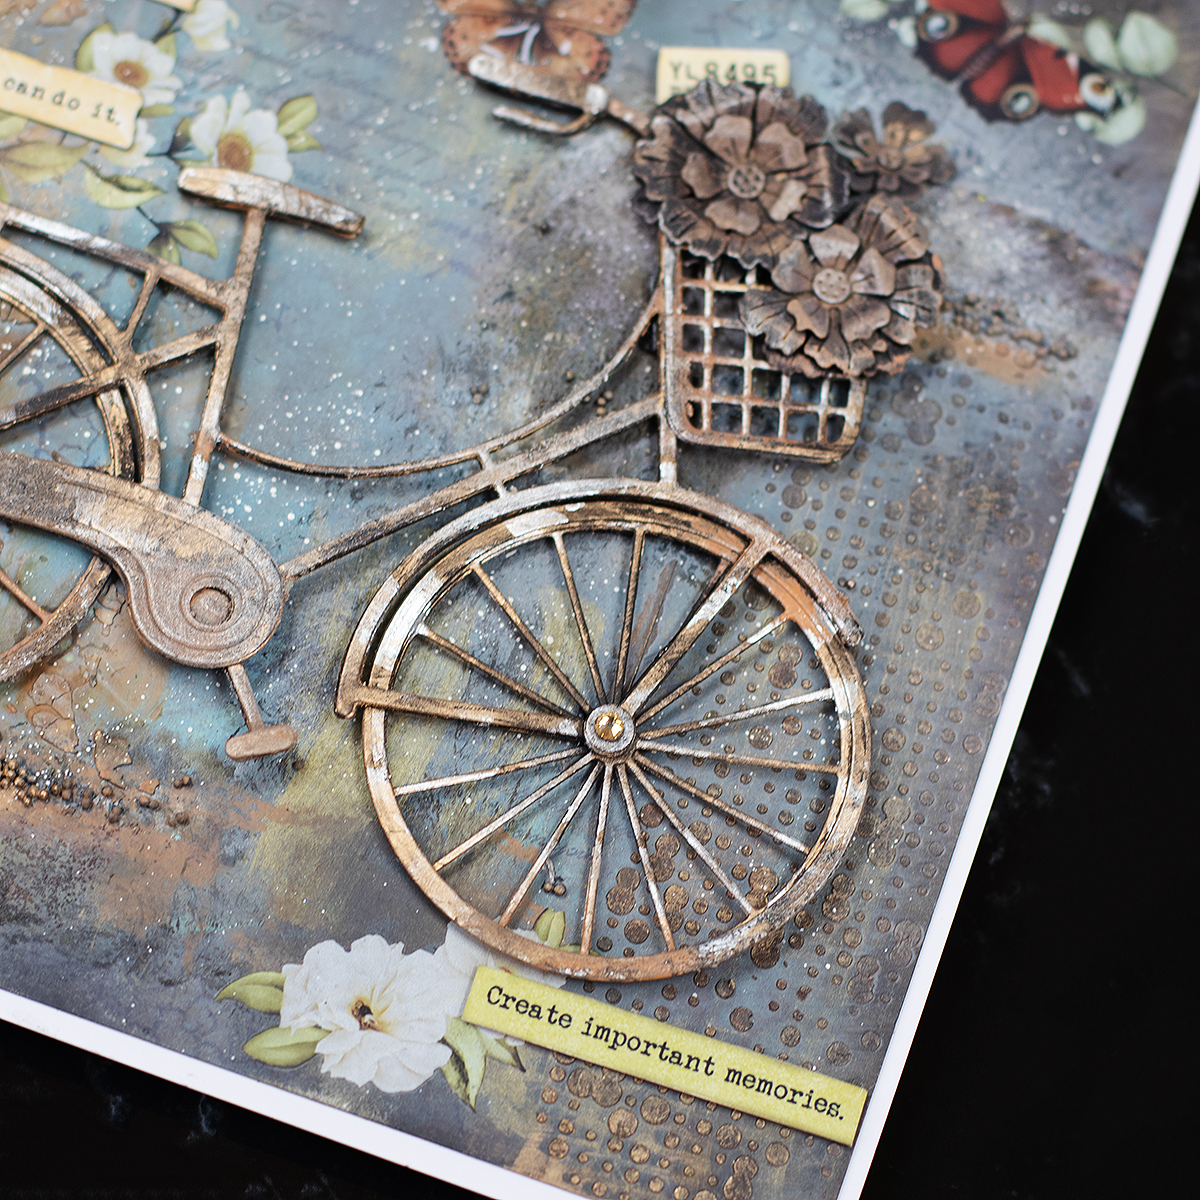
To give it a more vintage look, add Altenew Choco Hazelnut Ink and Altenew Navy Ink around the edges of the piece using an Altenew blending brush. - The Sled
First, I applied Antique Silver Shimmer Relief Paste over the matallic areas of the sled.
Then, I applied Altenew Choco Hazelnut Ink over the sled pieces and to acentate the colour, I applied Altenew Firebrick Ink at the edges.
Once you have your pieces coloured the next step is to assamble eveything, for this I. like to use liquid glue and foam tape.
Hiden protagonist of the day!
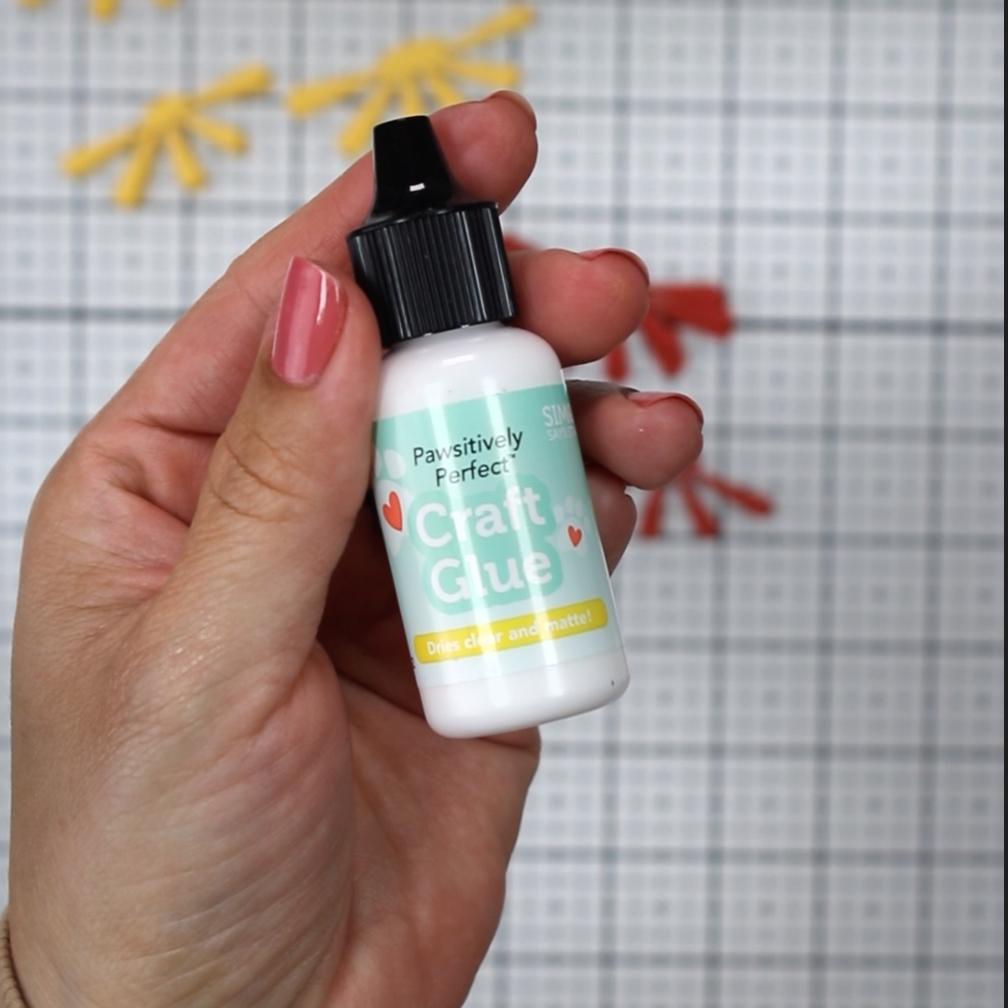
BTW! I never talk about adhesives but I got to tell you that I’m loving the new Simon Says Stamp Pawsitively Perfect glue.
Although I still need more time to experiment with the Pawsitively Perfect glue —especially for adhering different materials—I have to say, it’s seriously winning me over
I used it to glue mirror cardstock, and it worked like a charm—instant bond! I also used it to assemble all the pieces on this card.
It has a creamy, gel-like consistency, dries clear and non- sticky, and can easily be removed with a glue eraser if needed, without tearing the paper. It creates a beautiful, seamless bond between paper layers. You literally can’t see the seams. Just stunning!
Will it replace my forever favorite, Nuvo Deluxe Adhesive? I’m not sure yet… but I’ll keep you posted!
Thirsty for More?
Coming soon feauturing the Bike Bicycle die set by Spellbinders designed by me.
That’s all for today.
thanks for stopping by.
X Bibi
Supplies
Affiliate links apply at no extra cost to you. Thanks for your support.


![#holidays are almost over -sorry #travellovers, but here are some cards just for you.
Let’s keep the fun going in our craft rooms all year round!
[ ✨I made these cards for an Instagram Hop + Giveaways on the previous post so have a look!!!]
In this reel, I’m playing with the Mini Delight: Enjoy the Flight stamp and die set — tiny price, HUGE creative potential!
It’s sold out at Altenew but still available at @simonsaysstamp.
I used just the die-cut plane and sentiments from the stamp set but the stamps also includes an image that will allow you to create a sun, a moon, or even the word ! 💛
•Craft tip: mind the tape. I used low-tack tape, but the paper was super delicate and tore a little. Nothing I couldn’t cover 🙈🤪
📝 More info & supply list in my blog — link in bio.
Or visit 👉 BibiCameron.co.uk and type “flight” in the search box to find the post anytime.
#cardmaking #papercraft #stamping #diecutting #papercut #craft #cardmakersofinstagram #diy #stampsanddies #altenew #simonsaysstamp #handcrafted #creativecards #cardmakingideas #craftersgonnacraft #diecutting #cardmakingcommunity #cardmakinglove #cardmakingaddict #stampingfun #paper #papel #papier](https://bibicameron.co.uk/wp-content/plugins/instagram-feed/img/placeholder.png)
Leave a Reply